
Caramel Crispix
Disclosure: This post contains affiliate links.If you click and make a purchase, I may earn a small commission at no extra cost to you.


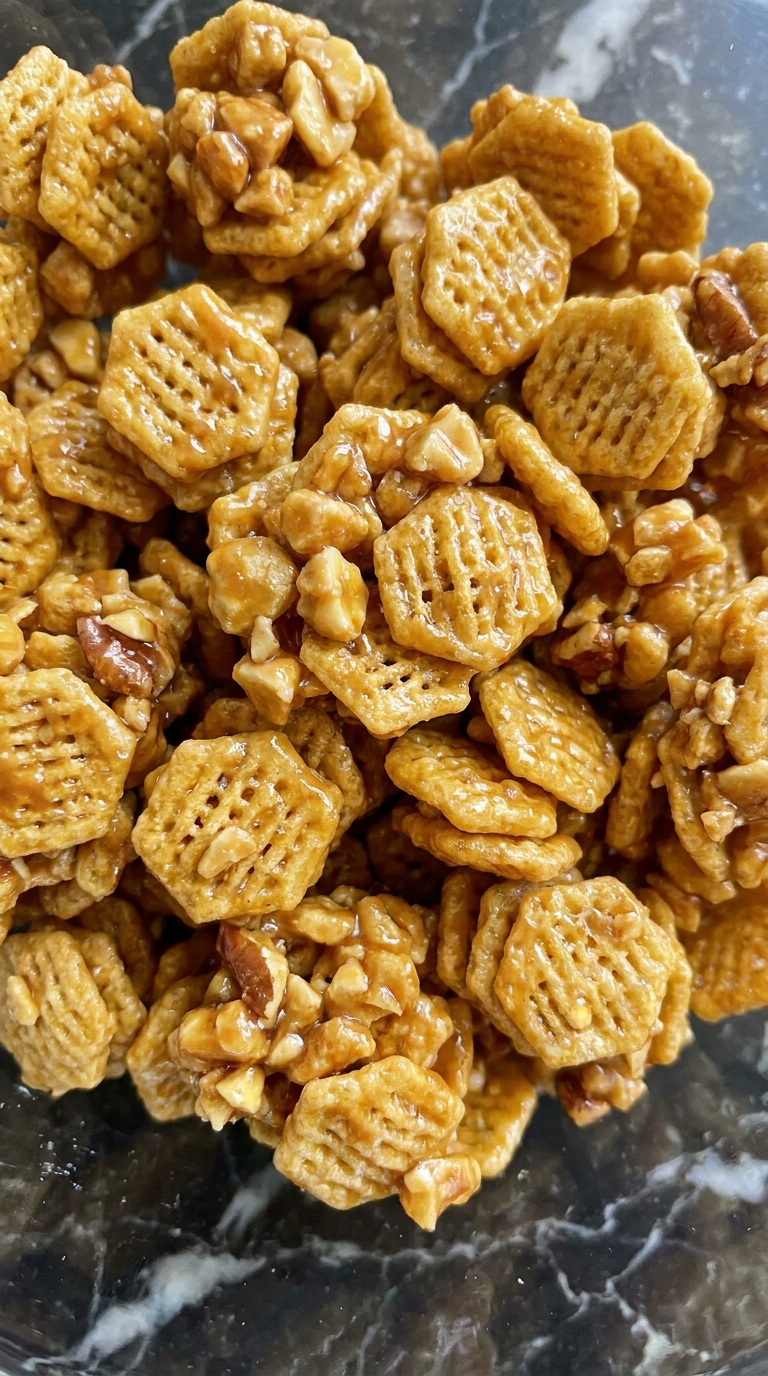
Caramel Crispix
There’s something magical about the moment when warm, buttery caramel meets the delicate crunch of cereal. Caramel Crispix transforms a simple pantry staple into an irresistible snack that fills your kitchen with the intoxicating aroma of brown sugar and vanilla. Each hexagonal piece becomes a golden vessel of sweetness, delivering that perfect shatter between your teeth followed by a melt-in-your-mouth finish. Trust me, you’re going to love this sweet, crunchy treat that strikes the perfect balance between sophisticated candy and comforting childhood snack. It’s the kind of recipe that disappears within minutes at parties, leaving everyone asking for the secret behind its addictive texture.
The Sweet Symphony of Crunch and Chew
What makes this snack truly special is the textural dance it performs. The Crispix cereal provides an airy, architectural structure that holds up under the weight of rich caramel, creating pockets of sweetness in every bite. Unlike popcorn that can shatter into dust or chips that turn limp, these sturdy squares maintain their integrity while delivering a satisfying crackle. The caramel itself achieves that elusive state of being both chewy and crisp, coating your fingers just enough to make licking them a necessary pleasure. This is the kind of sensory experience that turns ordinary Tuesday afternoons into small celebrations.
From Church Basements to Game Day Glory
Caramel-coated cereals have deep roots in American entertaining, particularly across the Midwest where potluck culture reigns supreme. This style of snack emerged during the 1950s and 60s when convenience foods met home baking ingenuity, allowing busy hosts to create impressive treats without elaborate pastry training. Church basements and school cafeterias became the testing grounds for these sweet and salty combinations, with recipes passed hand to hand on index cards. Today, it has evolved into a gourmet offering at wedding showers and game day spreads alike, proving that sometimes the simplest pleasures stand the test of time. The tradition continues because it represents hospitality at its finest, welcoming and abundant.
Why This Recipe Earns a Permanent Spot in Your Rotation
Versatile: Perfect for lunchboxes, movie nights, or holiday gifting, this snack adapts to any occasion with effortless charm and travels well without crumbling into dust.
Budget-Friendly: Using simple pantry staples like cereal and butter, you can feed a crowd for less than the cost of store-bought gourmet snacks while yielding triple the amount.
Quick and Easy: With just ten minutes of active prep, the oven does the heavy lifting while you tackle other tasks, making it ideal for multitasking hosts.
Customizable: Add nuts, chocolate drizzle, or spices to make this recipe uniquely yours without altering the fundamental chemistry of the caramel.
Crowd-Pleasing: The universal appeal of caramel ensures this disappears fast at potlucks and parties, pleasing both children and sophisticated palates.
Make-Ahead Friendly: Prepare it days in advance and store in an airtight container for instant snacking whenever hunger strikes.
Great for Leftovers: Though honestly, leftovers are rare with this addictive treat, any bits can be crumbled over ice cream for a decadent topping.
Insider Secrets for Caramel Success
Mastering the perfect coating requires understanding a few key techniques that separate good from great. The chemistry of caramel can be finicky, but with these professional insights, you will achieve consistent results every single time. Remember that patience is your greatest ally here, as rushing the process leads to burnt sugar or soggy cereal. This one’s a total game-changer for your snack repertoire.
Tip 1: Watch for the foam. When you add baking soda to the hot caramel, it will bubble up dramatically and double in volume. This reaction creates millions of tiny air pockets that give the final coating its light, crisp texture that shatters beautifully between your teeth.
Tip 2: Stir gently but thoroughly. Use a silicone spatula to fold the cereal using a lifting motion rather than aggressive stirring, which prevents crushing the delicate squares into powder.
Tip 3: Low and slow is the way to go. Resist the urge to crank up the heat to speed things along, which can scorch the sugar and create bitter, acrid flavors that ruin the batch.
Tip 4: Cool completely before storing. Warm caramel needs time to set into that perfect snap, and trapping steam in a container creates unwanted moisture.
Tip 5: Break it up by hand once cooled for satisfying clusters that range from single pieces to chunky boulders of goodness.
Tools for Caramel Mastery
You don’t need fancy gadgets or professional equipment to create this snack, but having the right tools on hand makes the process smoother and safer. Caramel involves high temperatures, so heat-resistant materials are essential for protecting your hands and countertops. Organization is key when working with hot sugar, so have everything measured and ready before you begin.
Large Roasting Pan: A deep, heavy-duty pan allows you to toss the cereal without spilling while ensuring even heat distribution throughout the baking process.
Parchment Paper: Line your counters or cooling racks with parchment for easy cleanup and to prevent the sticky caramel from adhering to surfaces.
Silicone Spatula: Heat-resistant and gentle, perfect for folding sticky caramel without crushing cereal or melting like plastic might.
Measuring Cups and Spoons: Precision matters with caramel chemistry, so use standard measurements rather than eyeballing the sugar and butter ratios.
Wooden Spoon: Ideal for stirring the hot caramel sauce without conducting heat to your hands, providing a comfortable grip during the initial cooking phase.
Your Caramel Crispix Shopping List
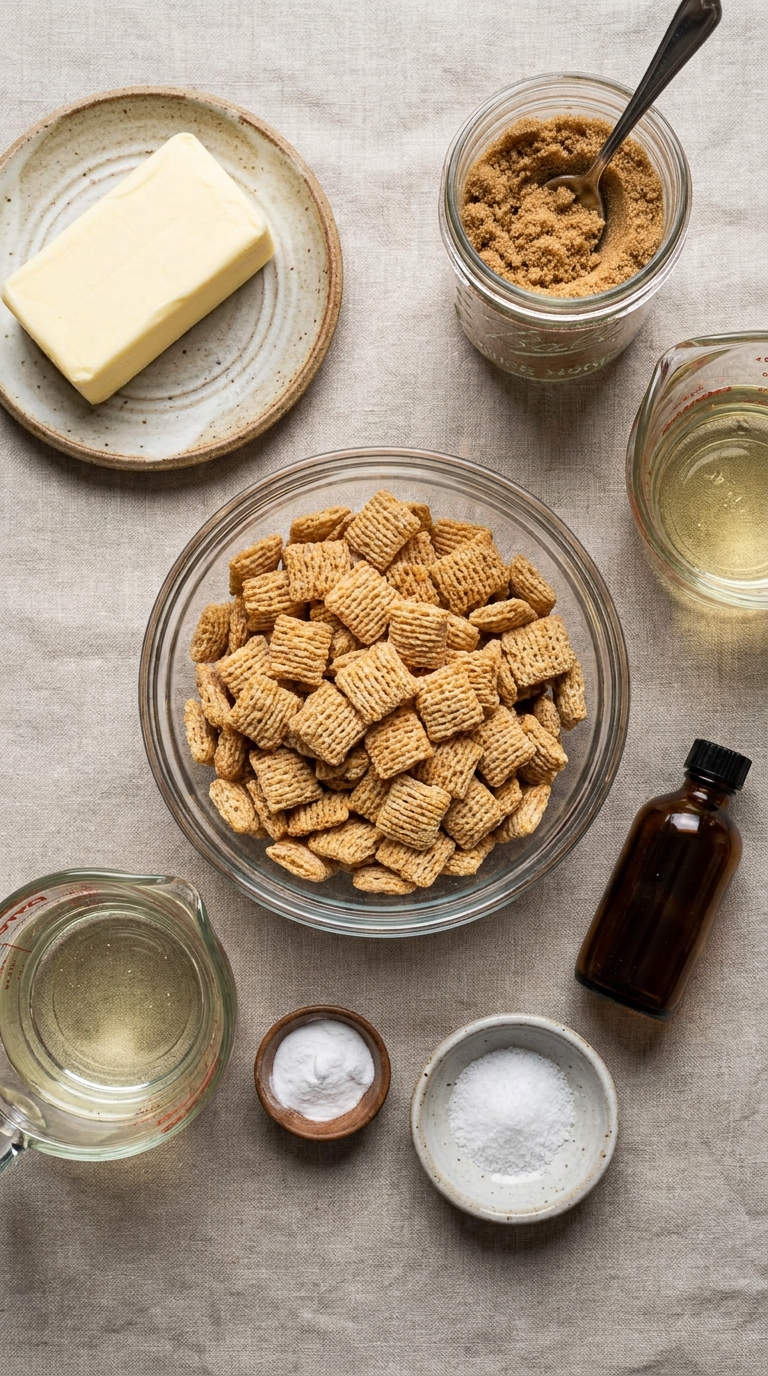
Gather these simple ingredients for snacking perfection. Each component plays a crucial role in creating that signature texture and flavor profile that makes this treat so addictive. Quality matters here, so use fresh butter and real vanilla extract rather than imitation for the best results.
- Crispix Cereal: 8 cups. The hexagonal, crispy rice and corn pieces provide the perfect structural integrity to hold the caramel without turning soggy, while their grid pattern captures maximum coating.
- Unsalted Butter: 1 cup (2 sticks). Creates the rich, creamy base for your caramel coating and helps achieve that glossy finish while carrying the vanilla flavor.
- Packed Brown Sugar: 1 cup. Delivers deep molasses notes and that signature caramel color and chew that distinguishes this from ordinary sugar coating.
- Light Corn Syrup: 1/2 cup. Prevents crystallization and ensures a smooth, glossy coating that stays tender rather than becoming grainy or gritty.
- Pure Vanilla Extract: 1 teaspoon. Adds aromatic complexity and rounds out the sweetness with warm, floral notes that elevate the flavor beyond mere sweetness.
- Baking Soda: 1/2 teaspoon. The secret weapon that reacts with the caramel to create a light, airy coating that shatters beautifully rather than becoming rock hard.
- Fine Sea Salt: 1/4 teaspoon. Balances the sweetness and enhances the butterscotch flavors, preventing the snack from becoming cloying.
Smart Swaps for Every Pantry
Unsalted Butter: Coconut oil or vegan butter sticks work beautifully for dairy-free versions, though they will add a slight coconut note.
Light Corn Syrup: Honey or pure maple syrup can substitute, though they will add distinct flavor notes and may darken the final color.
Brown Sugar: Coconut sugar or turbinado sugar offer deeper, more complex sweetness with hints of caramel and toffee.
Crispix: Rice Chex or Corn Chex can stand in, though the texture will be slightly different and more fragile.
Vanilla Extract: Almond extract or maple extract provide interesting flavor variations, though use half the amount as they are stronger.
Spotlight on the Stars
Crispix Cereal: These airy, hexagonal pockets are engineered to stay crispy under pressure. Unlike popcorn that can shatter or chips that turn limp, Crispix maintains its structure while cradling the perfect amount of caramel in its crevices. The dual composition of rice and corn creates a neutral flavor base that allows the caramel to shine while providing substantial crunch.
Brown Sugar: Not just sweetener, brown sugar brings molasses depth that white sugar cannot match. It caramelizes at just the right temperature, creating that amber glaze that hardens into the perfect snap. The moisture content in brown sugar also contributes to the chewy quality that makes this snack so satisfying.
Let’s Create Some Magic
Follow these steps for caramel-coated perfection. The process moves quickly once the caramel is ready, so having your station prepared ensures success. Work carefully with the hot sugar, but don’t fear the chemistry. It is worth every bite of the final result.
- Preheat Your Equipment: Position your oven rack in the center and preheat to 250 degrees Fahrenheit. Line a large roasting pan with parchment paper or give it a light coating of cooking spray to prevent sticking.
- Combine Ingredients: In a heavy-bottomed saucepan over medium heat, melt the butter completely. Add the brown sugar, corn syrup, and salt, stirring constantly until the mixture reaches a gentle boil. Let it bubble for four minutes without stirring to develop that deep caramel flavor and amber color.
- Prepare Your Cooking Vessel: Pour the Crispix cereal into your prepared roasting pan, spreading it out evenly. If you are adding nuts, scatter them over the cereal now so they toast along with the coating.
- Assemble the Dish: Remove the caramel from heat and immediately stir in the vanilla extract. Add the baking soda and stir vigorously. The mixture will foam up dramatically, which is exactly what you want for that light, crisp coating. Quickly pour this foamy caramel over the cereal.
- Cook to Perfection: Using your silicone spatula, gently fold and stir the cereal to coat every piece evenly. Slide the pan into the oven and bake for forty-five minutes, stirring thoroughly every fifteen minutes to ensure even coating and prevent burning.
- Finishing Touches: Remove from oven and spread the hot cereal mixture onto fresh parchment paper. Let it cool completely, about thirty minutes, until the caramel hardens and becomes glossy.
- Serve and Enjoy: Break the cooled mixture into bite-sized clusters with your hands. Transfer to a serving bowl or store in an airtight container.
Troubleshooting Common Caramel Mishaps
Even experienced bakers encounter challenges when working with sugar. Here is how to fix the most common issues that might arise during your Caramel Crispix adventure. Remember that humidity and altitude can affect caramel, so adjustments may be needed based on your kitchen environment.
Problem: The coating turned out chewy instead of crisp.
Solution: You likely did not bake it long enough. Return it to the oven for another ten to fifteen minutes at 250 degrees to drive out excess moisture.
Problem: The cereal tastes burnt or bitter.
Solution: Your oven temperature may run hot, or the caramel cooked too long on the stovetop. Next time, use an oven thermometer and remove the caramel from heat immediately when the four minutes are up.
Problem: The coating is grainy or crystallized.
Solution: Sugar crystals formed on the pan sides. Next time, wash down the sides of the pot with a wet pastry brush during the boiling phase, or add a tablespoon of water at the beginning to prevent crystallization.
Problem: The cereal is crushed and powdery.
Solution: You stirred too aggressively. Use a gentle folding motion rather than vigorous stirring, and consider using a larger vessel to give yourself more room to maneuver.
Problem: The caramel pooled in the bottom of the pan.
Solution: You need to stir more frequently during baking. Set a timer for every fifteen minutes and do not skip a stir.
Nutritional Snapshot
Servings: 12 generous portions
Calories per serving: 240
Note: These are approximate values.
Timing Breakdown
Prep Time: 10 minutes
Cook Time: 45 minutes
Total Time: 55 minutes
Delicious Twists to Explore
Chocolate Drizzle: Once cooled, drizzle melted dark chocolate over the clusters and let set before breaking apart for an elegant touch.
Spicy-Sweet Heat: Add 1/2 teaspoon cayenne pepper and 1 teaspoon cinnamon to the caramel for a Mexican hot chocolate vibe that tingles your tongue.
Nutty Crunch: Fold in 1 cup of toasted pecans or almonds before baking for added protein and textural contrast.
Holiday Spice: Replace vanilla with 1 teaspoon maple extract and add 1/2 teaspoon pumpkin pie spice for autumn gatherings.
Salted Caramel: Sprinkle flaky sea salt over the clusters immediately after removing from oven for that trendy sweet-savory contrast.
FAQ’s
1. How long does Caramel Crispix stay fresh?
Stored in an airtight container at room temperature, it stays crispy and delicious for up to two weeks. Avoid refrigeration, which introduces moisture and makes the coating sticky.
2. Can I make this in the microwave instead of the oven?
While possible, the oven method produces superior results. Microwave cooking tends to create uneven hot spots that can burn the sugar or leave some pieces soggy.
3. Why did my baking soda make the caramel overflow?
This is normal. The baking soda reacts with the acid in the brown sugar to create carbon dioxide bubbles. Use a large enough saucepan, at least three quarts, to contain the foam.
4. Can I use salted butter instead of unsalted?
Yes, but omit the additional salt in the recipe. The result will be slightly saltier, which some people actually prefer for balance.
5. Is this recipe gluten-free?
Crispix contains both rice and corn, but check your specific box as formulations can change. If certified gluten-free, this recipe is safe for celiac diets.
6. Can I double the recipe?
Absolutely. Use two roasting pans and rotate their positions in the oven halfway through baking. Do not attempt to fit double the amount in one pan, or you will get uneven coating.
7. Why is my caramel coating sticky?
Humidity is the enemy of caramel. If you live in a humid climate, let the crispix cool in an air-conditioned room, and store with a food-safe silica gel packet.
8. Can I add marshmallows or chocolate chips?
Add marshmallows only in the last five minutes of baking to prevent burning. Chocolate chips should be added after cooling to prevent melting.
9. What is the best way to package this for gifts?
Cellophane bags with decorative ribbons work beautifully. The clusters hold their shape well and travel nicely without crumbling.
10. Can I use air-popped popcorn instead of cereal?
Yes, substitute 8 cups of plain popped popcorn. Reduce baking time to thirty minutes total, stirring every ten minutes, as popcorn is more delicate.
Conclusion
As you crunch into your first cluster of Caramel Crispix, you will understand why this recipe has earned its place in the hall of fame of homemade snacks. It is worth every minute of baking time, and your kitchen will smell like a confectionery dream. Whether you are packaging it up for holiday gifts or sneaking handfuls during movie night, this treat delivers that perfect combination of sweet, salty, and crunchy that keeps you coming back for more. Share it with friends or hide it for yourself, either way, you have mastered a classic that will be requested for years to come.


