
Condensed Milk Bread
Disclosure: This post contains affiliate links.If you click and make a purchase, I may earn a small commission at no extra cost to you.



Condensed Milk Bread
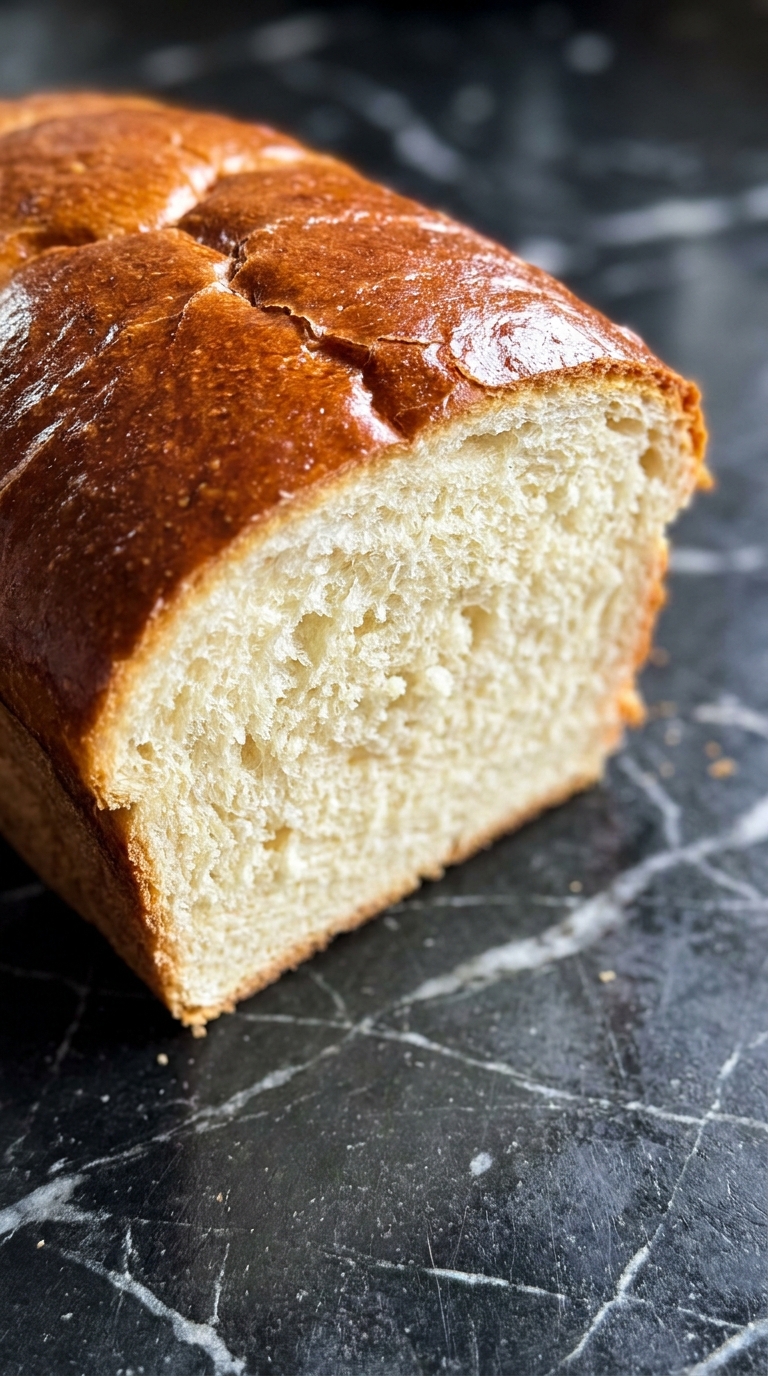
Imagine tearing into a loaf so pillowy soft that it practically melts on your tongue, with a subtle sweetness that lingers like a warm hug from the inside out. This Condensed Milk Bread carries the gentle aroma of caramelized dairy and fresh yeast, promising a texture that strikes that perfect balance between airy and substantial. Trust me, you’re going to love this.
The Irresistible Allure of Sweet Milk Bread
There’s something almost magical about bread that manages to be both comforting and slightly indulgent without crossing into dessert territory. The condensed milk doesn’t just add sweetness, it creates a tender crumb that stays moist for days, turning every slice into a cloud-like experience that begs for a smear of butter or a drizzle of honey.
A Slice of History
While enriched breads exist across many cultures, this particular style draws inspiration from Asian milk bread traditions, specifically the Japanese “Hokkaido milk bread” and Korean “cream bread” that gained popularity in the mid-twentieth century. Bakers discovered that adding sweetened condensed milk, originally developed as a preservation method for dairy, created an exceptionally soft texture due to the milk sugars and fats interfering with gluten development. Today, home bakers around the world have embraced this technique, making it a beloved staple from Tokyo to Toronto.
Why This Recipe Deserves a Permanent Spot in Your Kitchen
This loaf is the definition of reliable baking magic.
Versatile: Serve it toasted with jam for breakfast, use it for French toast on weekends, or enjoy it plain with afternoon tea.
Budget-Friendly: Using pantry staples and a single can of condensed milk yields two generous loaves for a fraction of bakery prices.
Quick and Easy: Despite its impressive texture, the hands-on time is minimal, and the dough is forgiving for beginners.
Customizable: Add citrus zest, dried fruit, or seeds to make it your own signature loaf.
Crowd-Pleasing: Even self-proclaimed non-bread-eaters find themselves reaching for seconds of this subtly sweet slice.
Make-Ahead Friendly: The dough can be refrigerated overnight, allowing you to bake fresh bread first thing in the morning.
Great for Leftovers: Stale slices transform into incredible bread pudding or croutons that retain a hint of sweetness.
Baker’s Insider Secrets
After years of perfecting this recipe, I’ve learned a few tricks that make all the difference between good bread and unforgettable bread.
Temperature matters. Room temperature ingredients blend more smoothly, so take your egg and butter out of the refrigerator thirty minutes before starting.
Don’t rush the rise. The second proof is where the magic happens, creating those delicate air pockets that give the bread its characteristic fluffiness.
Tent with foil. If the top browns too quickly during baking, loosely cover the loaf with aluminum foil to prevent burning while the interior finishes cooking.
Tap test. A perfectly baked loaf sounds hollow when tapped on the bottom, indicating the crumb structure is fully set.
Cool completely. Resist the urge to slice immediately, as the steam inside continues to set the crumb structure for cleaner slices.
Tools of the Trade
You don’t need a professional bakery setup, but a few key items will make the process smoother.
Stand mixer with dough hook: While you can knead by hand, the high hydration of this dough makes a mixer invaluable for developing gluten without exhausting your arms.
Digital kitchen scale: Measuring flour by weight ensures consistency, as cup measurements can vary significantly.
Loaf pan: A standard nine by five inch metal pan creates the perfect shape and supports the dough during its final rise.
Instant-read thermometer: Checking the internal temperature removes guesswork, ensuring the bread reaches one hundred ninety degrees Fahrenheit for optimal doneness.
Pastry brush: Essential for applying the milk wash that creates a golden, glossy crust.
Gathering Your Ingredients
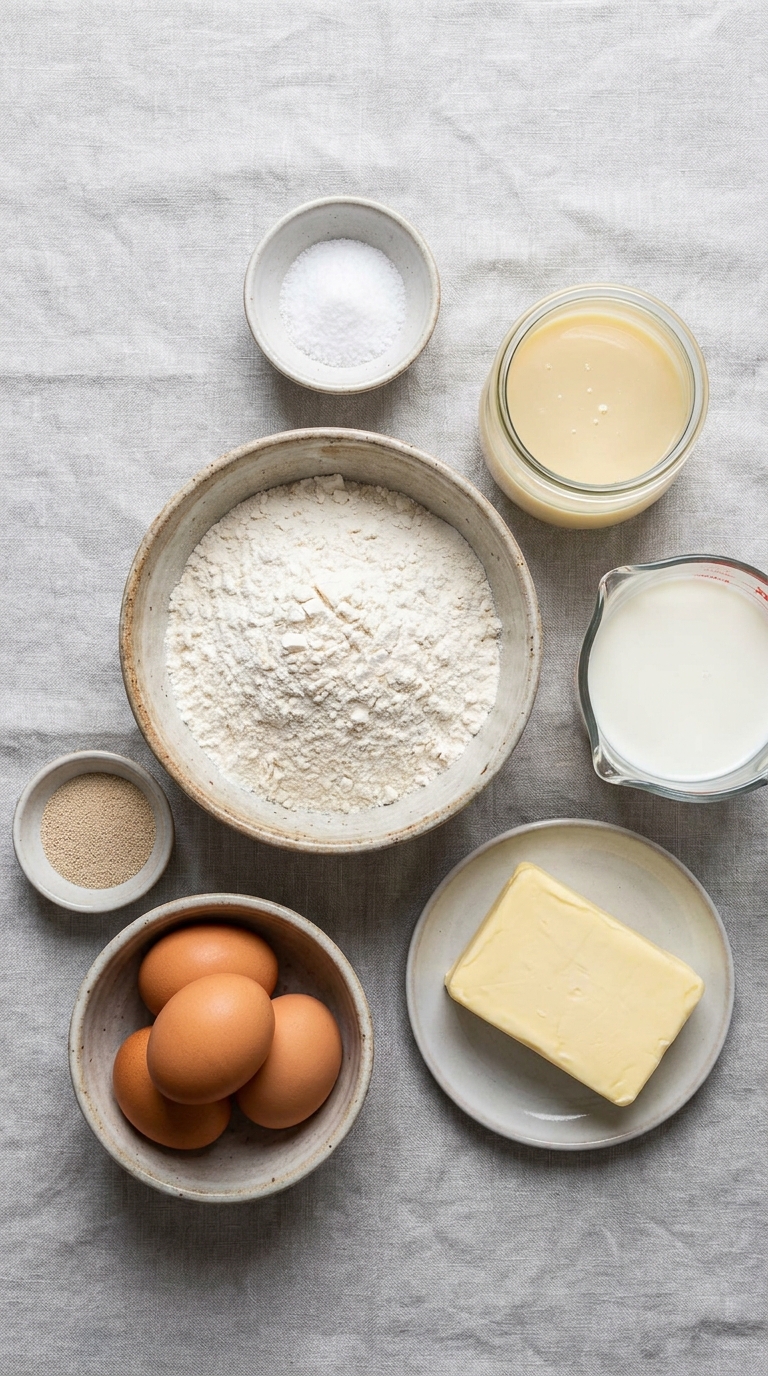
Quality matters here, so reach for the good butter and fresh yeast if possible. Each component plays a crucial role in creating that signature texture and flavor.
- Bread flour: Four and a half cups or five hundred seventy grams. The high protein content creates the strong gluten network necessary for that tall, airy loaf.
- Sweetened condensed milk: One half cup or one hundred twenty milliliters. This provides the signature sweetness and tender crumb while keeping the bread moist for days.
- Whole milk: Three quarters cup or one hundred eighty milliliters, warmed to one hundred ten degrees Fahrenheit. The liquid activates the yeast and hydrates the flour.
- Large egg: One whole egg plus one yolk, room temperature. The fats enrich the dough and contribute to the golden color and soft texture.
- Instant yeast: Two and one quarter teaspoons or seven grams. This leavening agent creates the rise and those lovely air pockets throughout the crumb.
- Unsalted butter: Four tablespoons or fifty seven grams, softened. The fat coats gluten strands, creating a tender bite and rich flavor.
- Fine sea salt: One and one half teaspoons. Salt controls yeast activity and strengthens the gluten structure while balancing the sweetness.
- Additional milk: Two tablespoons for the egg wash, creating that professional bakery shine on the crust.
Smart Swaps for Every Pantry
Life happens, and substitutions can save the day when you’re missing an ingredient.
Bread flour: All-purpose flour works in a pinch, though the crumb will be slightly less chewy and more cake-like.
Whole milk: Two percent milk or even oat milk can substitute, though whole milk provides the richest flavor.
Unsalted butter: Salted butter works fine, just reduce the added salt by half a teaspoon.
Instant yeast: Active dry yeast can be used, but dissolve it in the warm milk first and let it bloom for five minutes before adding other ingredients.
Spotlight on the Stars
These two ingredients deserve special recognition for the magic they bring to every slice.
Sweetened condensed milk: This thick, golden elixir is the heart of the recipe, containing both sugar and milk solids that caramelize slightly during baking, creating a subtle toffee undertone and keeping the interior remarkably soft.
Bread flour: The true backbone of the structure, its twelve to fourteen percent protein content develops strong gluten strands that trap carbon dioxide bubbles, allowing the loaf to rise tall and proud with a satisfying chew.
Bringing It All Together
Now comes the fun part, where simple ingredients transform into something extraordinary. Clear your counter, preheat your oven, and let’s create bread magic.
-
Preheat Your Equipment: Set your oven to three hundred fifty degrees Fahrenheit and position the rack in the center. Lightly grease your loaf pan with butter or nonstick spray, ensuring you get into the corners where dough loves to stick.
-
Combine Ingredients: In the bowl of your stand mixer, whisk together the bread flour, instant yeast, and sea salt. In a separate small bowl, combine the warm whole milk, condensed milk, whole egg, and egg yolk until smooth. Pour the wet mixture into the dry ingredients.
-
Prepare Your Cooking Vessel: Attach the dough hook to your mixer and begin mixing on low speed. Once a shaggy dough forms, increase to medium speed and knead for five minutes. The dough will be sticky, which is exactly what you want for a tender crumb. Add the softened butter one tablespoon at a time, allowing each piece to incorporate before adding the next. Continue kneading for another five to seven minutes until the dough passes the windowpane test, stretching thin enough to see light through without tearing.
-
Assemble the Dish: Transfer the dough to a lightly oiled bowl, turning it once to coat the surface. Cover with a damp kitchen towel or plastic wrap and let rise in a warm, draft-free spot for one to one and a half hours, until doubled in size. Gently punch down the dough to release excess gas, then turn it out onto a lightly floured surface. Pat into a rectangle roughly nine by twelve inches, then roll tightly from the short end, pinching the seam closed. Place seam-side down in your prepared loaf pan.
-
Cook to Perfection: Cover the pan loosely with oiled plastic wrap and let rise again for forty five minutes to one hour, until the dough crowns one inch above the pan rim. Brush the top gently with the reserved two tablespoons of milk. Bake for thirty five to forty minutes, rotating the pan halfway through, until the crust is deep golden brown and the internal temperature reaches one hundred ninety degrees Fahrenheit.
-
Finishing Touches: Remove the bread from the oven and immediately turn it out onto a wire cooling rack. This prevents the bottom from becoming soggy due to steam accumulation. Let it cool for at least one hour, though two hours is ideal for the cleanest slicing.
-
Serve and Enjoy: Slice thickly with a serrated knife using gentle sawing motions to avoid crushing the tender crumb. Serve slightly warm with a pat of salted butter melting into the crevices, or toast slices until the edges caramelize for an extra treat.
Common Pitfalls and How to Avoid Them
Even experienced bakers encounter hiccups, but knowing what to watch for makes all the difference.
Dense, heavy loaf: This usually means the dough didn’t proof long enough or the yeast was inactive. Always check your yeast expiration date and look for that doubled size before baking.
Tough, chewy texture: Over-kneading develops too much gluten, creating bread that feels like rubber. Stop when the dough is smooth and elastic but still soft to the touch.
Collapsed center: Opening the oven door during the first twenty minutes of baking causes temperature shocks that make the structure fall. Use the oven light to peek instead.
Burned crust with raw interior: Your oven likely runs hot. Invest in an oven thermometer and tent the bread with foil after twenty five minutes if it’s browning too quickly.
Sticking to the pan: Never skip greasing the pan, and run a butter knife around the edges immediately after baking to loosen the sides before turning out.
Nutritional Snapshot
Servings: Twelve slices per loaf
Calories per serving: Two hundred ten
Note: These are approximate values based on standard ingredients and may vary with specific brands.
Time Management Guide
Prep Time: Twenty minutes, plus resting time for ingredients
Cook Time: Thirty five to forty minutes
Total Time: Two hours and forty five minutes to three hours, including rising and cooling
Delicious Twists to Explore
Once you master the basic loaf, try these variations to keep things exciting.
Citrus Condensed Milk Bread: Add the zest of one lemon and one orange to the dough for a bright, fragrant twist that pairs beautifully with tea.
Chocolate Swirl Version: Spread three tablespoons of softened chocolate hazelnut spread over the dough rectangle before rolling, creating a sweet spiral throughout each slice.
Coconut Dream: Replace half the whole milk with coconut milk and sprinkle shredded coconut on top before baking for a tropical variation.
Savory Sesame: Reduce the condensed milk by half and add two tablespoons of toasted sesame oil, topping the loaf with black and white sesame seeds for an Asian inspired savory loaf.
Cinnamon Sugar Crust: Brush the top with melted butter immediately after baking and sprinkle with cinnamon sugar for a sweet crunch that contrasts with the soft interior.
FAQ’s
1. Why is my bread so sticky and hard to handle?
This dough is intentionally wetter than standard bread dough because the condensed milk adds liquid without adding free water. Resist the urge to add more flour, as this creates a dry final product. Use lightly oiled hands when shaping to prevent sticking without adding extra flour.
2. Can I make this without a stand mixer?
Absolutely, though it requires some elbow grease. Knead by hand for ten to twelve minutes on a lightly oiled surface rather than floured, which prevents incorporating too much extra flour into the dough.
3. How do I know when the dough has risen enough?
The dough should roughly double in volume and hold a gentle imprint when poked with a floured finger. If it springs back immediately, it needs more time. If it collapses, it has over-proofed.
4. Can I freeze this bread?
Yes, and it freezes beautifully. Wrap the completely cooled loaf tightly in plastic wrap, then aluminum foil, and freeze for up to three months. Thaw overnight at room temperature and refresh in a three hundred degree oven for ten minutes.
5. Why did my loaf crack on top?
A cracked top usually indicates the oven was too hot or the dough surface dried out during proofing. Cover the dough with oiled plastic wrap during rising, and ensure your oven temperature is accurate with a thermometer.
6. Can I use evaporated milk instead of sweetened condensed milk?
No, these are not interchangeable. Evaporated milk lacks the sugar content that makes this bread special. If you only have evaporated milk, you would need to add half a cup of sugar and adjust the liquid ratios.
7. How do I get a softer crust?
Brush the hot loaf with melted butter immediately after removing from the pan, then cover loosely with a clean kitchen towel while cooling. This traps steam and softens the crust.
8. Can I make rolls instead of a loaf?
Yes, divide the dough into twelve equal pieces after the first rise, shape into balls, and place in a greased nine by thirteen inch pan. Bake for twenty to twenty five minutes until golden.
9. Why is my bread gummy inside?
Underbaking is the culprit here. Always check the internal temperature, which should reach one hundred ninety degrees Fahrenheit. If in doubt, add five more minutes to the baking time.
10. Can I reduce the sugar content?
The condensed milk provides both structure and sweetness, but you can reduce it by two tablespoons if you prefer a less sweet loaf. Do not eliminate it entirely or the texture will suffer.
Conclusion
There’s something deeply satisfying about pulling a golden loaf of Condensed Milk Bread from your own oven, the sweet aroma filling your kitchen with warmth and promise. Whether you enjoy it fresh from the oven with a cup of coffee or toast it days later for a quick breakfast, this bread brings a touch of homemade luxury to everyday moments. The way it combines simplicity with indulgence makes it a recipe worth memorizing, and once you taste that first tender bite, you’ll understand why it’s worth every minute of rising time. Happy baking.


