
Check Your Flour Freshness
Disclosure: This post contains affiliate links.If you click and make a purchase, I may earn a small commission at no extra cost to you.


Check Your Flour Freshness
There is a particular kind of disappointment that hits when you have spent hours crafting the perfect layer cake or artisan loaf, only to detect a faint mustiness in the final bite, a whisper of cardboard that lingers on the tongue. That subtle sourness or paint-like sharpness is the telltale signature of flour that has passed its prime, oxidizing quietly in the dark corners of your pantry. Rather than risking an entire elaborate recipe on questionable ingredients, this simple, unfussy bake serves as your culinary canary in the coal mine. It strips baking down to its purest form, allowing the true character of your flour to shine through without the masking effects of heavy spices, chocolate, or strong flavors. Trust me, you’re going to love this straightforward approach to pantry validation, because there is nothing quite like the peace of mind that comes from knowing your foundational ingredients are absolutely pristine.
The Pure Appeal of a Minimalist Test
When you reduce a recipe to its absolute essence, every ingredient must pull its weight and prove its integrity. This biscuit-style test bake does exactly that, creating a tender, golden vessel that carries nothing but the clean, sweet aroma of fresh wheat. The texture should be light and yielding, with a crumb that squeaks slightly between your teeth and a flavor that reminds you of sun-warmed fields and summer breezes. If your flour is fresh, this simple combination transforms into something magical, a humble bite that tastes like home and possibility. It is the kind of unadorned perfection that makes you close your eyes and savor the moment, grateful for the kitchen wisdom that led you to test before you committed to something grander.
A Tradition of Testing and Trust
Long before sell-by dates were printed on paper bags, home bakers relied on sensory intuition to judge their stores. In farmhouse kitchens across the American Midwest and the rolling hills of European bread baskets, cooks would pinch off a small portion of dough before shaping the main batch, baking it quickly to taste the quality of the grain. This practice honored the preciousness of flour, which was once ground by hand and stored in wooden chests rather than climate-controlled silos. Understanding your ingredients was not just about flavor, but about economy and respect for the labor that brought the wheat from field to table. This recipe carries forward that tradition of mindful testing, connecting you to generations of bakers who knew that great baking starts with knowing exactly what you have before you begin.
Why This Test Deserves a Spot in Your Routine
Building confidence in your pantry staples means you can bake boldly without second guessing. This validation bake offers reliable results that tell you exactly where you stand with your flour supply, and it does so with minimal investment of time or resources.
Versatile: Once you confirm your flour is fresh, this same dough works beautifully as a base for strawberry shortcake, savory breakfast sandwiches, or alongside a hearty soup.
Budget-Friendly: Using just a cup of flour and basic pantry staples, this test costs mere cents compared to ruining an expensive chocolate torte or intricate pastry cream.
Quick and Easy: From mixing bowl to taste test in under thirty minutes, this recipe respects your schedule and delivers immediate answers.
Customizable: You can easily adapt the basic formula to test how your flour handles additions like cheese, herbs, or sugar without committing to a full recipe.
Crowd-Pleasing: Even as a test batch, these biscuits are genuinely delicious, meaning you can serve them immediately with butter and jam if the flour passes inspection.
Make-Ahead Friendly: If your flour is fresh, you can prepare the dry mix in advance and store it in the freezer, ready to test future bags as needed.
Great for Leftovers: Should you discover your flour is perfect, any uneaten biscuits make excellent croutons or bread pudding bases, ensuring nothing goes to waste.
Baker’s Insider Secrets for Accurate Assessment
Getting the most accurate read on your flour requires attention to detail and a few professional tricks that ensure you are tasting the grain itself, not interference from technique errors. This method works best when you treat it with the same care you would give a precious sourdough starter or a finicky souffle.
- Always smell your flour directly from the bag before mixing. Fresh flour smells mildly sweet and nutty, while rancid flour hits the nose with a sharp, chemical, or musty odor that is impossible to miss once you know what to look for.
- Use ice cold dairy products, as warmer ingredients can activate enzymes in the flour too quickly, potentially masking off-flavors or creating textures that confuse your assessment.
- Do not skip the small amount of sugar called for in the recipe, as sweetness acts as a flavor amplifier that will highlight any bitter or stale undertones hiding in oxidized flour.
- Bake on a light-colored pan rather than a dark one, which ensures the bottoms cook evenly and do not develop bitter, burnt notes that could be mistaken for rancid flour flavors.
- Taste the biscuit while it is still slightly warm, as this is when the wheat aromatics are most volatile and any defects in the grain will be most apparent to your palate.
Essential Tools for Flour Testing
You do not need a professional laboratory to assess your ingredients, but having the right tools on hand ensures your test is accurate and consistent every time you suspect your supply might be turning.
Digital Kitchen Scale: Weighing your flour eliminates the variability of scooping, ensuring you use exactly the right ratio of flour to liquid which affects hydration and flavor release.
Pastry Cutter or Bench Scraper: These tools cut butter into flour without warming it with your hands, preserving the cold temperature necessary for proper texture assessment.
Light-Colored Baking Sheet: This prevents the bottoms from browning too quickly, which could create bitter flavors unrelated to your flour’s freshness.
Wire Cooling Rack: Allows air to circulate around the hot biscuits immediately, stopping the cooking process and preventing condensation that might make the crumb gummy.
Glass Storage Jars: While not for the baking itself, having these ready means you can immediately transfer your validated fresh flour into airtight containers after testing.
What You’ll Need for the Freshness Test
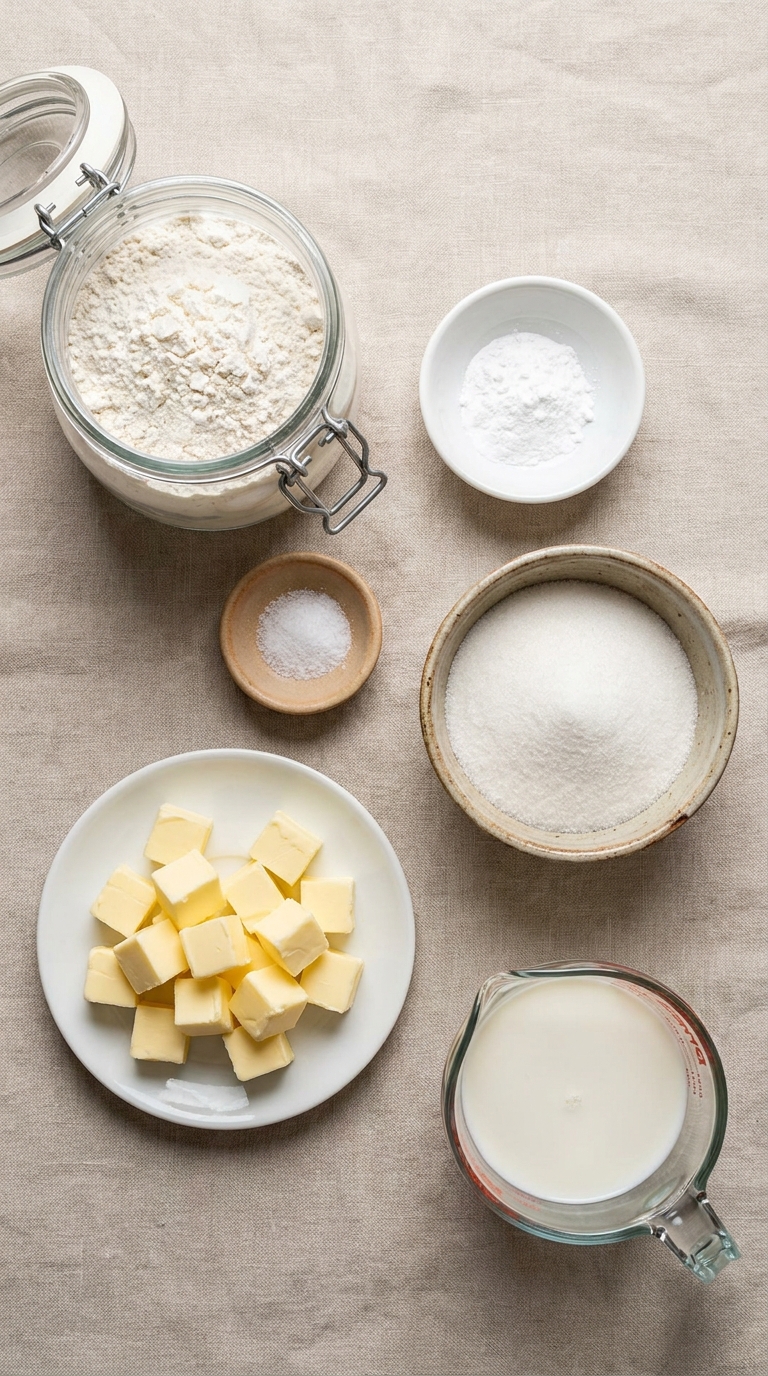
Gather these simple ingredients, keeping in mind that with so few components, quality becomes paramount. Each item plays a specific role in revealing the true nature of your flour, from the fat that carries flavor to the liquid that hydrates the starches and releases aromatic compounds.
- All-Purpose Flour: 2 cups (240g), lightly spooned and leveled, serving as the canvas that will reveal any stale, musty, or off aromas if present in your supply.
- Baking Powder: 1 tablespoon (14g), fresh and aluminum-free, ensuring the rise comes from proper leavening and is not confused with issues related to flour vitality.
- Fine Sea Salt: 1/2 teaspoon (3g), enhancing the subtle sweet wheat notes that indicate peak freshness while suppressing any slight bitterness.
- Granulated Sugar: 1 teaspoon (4g), acting as a flavor amplifier that will highlight any rancid or cardboard-like off-tastes in compromised flour.
- Unsalted Butter: 4 tablespoons (56g), diced and kept ice cold, providing fat content that carries flavor and creates texture without masking the flour’s true character.
- Whole Milk: 3/4 cup (180ml), straight from the refrigerator, binding the ingredients while adding enough liquid to fully hydrate the flour and release its aromatic potential.
Smart Swaps for Dietary Needs
While this test is designed to be basic and pure, you can make substitutions if necessary, though be aware that alterations may slightly change the flavor profile and affect your ability to detect subtle flour defects.
All-Purpose Flour: Whole wheat pastry flour or white whole wheat flour can be used, though the stronger bran flavors may mask subtle off-notes, so testing with white flour first is recommended.
Whole Milk: Buttermilk creates excellent tenderness and adds a tangy note, or you can use oat milk for dairy-free testing, though alternative milks may contribute their own flavors to the final assessment.
Unsalted Butter: Coconut oil or vegan butter sticks work well, provided they are kept equally cold and cubed small, though coconut oil will add a distinct aroma that might interfere with pure flour assessment.
Spotlight on the Star Ingredients
All-Purpose Flour: Look for a creamy white color without gray or yellow tinges, and a clean scent reminiscent of sweet grass and sun-dried wheat. Any musty, sour, or paint-like odors indicate the flour has turned, and the resulting biscuit will taste flat or bitter rather than nutty and bright.
Baking Powder: While not the focus of the freshness test, ensure yours is active by testing a teaspoon in hot water. If it does not fizz vigorously, your test batch might fail regardless of the flour’s quality, leading to false negatives about your grain.
The Testing Process Unveiled
Approach this process with a sense of curiosity and mindfulness, treating the mixing and baking as a diagnostic ritual that connects you deeply to your ingredients. The steps are simple, but each one is designed to maximize the flour’s ability to tell you its story.
-
Preheat Your Equipment: Position your oven rack in the center and preheat to 425°F (220°C). Line a baking sheet with parchment paper or a silicone mat. This high heat creates quick steam that tests the flour’s protein structure and moisture content, revealing its true baking potential.
-
Combine Ingredients: In a large mixing bowl, whisk together the flour, baking powder, salt, and sugar until thoroughly blended. This even distribution ensures that when you taste the final biscuit, any off-flavors from the flour will be unmistakable and not hidden by uneven seasoning or clumps of leavening.
-
Prepare Your Cooking Vessel: Scatter the cold butter cubes over the dry ingredients. Using a pastry cutter or your fingertips, work quickly to cut the butter into the flour until the mixture resembles coarse meal with some pea-sized butter pieces remaining. These butter pockets create steam during baking, which tests the flour’s ability to create tender, flaky layers rather than dense, heavy crumb.
-
Assemble the Dish: Create a well in the center of the mixture and pour in the cold milk. Stir gently with a fork just until the dough comes together into a shaggy, slightly sticky mass. Overmixing develops gluten which can mask the delicate texture indicators of fresh flour, so stop while it still looks a bit rough and unpolished.
-
Cook to Perfection: Turn the dough out onto a lightly floured surface and pat it into a 1-inch thick rectangle. Cut into 4 squares or use a biscuit cutter for rounds. Place on the prepared baking sheet with space between them. Bake for 12 to 15 minutes until the tops are golden brown and the bottoms sound hollow when tapped. The aroma filling your kitchen should be buttery and sweetly wheaty, never chemical or musty.
-
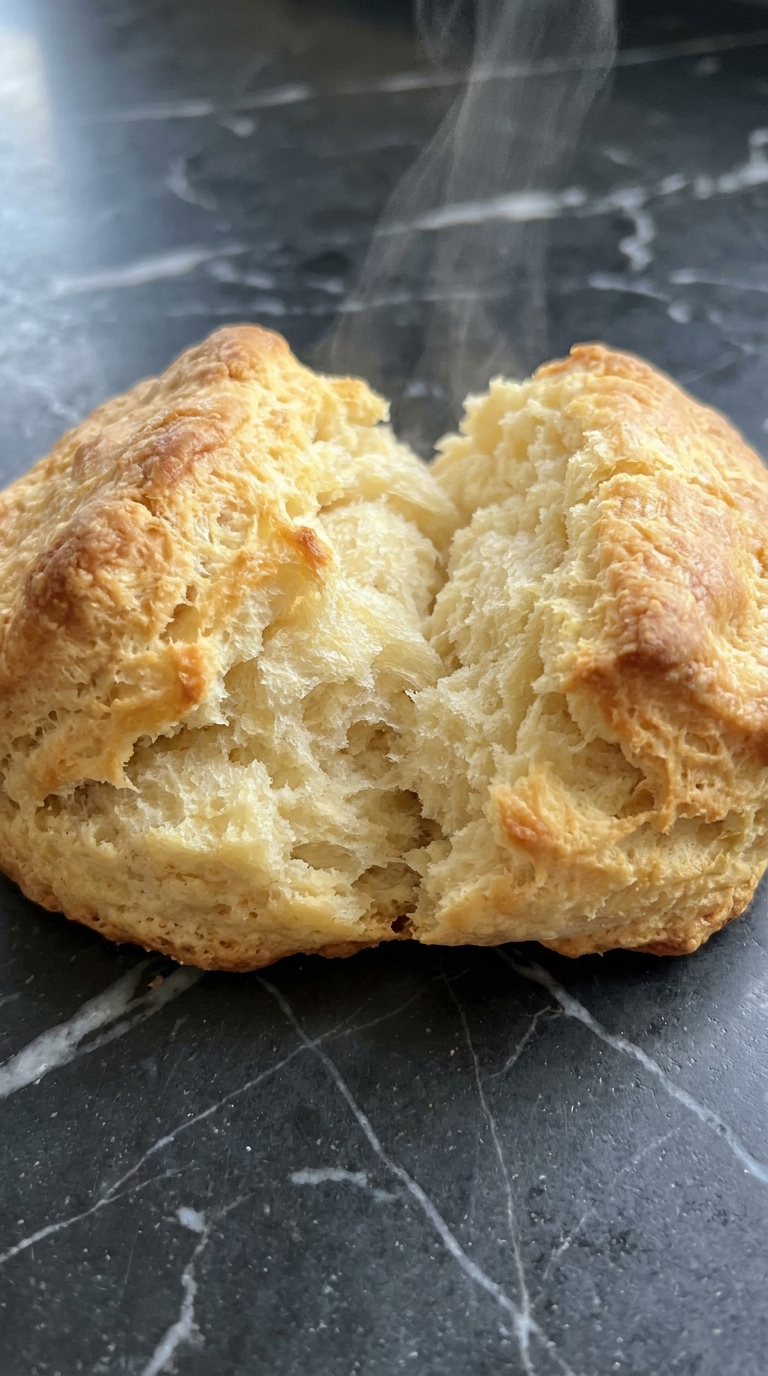
Finishing Touches: Transfer the biscuits immediately to a wire cooling rack. While still warm, split one open and inhale deeply. Fresh flour will smell sweet and nutty, while rancid flour will hit your nose with a sour, unpleasant sharpness. The crumb should be tender and moist, not gummy or dry.
-
Serve and Enjoy: Taste the biscuit plain first. It should have a clean, slightly sweet wheat flavor with no bitterness or stale aftertaste. If it tastes good, your flour is fresh and ready for all your baking projects. If you detect any off-notes, compost the batch and refresh your flour supply immediately.
Common Pitfalls to Sidestep
Even with a simple test batch, certain mistakes can lead to false readings about your flour’s quality. Here is how to avoid the most common errors that might confuse your assessment.
- Using butter that is too warm will create a dense, greasy biscuit that might feel stale even with fresh flour. Always work with cold, firm butter straight from the refrigerator.
- Overworking the dough develops excessive gluten, resulting in a tough, chewy texture that masks the tender crumb you should expect from fresh flour. Mix only until the ingredients barely come together.
- Baking on a dark or warped pan can cause uneven browning or burnt bottoms, creating bitter flavors that you might mistakenly blame on the flour rather than the equipment.
- Storing flour near strong odors like spices, onions, or cleaning supplies can cause it to absorb those smells, making it taste off even if it is not technically rancid. Always store flour in airtight containers away from aromatic items.
Nutritional Snapshot
Servings: 4 test biscuits
Calories per serving: Approximately 280
Note: These are approximate values based on standard ingredients and portion sizes.
Timing Your Test Batch
Prep Time: 10 minutes
Cook Time: 15 minutes
Total Time: 25 minutes
Delicious Variations to Explore
Once you have confirmed your flour is fresh and vibrant, you can use this same base recipe to test how well your grain handles different flavor profiles and additions.
Herb-Infused Validation: Add 1 tablespoon of finely chopped fresh rosemary or thyme to the dry ingredients to test how the flour carries delicate herbal notes without becoming gummy or bitter.
Sharp Cheddar Integration: Fold in 1/4 cup of grated sharp cheddar cheese with the butter to see if the flour can handle savory fat additions while maintaining a light, flaky structure.
Sweet Honey Drizzle: Brush the tops with warm honey immediately upon removal from the oven to test how the flour responds to sweet glazes and whether it remains tender or becomes soggy.
Whole Grain Comparison: Make two small batches side by side, one with your test flour and one with a new bag, to compare directly the differences in rise, color, and aroma.
FAQ’s
How can I tell if my flour is bad before I even bake with it?
Fresh flour should smell mildly sweet and nutty, similar to wheat germ or sun-dried grass. If your flour smells musty, sour, like old paint, or has no smell at all, it has likely gone rancid or lost its vitality.
Can I use this test for whole wheat flour or gluten-free blends?
Yes, though whole wheat flour has natural oils in the bran that go rancid faster than white flour, so it may taste stronger regardless. For gluten-free blends, the texture will be different, but you can still detect stale or cardboard flavors using this method.
How long does all-purpose flour typically last?
All-purpose flour stored in a cool, dark pantry in its original paper bag lasts about 6 to 8 months. Stored in an airtight container in the freezer, it can last up to 2 years while maintaining peak freshness.
Is it safe to eat biscuits made with old flour?
While rancid flour is not toxic in the way that moldy food can be, it contains oxidized fats that taste terrible and offer no nutritional value. It will not make you sick immediately, but it is unpleasant and lacks the qualities you want in baking.
Can I freeze flour to keep it fresh longer?
Absolutely, freezing is the best way to extend flour’s life. Place the bag in a freezer-safe container to prevent moisture absorption and odor contamination. You can use it straight from frozen without thawing.
What does rancid flour smell like exactly?
Rancid flour often smells like old cardboard, wet cardboard boxes, library books that have gotten damp, or sometimes like oil paint or crayons. It lacks the clean, sweet aroma of fresh grain.
Why does my flour smell like paint or chemicals?
That paint-like smell indicates that the fats in the wheat germ have oxidized. This happens when flour is exposed to air, heat, or light over time. It is a definitive sign that the flour should be discarded.
Can I still use flour that is past its best-by date?
Best-by dates are guidelines, not expiration dates. If the flour smells and tastes fresh in this test bake, it is fine to use. If it smells off or produces flat, bitter biscuits, discard it regardless of the printed date.
How should I store flour after opening the bag?
Transfer opened flour to an airtight glass or plastic container with a tight seal. Store it in a cool, dark cabinet away from the oven or dishwasher heat, or freeze it for maximum longevity.
What if my biscuit tastes bland but not necessarily bad?
Blandness usually indicates the flour has lost its aromatic oils through age but has not yet gone fully rancid. It is safe to eat but will not provide the flavor you want in baking. Consider using it for thickening sauces rather than prominent baked goods.
Conclusion
Knowing the exact condition of your flour empowers you to bake with confidence and creativity, turning your kitchen into a place where every cake rises tall and every cookie tastes like a celebration. This simple test takes only moments but saves you from the heartbreak of ruined recipes and wasted ingredients. The next time you reach for that half-full bag hiding behind the cereal boxes, take the time to verify its vitality. Your taste buds will thank you, and your baking will shine with the clean, sweet essence of truly fresh grain. Happy baking, and may your pantry always be filled with ingredients worthy of your culinary dreams.


