

Hocus Pocus Cookies
Alright, gather around because I have something magical to share with you today—Hocus Pocus Cookies! Trust me, you won’t believe the spell these cookies cast once you take a bite. Imagine a soft, chewy cookie with a perfect balance of sweet and a touch of salt, all wrapped up in an irresistible, festive flavor. It’s like a little bit of Halloween magic (or just everyday magic, depending on your mood) in every bite.
This isn’t just any cookie; this is a game-changer—the kind of cookie that gets devoured before they even cool down. You know, the ones that make everyone in the room ask, “Wait, what’s in these?! They’re SO good!” Spoiler alert: it’s the perfect combo of comforting nostalgia with a fun twist of flavors that’ll have you hooked from the first bite. So, grab your apron (or your favorite comfy sweater) and let’s get baking—because these cookies? Oh, they’re going to be your new go-to treat.
Why You’ll Love Hocus Pocus Cookies
These cookies are a little sweet, a little salty, and a whole lot of fun! Seriously, if you’re looking for a new baking obsession, here it is. Here’s why these cookies are about to steal the show:
Versatile
Perfect for anything—whether you’re looking to treat yourself, impress guests, or pack them in lunchboxes. The flavors are irresistible, so they’re perfect for just about any occasion. You can whip them up in no time and have everyone asking for more.
Budget-Friendly
You don’t need any special ingredients here. We’re talking about things you probably already have sitting in your pantry, and yet the result? Pure cookie magic. You’ll be making these on repeat without breaking the bank.
Quick and Easy
Even if you’re not an experienced baker, you’ll love how simple this recipe is. It’s basically foolproof—just mix, scoop, bake, and enjoy! It’s the kind of recipe that’s easy enough to do on a whim but impressive enough to make you feel like a total baking pro.
Customizable
Not everyone likes the same thing, so feel free to switch it up! You can tweak these cookies with your favorite add-ins—chocolate chips, crushed candy, or even a dash of cinnamon to make them your own. You do you!
Crowd-Pleasing
Trust me, these cookies are going to be a hit! Whether you’re baking them for a party, your family, or just yourself, they’re guaranteed to be devoured. Everyone will love the balance of flavors in every bite.
Disclosure: This post contains affiliate links.If you click and make a purchase, I may earn a small commission at no extra cost to you.


Ingredients
The magic is in the simplicity of these ingredients. Here’s what you’ll need to get started:
Butter
A must for any good cookie. It gives these cookies that rich, melt-in-your-mouth texture. The key to making them soft and chewy!
Brown Sugar
This is where the sweetness comes in—brown sugar gives these cookies that perfect caramelized flavor that will have everyone going back for seconds.
Granulated Sugar
You need a little bit of sweetness to balance everything out. A touch of granulated sugar helps these cookies just the right amount of sweetness.
Eggs
The binding agents that bring everything together, giving these cookies a chewy, soft center.
Vanilla Extract
This is the secret ingredient that will make your kitchen smell like heaven. It adds that rich, warm flavor that makes these cookies truly irresistible.
Flour
The base of your dough, providing structure and helping these cookies hold their perfect chewy shape.
Baking Soda
A little lift to make sure these cookies are perfectly fluffy and spread just the right amount while baking.
Salt
Yes, salt! It balances the sweetness and brings out the full flavor of all the other ingredients. Trust me, it’s a key ingredient in the magic.
Add-Ins (Chocolate Chips, Sprinkles, Nuts, etc.)
Here’s where you can get creative! Add in your favorite goodies to customize these cookies to your liking.
(Note: The full ingredients list, including measurements, is provided in the recipe card directly below.)
Instructions
Let’s get started on these show-stopping cookies! Follow these simple steps, and you’ll have yourself a batch of delicious cookies in no time.
Preheat Your Oven
Start by preheating your oven to the right temperature (this ensures the cookies bake evenly and perfectly every time).
Mix Your Wet Ingredients
In a large bowl, beat together your butter, brown sugar, and granulated sugar until it’s all creamy and smooth. Add in your eggs and vanilla extract and mix well. You want it to be light, fluffy, and full of flavor!
Add Dry Ingredients
In a separate bowl, whisk together your flour, baking soda, and salt. Gradually add this dry mixture to your wet ingredients, mixing until just combined. You don’t want to overmix, so keep it gentle.
Add Your Fun Ingredients
Here’s where the magic happens! Add in your favorite mix-ins, like chocolate chips, nuts, or sprinkles. Mix until evenly distributed.
Scoop & Bake
Scoop out tablespoon-sized balls of dough and place them on a lined baking sheet. Leave a little space between each ball so they have room to spread. Bake for 10-12 minutes or until golden around the edges. The center should still look soft, but don’t worry—these cookies will set up beautifully as they cool!
Let Them Cool
Once they’re out of the oven, let the cookies cool for a few minutes on the baking sheet before transferring them to a wire rack. The anticipation of waiting for these warm, gooey cookies to cool is half the fun!
Serve & Enjoy
Once cooled, serve them up and enjoy every single bite. These cookies are perfect with a glass of milk, a cup of coffee, or just as a sweet treat to enjoy on their own!
How to Serve Hocus Pocus Cookies
These cookies are magical enough to stand on their own, but here are a few ways you can make them even more special:
With Milk
You can’t go wrong with the classic pairing of cookies and milk. The sweetness of the cookies and the creaminess of the milk? Perfection.
As a Dessert Sandwich
Take two cookies and sandwich your favorite ice cream between them for the ultimate cookie ice cream sandwich.
With a Warm Drink
These cookies are the perfect treat to enjoy with a cup of hot cocoa, tea, or coffee. It’s like wrapping yourself in a warm blanket—comforting and cozy.
As a Party Snack
Serving these at a party? Trust me, they’ll be gone in a flash. They’re always a crowd-pleaser!
Additional Tips
- Prep Ahead: You can always prep the dough ahead of time and store it in the fridge for up to 3 days. Just scoop and bake when you’re ready.
- Make Them Bigger: Want to make giant cookies? Simply increase the size of the dough scoops and bake a bit longer.
- Add More Flavor: Feel free to switch up the add-ins to make these cookies your own. Try peanut butter chips, caramel chunks, or even white chocolate.
- Storage Tips: Store your leftover cookies in an airtight container for up to a week, though I’m betting they won’t last that long.
FAQ Section
Q1: Can I substitute the butter for margarine?
A1: Sure! Margarine can work, but butter gives these cookies that rich flavor that’s hard to beat.
Q2: Can I make the dough ahead of time?
A2: Absolutely! You can refrigerate the dough for up to 3 days before baking. Just scoop, bake, and enjoy when you’re ready.
Q3: How do I store leftovers?
A3: Store them in an airtight container at room temperature for up to a week. You can also freeze them for up to 3 months.
Q4: Can I freeze the dough?
A4: Yes! Freeze the dough in individual scoops and bake them fresh when you’re ready.
Q5: What’s the best way to reheat these cookies?
A5: Warm them up in the microwave for a few seconds or place them in a low-temperature oven to get that fresh-out-of-the-oven experience.
Conclusion
These Hocus Pocus Cookies are going to be your new favorite treat, and I’m so excited for you to try them. Whether you’re baking them for a special occasion, a cozy afternoon, or just because—you can’t go wrong with this magical recipe. So go ahead, put on your apron, and get ready to enjoy every last crumb!
Print
Hocus Pocus Cookies
- Prep Time: 25 minutes (excluding chilling time)
- Cook Time: 12-14 minutes
- Total Time: 45 minutes (including chilling time)
- Yield: Approximately 24 cookies
- Category: Dessert, Cookies, Halloween
- Method: Baking
- Cuisine: Vegetarian
- Diet: Vegetarian
Description
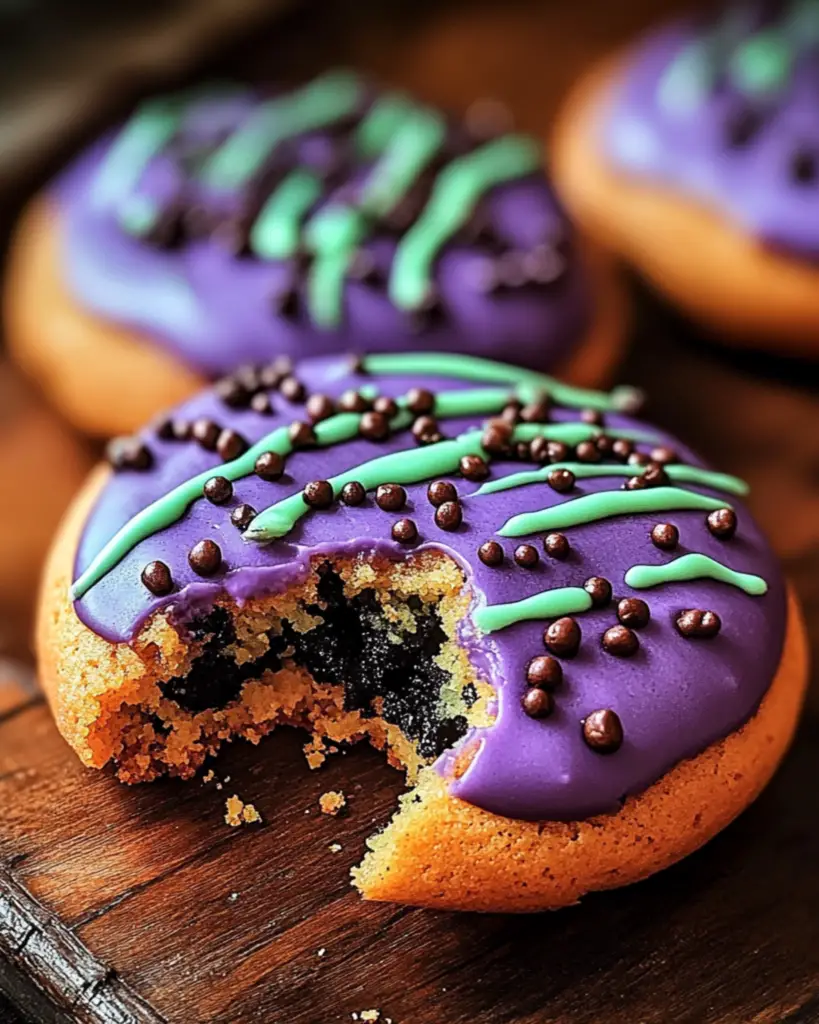
These vibrant and festive Hocus Pocus Cookies are the perfect treat for Halloween! With colorful dough, white chocolate chips, and sprinkles, they are a deliciously magical addition to your spooky celebrations.
Ingredients
- 1 1/2 cups butter, softened
- 2 cups white sugar
- 3 large eggs
- 3 tsp vanilla extract
- 1 1/2 tsp cornstarch
- 1 1/2 tsp baking soda
- 3/4 tsp salt
- 2 cups cake flour
- 2 1/2 cups all-purpose flour
- Orange, green, and purple gel food coloring
- 2 cups white chocolate chips
- Halloween sprinkles
Instructions
- Line a baking sheet with parchment paper.
- In a stand mixer, combine butter and sugar, mixing on high until light and fluffy.
- Add eggs one at a time, mixing after each addition.
- Add vanilla extract and continue mixing.
- In a separate bowl, combine cake flour, all-purpose flour, cornstarch, baking soda, and salt. Whisk together.
- Gradually add the dry mixture to the butter mixture, mixing on medium speed.
- Divide the dough into 3 equal parts. Color one part orange, one part green, and one part purple using gel food coloring. Knead until the color is evenly incorporated.
- Place white chocolate chips in a bowl and Halloween sprinkles in a shallow dish.
- Scoop 2 teaspoons of each colored dough and roll them into separate balls. Gently press them together, ensuring the colors don’t blend.
- Roll the dough balls into a ball shape and slightly flatten. Roll the edges in the Halloween sprinkles.
- Place cookies on the baking sheet and gently press white chocolate chips into the top and sides.
- Chill the cookies in the fridge for 30 minutes.
- Preheat the oven to 400°F (200°C).
- Place chilled cookies on the baking sheet, spaced about 2 inches apart.
- Bake for 12-14 minutes or until edges are golden.
- Remove from the oven and allow to cool for a few minutes before transferring to a wire rack to cool completely.
- Store in an airtight container.
Notes
- You can use any sprinkles you like for a more personalized touch.
- If you prefer softer cookies, bake them for a few minutes less.
Nutrition
- Serving Size: 1 cookie
- Calories: 210
- Sugar: 18g
- Sodium: 100mg
- Fat: 12g
- Saturated Fat: 7g
- Unsaturated Fat: 4g
- Trans Fat: 0g
- Carbohydrates: 24g
- Fiber: 1g
- Protein: 2g
- Cholesterol: 40mg


