
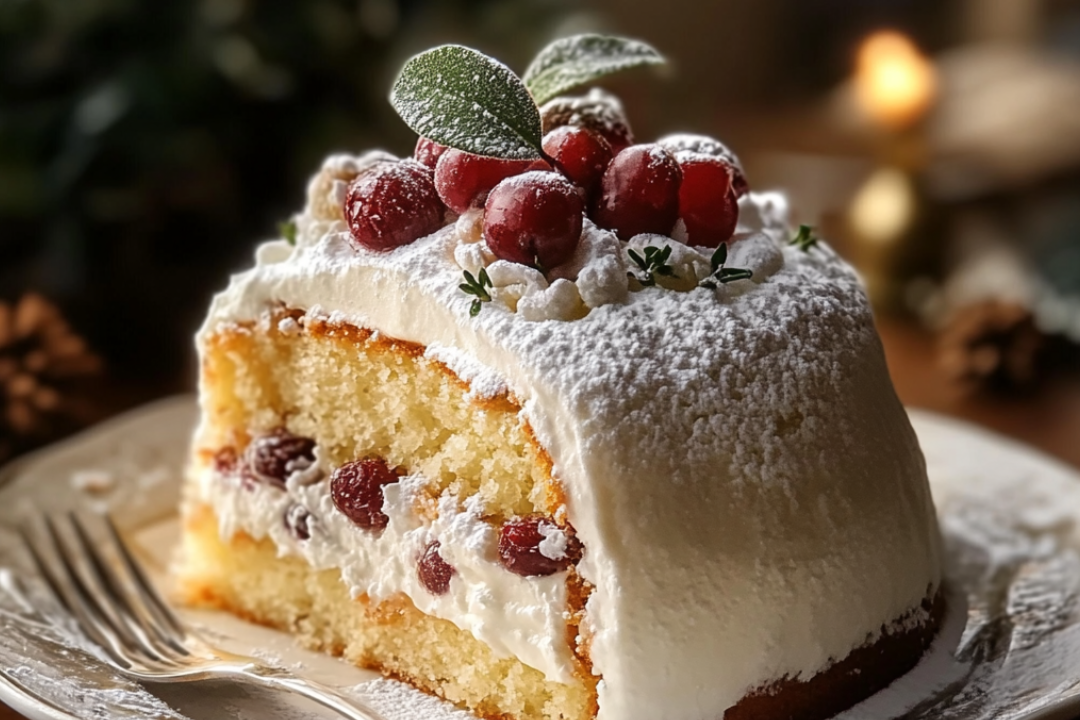
Snowy Bavarian Bliss Cake: A Dreamy, Cloud-Like Dessert to Swoon Over
Okay, friend, let’s talk dessert. Imagine biting into something so soft, so creamy, and so utterly luxurious that it feels like you’ve been transported to a snowy Alpine village, where everything is magical and dusted with powdered sugar. That’s what Snowy Bavarian Bliss Cake is all about. It’s not just a dessert; it’s an experience—like wrapping yourself in a warm blanket on a cold day or hearing your favorite song on repeat.
This cake is elegant yet approachable, a perfect mix of light-as-air textures and rich flavors. And the best part? It’s much easier to make than it looks. So grab your apron and let’s create a little slice of heaven together!
Why You’ll Love Snowy Bavarian Bliss Cake
This recipe will win over your taste buds and your heart, and here’s why:
- Delicate Yet Decadent: The perfect balance of fluffy and rich, with layers that practically melt in your mouth.
- Great for Any Occasion: Whether it’s a birthday, a dinner party, or a cozy night in, this cake always feels like a celebration.
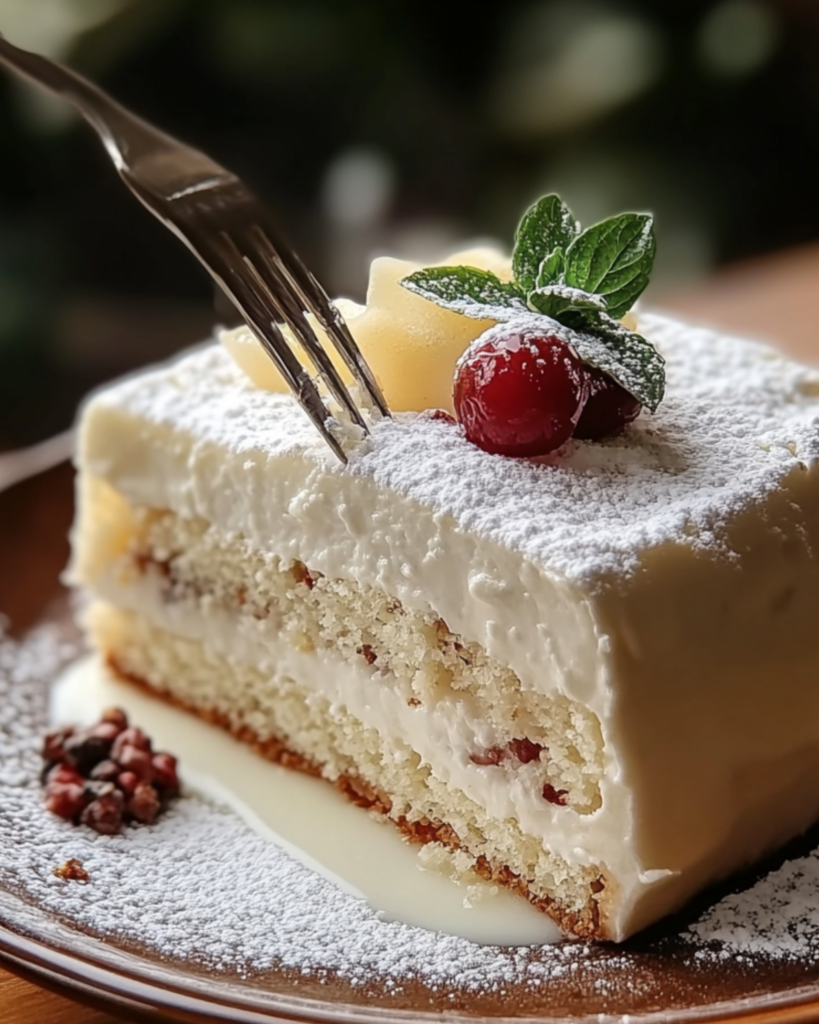
- Visually Stunning: It’s a showstopper with its snowy white finish and elegant layers. A dessert that’s made for Instagram.
- Crowd-Pleaser: Who can resist a dessert that’s as pretty as it is delicious?
- Customizable: Add a hint of citrus, a drizzle of chocolate, or a berry compote—this cake is your canvas.
Disclosure: This post contains affiliate links.If you click and make a purchase, I may earn a small commission at no extra cost to you.


Ingredients in Snowy Bavarian Bliss Cake
(Note: The full ingredients list, including measurements, is provided in the recipe card directly below.)
- Egg Whites: The secret to that light, airy texture. These will whip up to form the perfect meringue base.
- Sugar: For sweetness and structure—this cake is all about balance.
- Vanilla Extract: A warm, aromatic touch that ties all the flavors together.
- Heavy Cream: Whipped into dreamy peaks for the filling, adding richness without being heavy.
- Gelatin: Keeps the creamy layers set and silky smooth.
- Powdered Sugar: A finishing touch of sweetness that also gives it its signature snowy look.
Instructions
Preheat Your Oven
Preheat your oven to 350°F (175°C) and prepare two 8-inch round cake pans by greasing them and lining the bottoms with parchment paper. This will make removing the cake layers a breeze.
Whip Up the Meringue
In a clean, dry bowl, whip the egg whites until soft peaks form. Gradually add sugar, continuing to beat until stiff, glossy peaks hold their shape. This will be the airy backbone of your cake.
Fold and Combine
Gently fold the meringue into the dry ingredients, being careful not to deflate the mixture. Pour the batter evenly into the prepared pans and smooth the tops.
Bake to Perfection
Bake for 20–25 minutes, or until the cakes are lightly golden and spring back when touched. Let them cool completely in the pans before transferring to a wire rack.
Create the Creamy Filling
In a small saucepan, bloom the gelatin in water, then heat gently until dissolved. Whip the heavy cream and powdered sugar until soft peaks form, then stir in the vanilla and gelatin mixture.
Assemble the Cake
Place one cake layer on a serving plate and spread a generous amount of the whipped cream filling on top. Add the second layer and frost the entire cake with the remaining cream.
Snowy Finish
Dust the cake liberally with powdered sugar and garnish with fresh berries or edible flowers if desired.
Chill and Serve
Refrigerate the cake for at least 2 hours to allow the flavors to meld and the filling to set. Slice and enjoy your masterpiece!
How to Serve Snowy Bavarian Bliss Cake
- With Berries: A handful of fresh raspberries or strawberries add a tart contrast to the creamy sweetness.
- With Coffee: Pair this cake with a rich espresso or a frothy cappuccino for the ultimate indulgence.
- On Its Own: Honestly, this cake is a star all by itself—no extras needed.
Additional Tips
- Keep It Cool: Store the cake in the refrigerator to maintain its structure and freshness.
- Prep Ahead: Make the cake layers the day before and assemble them on the day of serving.
- Get Creative: Add a hint of almond extract, or swirl in some melted chocolate for a unique twist.
FAQ
Q1: Can I make this cake without gelatin?
A1: Yes! You can substitute it with agar-agar for a vegetarian option, though the texture may differ slightly.
Q2: How long does this cake last in the fridge?
A2: Up to 3 days, but good luck keeping it around that long!
Q3: Can I freeze the cake?
A3: You can freeze the layers separately, but the whipped cream filling is best when fresh.
Q4: Can I use a different size pan?
A4: Of course, but you may need to adjust the baking time.
Q5: What’s the best way to whip cream?
A5: Chill your bowl and beaters beforehand—it makes all the difference.
Conclusion
There you have it—your new go-to cake for every occasion. Snowy Bavarian Bliss Cake is as delightful to eat as it is to make. Trust me, once you try it, you’ll be finding excuses to bake it again and again. So what are you waiting for? Grab your whisk and let the baking adventure begin!
Print
Snowy Bavarian Bliss Cake: A Dreamy, Cloud-Like Dessert to Swoon Over
- Prep Time: 20 minutes
- Cook Time: 30 minutes
- Total Time: 50 minutes
- Yield: 12 servings
- Category: Dessert
- Method: Baking
- Cuisine: American (German Chocolate-inspired)
- Diet: Vegetarian
Description
A heavenly dessert featuring layers of moist white cake, decadent coconut-pecan frosting, and a touch of German chocolate magic! Perfect for celebrations or indulgent treats.
Ingredients
-
For the Cake:
- 1 package white cake mix: Use your favorite white cake mix for an easy, light base.
- 1 cup buttermilk: Adds moisture and richness to the cake.
- 1/2 cup vegetable oil: Helps keep the cake moist.
- 4 large egg whites: Lightens the texture of the cake.
- 1 teaspoon vanilla extract: For a sweet, aromatic flavor.
For the Frosting:
- 1/2 cup unsalted butter: The base for the delicious frosting.
- 1 cup granulated sugar: Sweetens the frosting to perfection.
- 1 cup evaporated milk: Adds creaminess to the frosting.
- 3 large egg yolks: Adds richness and thickness to the frosting.
- 1 teaspoon vanilla extract: For flavor.
- 1 1/2 cups sweetened shredded coconut: Gives the frosting a tropical, chewy texture.
- 1 cup chopped pecans: Provides crunch and a nutty flavor.
Instructions
- Prepare the Cake: Preheat your oven to 350°F (175°C). Grease and flour two 9-inch round cake pans.
- Mix the Batter: In a large mixing bowl, combine the white cake mix, buttermilk, vegetable oil, egg whites, and vanilla extract. Beat on medium speed until smooth and well combined.
- Bake the Cake: Pour the batter evenly into the prepared pans. Bake for 25-30 minutes, or until a toothpick inserted into the center comes out clean.
- Cool the Cakes: Let the cakes cool in the pans for 10 minutes, then transfer them to a wire rack to cool completely.
- Make the Frosting: Melt the butter in a medium saucepan over medium heat. Stir in the sugar, evaporated milk, egg yolks, and vanilla extract. Cook while stirring constantly until the mixture thickens and turns golden brown (about 10-12 minutes).
- Add Coconut & Pecans: Remove from heat and stir in the shredded coconut and chopped pecans. Let the frosting cool slightly.
- Assemble the Cake: Spread the coconut-pecan frosting between the cake layers and on top and sides of the cake. Slice, serve, and enjoy!
Notes
For a smoother frosting, allow the frosting to cool slightly before spreading it.
You can refrigerate the cake for a firmer texture if desired.
Garnish with additional coconut or pecans for extra flavor and texture.
Nutrition
- Serving Size: 1 slice
- Calories: 520 kcal
- Sugar: 40g
- Sodium: 160mg
- Fat: 26g
- Saturated Fat: 9g
- Unsaturated Fat: 12g
- Trans Fat: 0g
- Carbohydrates: 70g
- Fiber: 2g
- Protein: 4g
- Cholesterol: 85mg


