

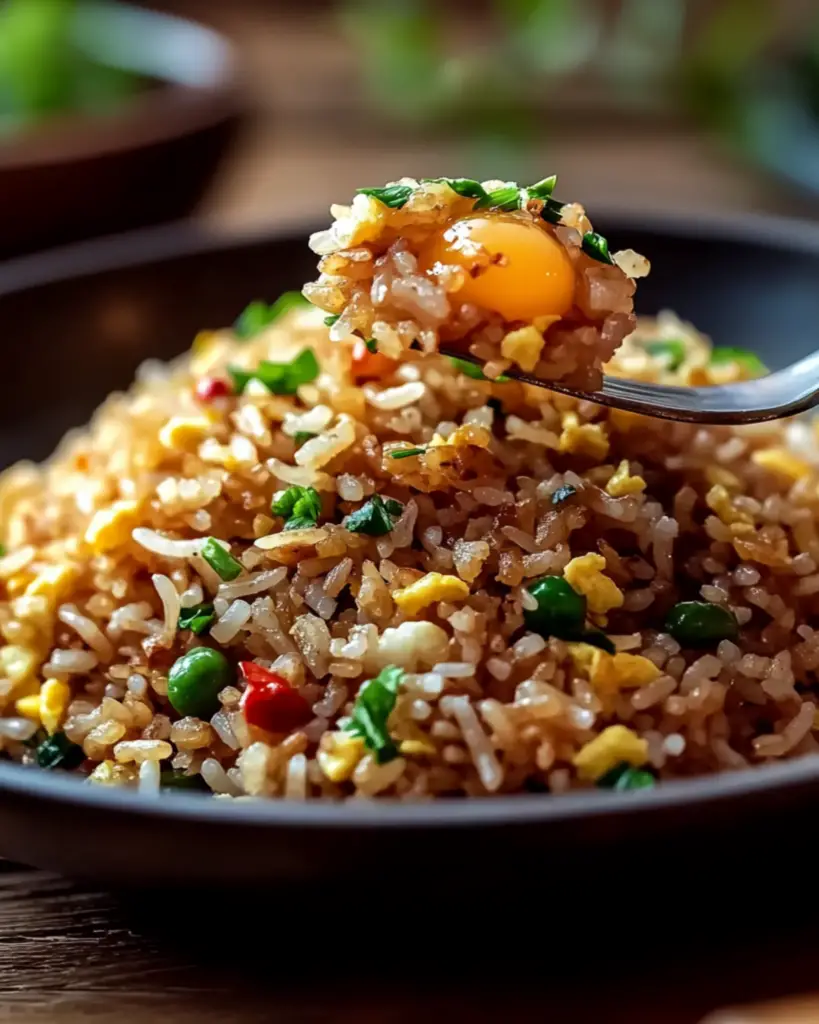
Restaurant-Style Egg Fried Rice
Hey there, food lover! Are you craving something simple, yet packed with flavor and a touch of restaurant-style magic? Look no further than this Restaurant-Style Egg Fried Rice! Picture this: warm, fluffy rice, golden scrambled eggs, and a medley of colorful veggies all tossed together with a savory, perfectly seasoned sauce. Trust me, this one is a game-changer! Whether you’re whipping it up for a cozy dinner, prepping lunch for the week, or impressing guests, this dish is sure to steal the show. It’s so easy, you’ll be hooked after just one bite—and the best part? It’s super customizable to fit your taste buds. Ready to dive in? Let’s go!
Why You’ll Love Restaurant-Style Egg Fried Rice
This isn’t just about the rice; it’s about creating those moments where you can sit down and savor each bite. Whether it’s for a busy weeknight, a casual family dinner, or even as a side for your favorite Asian-inspired dishes, this egg fried rice works for every occasion. Here’s why you’ll love it:
Versatile:
Perfect for any meal! Whether you’ve got a ton of leftover rice or are planning a quick dinner, this fried rice will hit the spot. It’s also great for meal prepping, so you can enjoy it all week long.
Budget-Friendly:
You probably already have most of these ingredients in your kitchen. It’s a total winner when you want something satisfying without breaking the bank.
Quick and Easy:
Say goodbye to complicated recipes! This fried rice is super easy to make. In less than 30 minutes, you’ll have a plate full of deliciousness that tastes just like your favorite restaurant.
Customizable:
Love bold flavors? Add some chili flakes or a dash of soy sauce. Want something milder? Just skip the spicy stuff and enjoy a savory, comforting dish that’s tailored to your tastes.
Crowd-Pleasing:
Perfect for both kids and adults alike. It’s one of those rare dishes that brings everyone to the table—whether they’re rice lovers or not!
Disclosure: This post contains affiliate links.If you click and make a purchase, I may earn a small commission at no extra cost to you.


Ingredients
The magic of this egg fried rice is in its simplicity. Here’s what you’ll need to bring that restaurant-style flavor to your kitchen:
- Cooked Rice: The foundation of our dish. Use day-old rice for the best texture—it’s a game-changer!
- Eggs: Lightly scrambled to add that rich, silky texture.
- Carrots: Diced small for that perfect pop of color and sweetness.
- Green Peas: Sweet and savory, they complement the rice beautifully.
- Green Onions: Adds a mild onion flavor and a bit of freshness to balance everything out.
- Soy Sauce: The key to that rich, umami flavor. It brings everything together.
- Sesame Oil: A tiny drizzle for a nutty, aromatic finish that makes this dish extra special.
- Garlic: A touch of garlic to add fragrance and depth.
- Cooking Oil: For sautéing and ensuring everything cooks up perfectly.
(Note: The full ingredient list, including measurements, is provided in the recipe card directly below.)
Instructions
Ready to create this flavor-packed fried rice? Let’s walk through the steps together.
1. Prepare Your Rice
Start by cooking your rice and letting it cool down. Day-old rice works best because it’s less sticky and gives that perfect fried rice texture. If you’re using freshly made rice, spread it out on a tray to cool before using it.
2. Scramble Your Eggs
In a hot pan, add a little oil and scramble the eggs. Keep them soft and slightly runny, then set them aside. You want them to be light and fluffy—don’t overcook them.
3. Sauté the Veggies
In the same pan, add a little more oil if needed. Toss in your garlic, carrots, and green peas. Sauté until they’re tender and fragrant—this is where all those delicious aromas come together.
4. Stir in the Rice
Once your veggies are ready, add in the cooled rice. Break up any clumps with your spatula, then stir-fry the rice until it’s heated through. This step gives it that signature texture.
5. Season It Up
Pour in your soy sauce and sesame oil. Stir everything together, making sure the rice is coated evenly with the sauce. The sesame oil will give it that amazing depth of flavor that makes this fried rice pop.
6. Add the Scrambled Eggs
Finally, toss the scrambled eggs back into the pan. Gently stir them in so they break up into nice, bite-sized pieces. Sprinkle in some green onions for a fresh finish.
7. Serve and Enjoy!
Once everything is perfectly mixed and sizzling hot, it’s time to plate up! Garnish with a few more green onions or even a sprinkle of sesame seeds if you’re feeling fancy.
How to Serve Restaurant-Style Egg Fried Rice
This egg fried rice is perfect as a standalone meal, but here are a few ways to take it to the next level:
Fresh Salads
Pair it with a light, crunchy salad dressed in a tangy vinaigrette. The freshness will complement the richness of the fried rice beautifully.
Protein Additions
Want to make this dish even more filling? Add grilled chicken, shrimp, or tofu to the fried rice for a protein-packed meal that’s still light and flavorful.
Pickled Vegetables
A side of pickled cucumbers or radishes adds a refreshing contrast to the warm, savory rice.
Additional Tips
Here are a few tips to make this egg fried rice even more fabulous:
Prep Ahead:
If you’re in a hurry, you can chop the veggies and scramble the eggs ahead of time. This makes the whole process go even faster when you’re ready to cook.
Spice It Up:
Add a pinch of chili flakes or some chopped fresh chili if you like a bit of heat. You can also drizzle a little chili oil for a nice kick.
Dietary Adjustments:
This recipe is easy to make vegan—just skip the eggs and add tofu or more veggies for that protein boost.
Store Leftovers:
Leftovers? Store them in an airtight container in the fridge for up to 3 days. To reheat, just give it a quick stir-fry on the stove or pop it in the microwave.
Double the Batch:
If you’re feeding a crowd or just want extra for later, feel free to double the recipe. It freezes wonderfully, so you’ll have a homemade meal ready to go whenever you need it.
FAQ Section
Q1: Can I substitute regular soy sauce with gluten-free soy sauce?
A1: Absolutely! Just swap out the regular soy sauce for a gluten-free alternative, and you’re good to go.
Q2: Can I make this dish ahead of time?
A2: Fried rice is best when freshly made, but you can certainly prep the ingredients ahead of time. Just store them separately, and when you’re ready, stir-fry everything together.
Q3: How do I store leftovers?
A3: Store leftovers in an airtight container for up to 3 days in the fridge. When reheating, a quick stir-fry in a pan will bring it back to life.
Q4: Can I freeze this dish?
A4: Yes, it freezes well! Store it in a freezer-safe container for up to a month. When you’re ready to eat, just thaw in the fridge overnight and reheat in a pan.
Q5: How do I reheat this fried rice?
A5: Reheat it in a hot pan with a splash of oil to bring back that crispy texture, or use the microwave in short bursts, stirring in between.
Q6: Can I add meat to this dish?
A6: Absolutely! Chicken, shrimp, or even leftover pork or beef would make a great addition.
Conclusion
This Restaurant-Style Egg Fried Rice is not just a meal—it’s a celebration of simple ingredients transformed into something truly special. It’s comforting, flavorful, and so easy to make! So next time you’re looking for a quick meal that tastes like it came straight from your favorite restaurant, remember this dish. You’ll be amazed at how quickly it comes together—and how quickly it disappears off the plate!
Happy cooking, and trust me—you’re going to love this one!
Print
Restaurant-Style Egg Fried Rice
- Prep Time: 5 minutes
- Cook Time: 10 minutes
- Total Time: 15 minutes
- Yield: 4 servings
- Category: Main Dish, Side Dish
- Method: Stir-frying
- Cuisine: Chinese, Asian
- Diet: Vegan
Description
This Restaurant Style Egg Fried Rice is quick, easy, and packed with flavor! Made with day-old rice, scrambled eggs, and a simple stir-fry of peas, carrots, and soy sauce, this fried rice recipe is a delicious side dish or a complete meal. Perfect for busy weeknights or as a tasty companion to your favorite Asian dishes
Ingredients
- 3 cups cooked white rice (preferably day-old rice)
- 2 tablespoons oil
- 1 cup frozen peas and carrots (thawed)
- 1 onion, chopped
- 1 tablespoon minced garlic (about 3 cloves)
- 2 eggs, slightly beaten
- 3 tablespoons soy sauce
- Ground black pepper to taste
- Green onions for garnish (optional)
Instructions
- Heat Oil & Fry Eggs: On medium heat, add 1 tablespoon of oil in a large pan or wok. Add the slightly beaten eggs and scramble until fully cooked. Remove the eggs from the pan and set aside.
- Saute Onions & Garlic: In the same pan, add another tablespoon of oil. Saute the chopped onion and minced garlic until fragrant.
- Add Peas & Carrots: Add the thawed peas and carrots and stir-fry for a few minutes until tender.
- Stir Fry Rice & Soy Sauce: Add the cooked rice to the pan along with the soy sauce. Stir everything together, breaking apart any clumps of rice.
- Combine Eggs & Season: Add the scrambled eggs back into the pan, stir-frying until everything is well combined and heated through.
- Season & Garnish: Add ground black pepper to taste and garnish with green onions if desired. Serve hot and enjoy!
Notes
- Day-old rice works best as it’s drier and doesn’t get mushy during stir-frying.
- You can add other vegetables like bell peppers, corn, or broccoli for more variety.
- If you prefer a more savory taste, add a dash of sesame oil or extra soy sauce.
Nutrition
- Serving Size: 1 plate (1/4 of the recipe)
- Calories: 290
- Sugar: 3g
- Sodium: 450mg
- Fat: 12g
- Saturated Fat: 1g
- Unsaturated Fat: 10g
- Trans Fat: 0g
- Carbohydrates: 38g
- Fiber: 2g
- Protein: 7g
- Cholesterol: 90mg


