Triple Chocolate Cheesecake with Oreo Crust
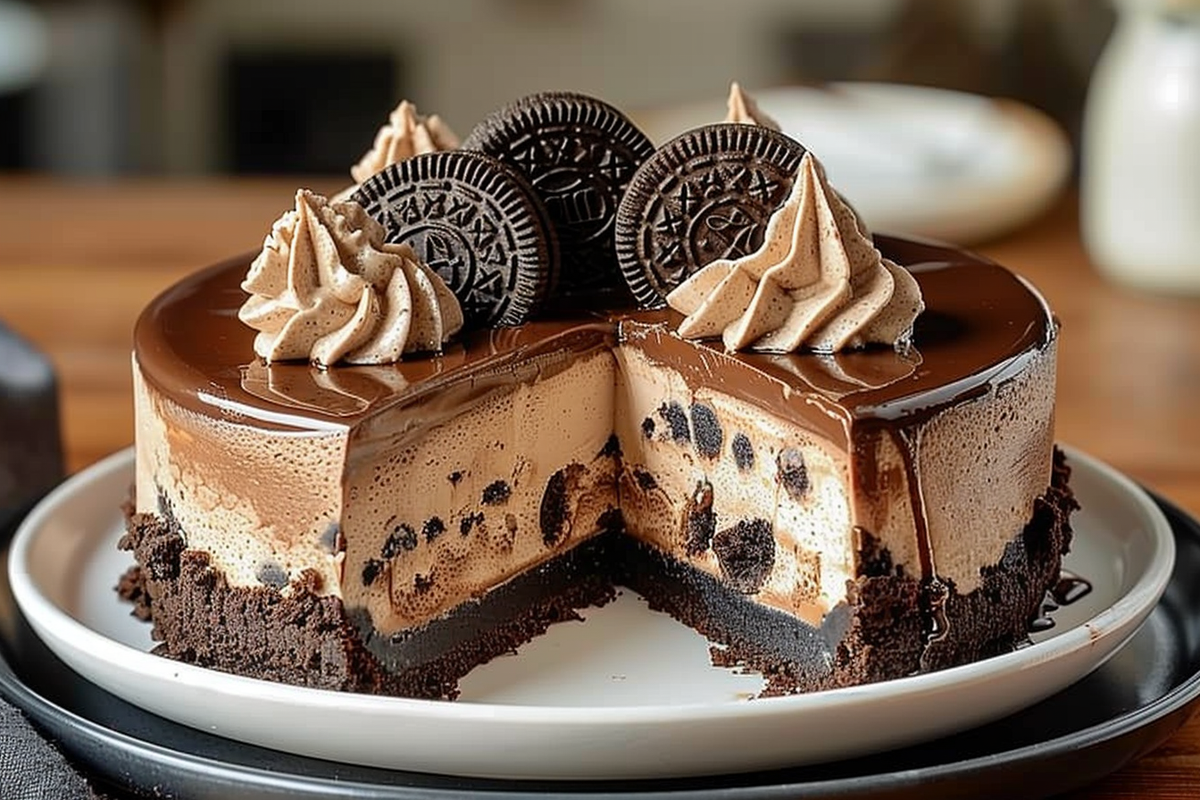
Indulging in a rich, creamy slice of Triple Chocolate Cheesecake with an Oreo Crust is a dessert experience that chocolate lovers can’t resist. This decadent treat combines the flavors of semi-sweet, milk, and white chocolate, making each bite a blissful delight. With its luscious texture and irresistible taste, this cheesecake is perfect for special occasions or just a well-deserved treat after a long day.
Why You Will Love This Recipe
This Triple Chocolate Cheesecake is not only visually stunning with its layered chocolates, but it also offers an explosion of flavors that will satisfy any chocolate craving. The Oreo crust adds a delightful crunch that complements the smooth cheesecake filling. Whether you’re serving it at a gathering or enjoying a quiet night at home, this cheesecake is guaranteed to impress. Additionally, the recipe is straightforward, so you don’t have to be a professional baker to create this heavenly dessert.
Ingredients
Gathering the right ingredients is crucial for achieving the best flavors in your cheesecake. Below is what you will need:
For the Crust:
- 24 Oreo cookies, finely crushed
- 1/4 cup unsalted butter, melted
For the Cheesecake Filling:
- 24 oz (3 packages) cream cheese, softened
- 1 cup granulated sugar
- 1 teaspoon vanilla extract
- 3 large eggs
- 1/2 cup sour cream
- 8 oz semi-sweet chocolate, melted and cooled slightly
- 4 oz milk chocolate, melted and cooled slightly
- 4 oz white chocolate, melted and cooled slightly
For the Topping:
- 1/2 cup heavy cream
- 4 oz semi-sweet chocolate, chopped
- 4 oz milk chocolate, chopped
- Chocolate shavings, optional, for garnish
Directions
Step 1: Preheat your oven to 350°F (175°C) and grease a 9-inch springform pan. This ensures that the cheesecake will release easily once it’s baked.
Step 2: In a medium bowl, combine the finely crushed Oreo cookies with the melted butter, mixing until the crumbs are evenly coated. This mixture will form the crust of your cheesecake.
Step 3: Press the cookie mixture firmly into the bottom of the prepared springform pan to form an even crust layer. This step is essential for a solid base.
Step 4: Bake the crust in the preheated oven for 10 minutes. This step helps to set the crust and enhance the flavor. After baking, remove it from the oven and let it cool while preparing the filling.
Step 5: In a large mixing bowl, beat the softened cream cheese and granulated sugar together until smooth and creamy. Make sure there are no lumps for a silky texture.
Step 6: Add the vanilla extract and mix until thoroughly incorporated. Vanilla enhances the overall flavor of your cheesecake.
Step 7: Add the eggs one at a time, beating well after each addition. This method helps to achieve a smooth filling without overmixing.
Step 8: Mix in the sour cream until well combined. The sour cream adds richness and tanginess that balances the sweetness of the chocolates.
Step 9: Divide the cheesecake batter evenly into three separate bowls. This allows you to flavor each section with different chocolates.
Step 10: Stir the melted semi-sweet chocolate into one bowl, the melted milk chocolate into the second bowl, and the melted white chocolate into the third bowl, making sure each batter is combined well.
Step 11: Pour the semi-sweet chocolate batter over the prepared crust, spreading it out evenly with a spatula. This is the base layer of your cheesecake.
Step 12: Carefully pour the milk chocolate batter over the semi-sweet layer and again spread it evenly. Repeat with the white chocolate batter on top.
Step 13: Place the springform pan into a larger roasting pan and fill the roasting pan with hot water until it reaches halfway up the sides of the springform pan. The water bath helps prevent cracking in the cheesecake.
Step 14: Bake in the preheated oven for 60-70 minutes, or until the center is just set, and the top looks dry. This gentle cooking helps create the cheesecake’s creamy texture.
Step 15: Turn off the oven and leave the cheesecake inside with the door slightly open for 1 hour. This gradual cooling process helps prevent cracks.
Step 16: After an hour, remove the cheesecake from the oven and refrigerate for at least 4 hours, or overnight for the best results.
Step 17: To prepare the topping, heat the heavy cream in a small saucepan until it just begins to simmer, then remove it from the heat. Add the chopped semi-sweet and milk chocolate, letting it sit for 5 minutes to soften.
Step 18: Stir until the chocolate mixture is smooth and glossy. Pour the ganache over the chilled cheesecake and spread it evenly across the top.
Step 19: Optionally, garnish with chocolate shavings for an elegant touch. This adds not only flavor but also aesthetic appeal.
Frequently Asked Questions
1. Can I use low-fat cream cheese?
While you can use low-fat cream cheese, it may not produce the same creamy texture and rich flavor as regular cream cheese.
2. How do I store leftover cheesecake?
Leftover cheesecake can be stored in the refrigerator, tightly covered with plastic wrap, for up to a week.
3. Can I freeze the cheesecake?
Yes, you can freeze cheesecake. Wrap it tightly in plastic wrap and foil; it will keep in the freezer for up to three months.
4. What can I use instead of sour cream?
You can substitute sour cream with Greek yogurt or a mixture of cream cheese and milk to maintain consistency.
5. How do I know when my cheesecake is done?
The cheesecake is done when the edges are set, but the center is still slightly jiggly. It will continue to set as it cools.
Conclusion
Making a Triple Chocolate Cheesecake with Oreo Crust may seem intimidating, but with this comprehensive guide, you can achieve impressive results. Each layer of chocolate brings depth to the flavor, making it a real showstopper for any event. Treat yourself to a slice (or two) of this richly layered cake, and witness the joy it brings to all who indulge!

