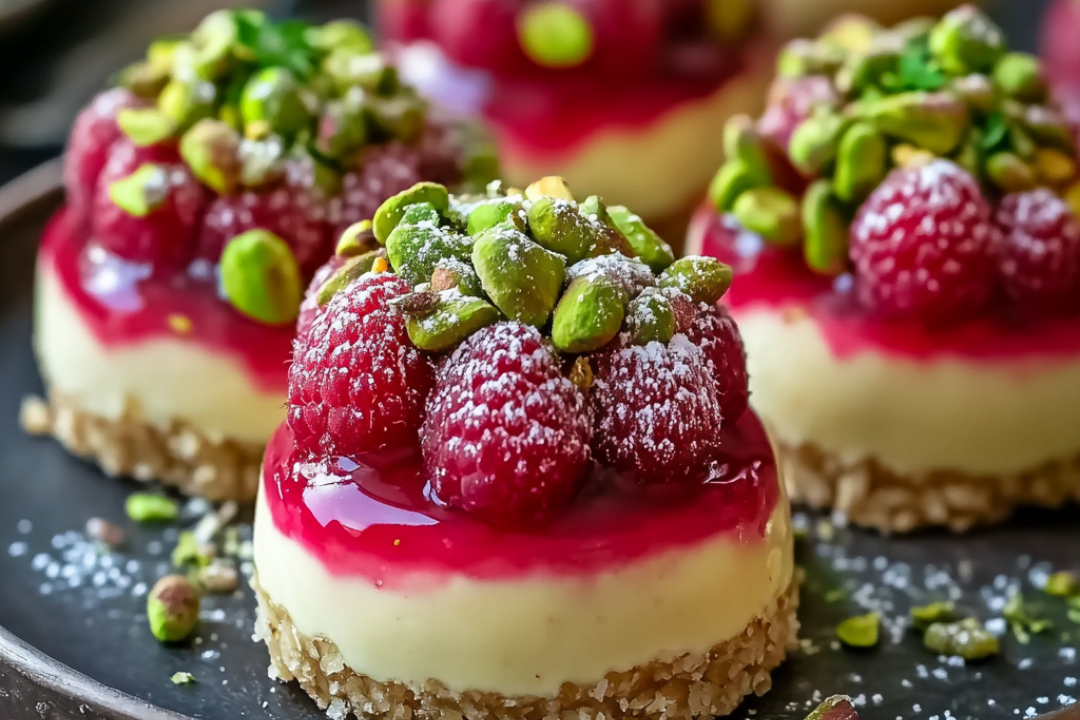
Pistachio & Raspberry Cheesecake Domes
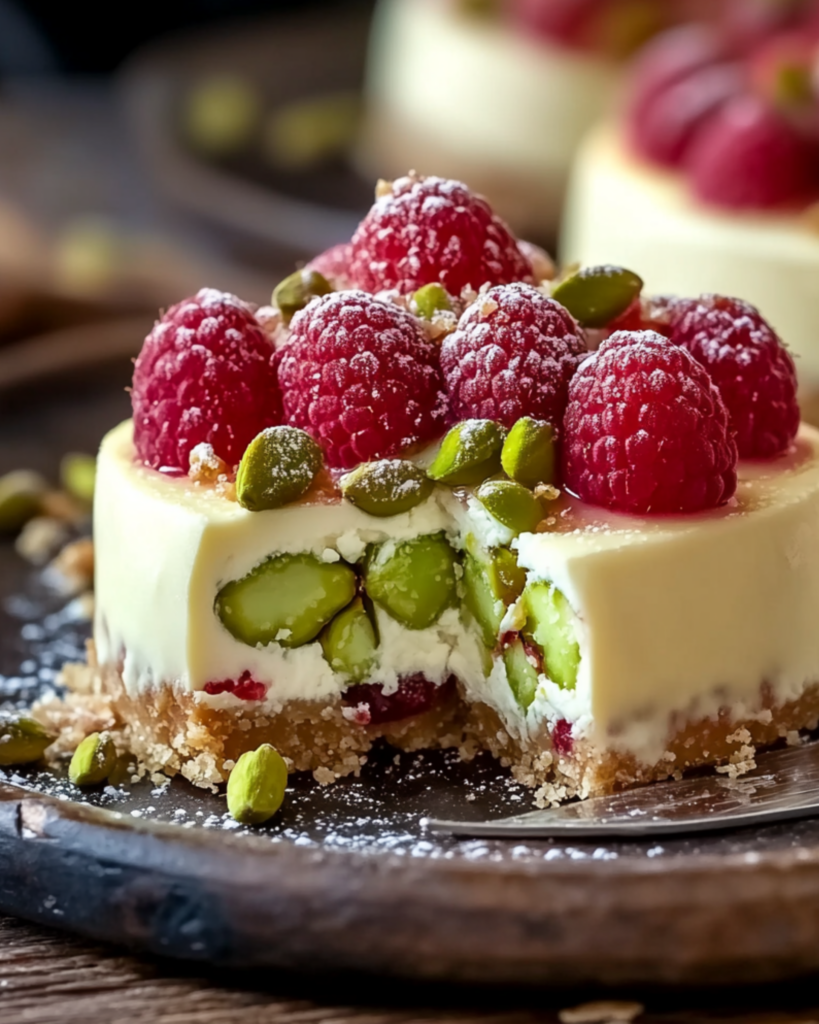
Oh my goodness, you are in for a treat with this one! If you’re in the mood for something a little extra, something that will make you feel like a pastry chef (but without the stress), then these Pistachio & Raspberry Cheesecake Domes are about to become your new favorite dessert. Imagine a creamy, velvety cheesecake nestled inside a perfectly crunchy pistachio crust, all topped with the sweet tartness of fresh raspberries. It’s an irresistible combination of textures and flavors that will have you coming back for more. Trust me, you’re going to love this! Whether you’re impressing guests or treating yourself to something special, these little domes are an absolute showstopper.
Why You’ll Love Pistachio & Raspberry Cheesecake Domes
This recipe is more than just a dessert—it’s about indulging in those special moments when you want to savor every bite. Here’s why you’ll be hooked:
- Versatile: Perfect for any occasion—whether you’re celebrating a special event, hosting a dinner party, or simply wanting to treat yourself to something delicious, these cheesecake domes are the perfect choice.
- Elevated, Yet Easy: Don’t let the fancy vibes fool you—this recipe is surprisingly easy. With just a few simple ingredients, you’ll feel like you’ve stepped into a patisserie without all the complicated steps. Plus, it’s a no-bake dessert, which means less time in the kitchen and more time enjoying the moment.
- Flavor Explosion: The rich, nutty pistachio crust balances out the creamy, dreamy cheesecake filling and the pop of freshness from the raspberries. It’s an experience for your taste buds, and the textures? Absolute perfection.
- Impresses Every Time: Let’s face it, we all want a dessert that steals the show. These cheesecake domes are absolutely beautiful and will have your friends and family asking, “How did you make this?” You can confidently say, “It’s easier than it looks!”
Disclosure: This post contains affiliate links.If you click and make a purchase, I may earn a small commission at no extra cost to you.
Ingredients for Pistachio & Raspberry Cheesecake Domes
Here’s the magic of this dessert. The ingredients come together to make something spectacular without requiring exotic or hard-to-find items. Let’s break it down:
Pistachios:
The star of the crust. These nutty, buttery little gems add the perfect crunch and depth of flavor.
Digestive Biscuits (or Graham Crackers):
They form the base of the crust and add a subtle sweetness that complements the pistachios.
Butter:
This brings everything together and gives the crust that melt-in-your-mouth texture.
Cream Cheese:
The base of the cheesecake filling. It’s creamy, dreamy, and totally indulgent.
Heavy Cream:
Makes the filling extra smooth and luxurious—because we’re all about that richness here.
Powdered Sugar:
This ensures your filling is perfectly sweet, without being overwhelming.
Fresh Raspberries:
A burst of freshness and tartness that beautifully contrasts with the rich filling and nutty crust. These add color, vibrancy, and a whole lot of flavor.
(Note: the full ingredients list, including measurements, is provided in the recipe card directly below.)
Instructions for Pistachio & Raspberry Cheesecake Domes
Now that we’ve gathered everything we need, it’s time to put it all together! Here’s how you can whip up these delightful cheesecake domes:
Prepare the Crust:
Start by blitzing the pistachios and digestive biscuits (or graham crackers) in a food processor until they form a fine crumb. Add melted butter and pulse again until everything comes together. This is going to be the crunchy base of your dessert, so be sure it’s mixed well.
Shape the Crust:
Press the crust mixture into the bottom of your individual dome molds or cupcake liners, creating an even layer. Use the back of a spoon or your fingers to press it down firmly. This step is key for getting that perfect texture when you bite into it!
Make the Cheesecake Filling:
In a large bowl, beat the cream cheese with powdered sugar until smooth and creamy. Add in the heavy cream and beat until everything is fully combined and light. This is where the magic happens—the filling should be velvety and thick but still spreadable.
Fill the Molds:
Spoon the cheesecake filling over the crust, smoothing the top so that it’s even. If you want to add a little extra texture, swirl the filling lightly with a spoon to create some beautiful patterns.
Chill and Set:
Pop the cheesecake domes into the fridge for at least 3 hours (or overnight if you’re patient). This gives them time to firm up and develop that perfect cheesecake texture.
Top with Fresh Raspberries:
Before serving, top each dome with fresh raspberries. They add a pop of color, a bit of tanginess, and of course, a little something extra to make your domes look stunning.
Serve and Enjoy:
Once chilled and set, these little beauties are ready to be devoured! Serve them as individual portions for a showstopping dessert that will impress your guests (or just treat yourself!).
How to Serve Pistachio & Raspberry Cheesecake Domes
These pistachio & raspberry cheesecake domes stand out on their own, but if you want to take them to the next level, here are some serving suggestions:
- Elegant Presentation: Serve these cheesecake domes on a beautiful platter, garnished with extra pistachios, fresh mint, or a drizzle of raspberry coulis for that extra “wow” factor.
- Pair with Sparkling Water or Light Wine: The light, tart raspberry topping and creamy cheesecake filling pair wonderfully with a crisp glass of sparkling water or a lightly chilled white wine like Sauvignon Blanc.
- Add a Sweet Sauce: A drizzle of honey or a swirl of caramel sauce can bring a sweet contrast to the tanginess of the raspberries.
Additional Tips
- Prep Ahead: You can easily prep these domes the day before. They set beautifully overnight and are perfect for making ahead for parties or gatherings.
- Storage Tips: Store leftovers in an airtight container in the fridge for up to 3 days. These are best enjoyed fresh, but they’ll still be delicious for a little while.
- Make It a Theme: You can play around with different toppings—swap the raspberries for other berries like blueberries or strawberries, or even add a few crushed pistachios for extra crunch on top!
FAQ Section
Q1: Can I substitute [ingredient] with [alternative ingredient]?
A1: Absolutely! For instance, if you don’t have digestive biscuits, you can use graham crackers or even shortbread cookies for a slightly different flavor.
Q2: Can I make these ahead of time?
A2: Yes, these are actually perfect to make ahead! Just store them in the fridge until you’re ready to serve.
Q3: How do I store leftovers?
A3: Store leftovers in an airtight container in the fridge for up to 3 days. To keep the raspberries fresh, you may want to add them just before serving.
Q4: Can I freeze these domes?
A4: Yes! Freeze the domes before adding the raspberries, and they’ll last up to a month. Thaw them in the fridge overnight before serving.
Q5: Can I double the recipe?
A5: Definitely! You can easily double the recipe and make a larger batch. Just make sure you have larger molds to accommodate the extra filling.
Q6: What side dishes go well with this recipe?
A6: Since these domes are rich and indulgent, pairing them with a light, fresh salad or some citrus fruits can balance things out.
Q7: How can I make this dessert healthier?
A7: You could swap the cream cheese for a lighter version or use a healthier sweetener like honey or maple syrup in place of powdered sugar.
Conclusion
These Pistachio & Raspberry Cheesecake Domes are a true game-changer. They’re visually stunning, incredibly delicious, and surprisingly simple to make. Whether you’re hosting a fancy dinner or just treating yourself to something special, these domes will never disappoint. Go ahead and try them—you won’t regret it!
Print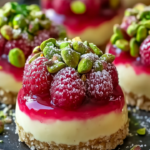
Pistachio & Raspberry Cheesecake Domes
- Prep Time: 30 minutes (excluding freezing/chilling time)
- Cook Time: 5 minutes (for the raspberry filling)
- Total Time: 5-6 hours (including freezing/chilling time)
- Yield: 6 domes
- Category: Dessert
- Method: No-bake, Frozen
- Cuisine: American, French (inspired by pistachio and raspberry flavors)
- Diet: Vegetarian
Description
These elegant Pistachio & Raspberry Cheesecake Domes are a perfect mix of creamy, nutty, and fruity flavors with a stunning presentation. A no-bake dessert featuring a silky pistachio cheesecake mousse, a tart raspberry center, and a crunchy biscuit base
Ingredients
-
For the Pistachio Cheesecake Mousse:
- 8 oz (225g) cream cheese, softened
- 1/2 cup heavy cream, whipped to soft peaks
- 1/3 cup powdered sugar
- 1/3 cup pistachio paste (or finely ground pistachios)
- 1/2 teaspoon vanilla extract
- 1/2 teaspoon gelatin powder + 1 tbsp water (optional, for a firmer set)
For the Raspberry Filling:
- 1/2 cup fresh or frozen raspberries
- 2 tbsp sugar
- 1/2 teaspoon cornstarch + 1 tbsp water (to thicken)
- 1 teaspoon lemon juice
For the Biscuit Base:
- 1/2 cup crushed graham crackers or digestive biscuits
- 2 tbsp melted butter
- 1 tbsp crushed pistachios (for extra crunch)
For Garnish:
- Crushed pistachios
- Fresh raspberries
- White chocolate glaze or dusting of powdered sugar (optional)
Instructions
-
Make the Raspberry Filling
- In a small saucepan, combine raspberries, sugar, and lemon juice over medium heat.
- Stir until the raspberries break down and release their juices.
- Mix cornstarch with water, then add to the raspberry mixture. Cook until slightly thickened (~2 minutes).
- Strain to remove seeds (optional) and let cool completely.
-
Prepare the Pistachio Cheesecake Mousse
- In a bowl, beat cream cheese, pistachio paste, powdered sugar, and vanilla until smooth.
- If using gelatin, bloom it in 1 tbsp cold water, then microwave for 10 seconds and stir into the mixture.
- Gently fold in the whipped heavy cream until smooth.
-
Assemble the Domes
- Fill half-sphere silicone molds halfway with the pistachio cheesecake mixture.
- Add a small spoonful of cooled raspberry filling to the center of each.
- Cover with more cheesecake mixture and smooth the tops.
- Freeze for 4-6 hours, or until firm enough to unmold.
-
Make the Biscuit Base
- Mix crushed biscuits, melted butter, and crushed pistachios in a bowl.
- Press a small amount onto a parchment-lined tray, forming rounds slightly larger than the domes.
- Chill in the fridge to set.
-
Unmold & Decorate
- Carefully unmold the cheesecake domes and place them on top of the biscuit bases.
- Garnish with crushed pistachios, fresh raspberries, and a drizzle of white chocolate glaze (optional).
Notes
- The raspberry filling can be made ahead and stored in the fridge.
- For a firmer texture, use the optional gelatin in the cheesecake mousse.
- These domes can be made a day in advance and stored in the freezer until ready to serve.
- If you don’t have pistachio paste, finely ground pistachios can be used as a substitute.
Nutrition
- Serving Size: 1 dome
- Calories: 350
- Sugar: 20g
- Sodium: 150mg
- Fat: 25g
- Saturated Fat: 7g
- Unsaturated Fat: 17g
- Trans Fat: 0g
- Carbohydrates: 30g
- Fiber: 3g
- Protein: 6g
- Cholesterol: 40mg

