

Peanut Butter Lunch Lady Cookie Bars
Let me just say it: these Peanut Butter Lunch Lady Cookie Bars are a total game-changer! Think of them as the ultimate treat that strikes the perfect balance between chewy, nutty, and oh-so-delicious. Imagine taking a bite and being met with a sweet peanut butter flavor that’s just rich enough to be indulgent but light enough to make you crave another. Trust me, you’re going to love this one. It’s the kind of dessert that transports you right back to your childhood—comforting, familiar, and best enjoyed with a big glass of milk. Whether you’re baking for a family dinner, a get-together with friends, or just to satisfy that sweet tooth, these bars are sure to win everyone over. Ready to bake? Let’s dive in!
Why You’ll Love Peanut Butter Lunch Lady Cookie Bars
This recipe isn’t just about the ingredients—it’s about creating memories, and I’m pretty sure this treat will be a part of your future traditions. Here’s why it’s always a crowd-pleaser:
- Versatile: These cookie bars are perfect for everything from busy weeknights to casual get-togethers. Imagine surprising your family with a fresh batch after a long day, or serving them at a party where people beg for the recipe!
- Budget-Friendly: You don’t need a fancy ingredient list for these bars—just some pantry staples that will make your taste buds do a happy dance. It’s ideal when you want to make something delicious without breaking the bank.
- Quick and Easy: The steps are simple and straightforward, making this the perfect baking project for beginners. There’s no need to worry about complicated techniques; these bars come together in no time!
- Customizable: You can play around with the recipe! Want to make them extra peanut buttery? Add a handful of chopped peanuts. Want a little more chocolate in the mix? Drizzle on some melted chocolate for that extra oomph.
- Crowd-Pleasing: This recipe hits the spot every time! Kids, adults, and peanut butter lovers alike will be reaching for seconds. It’s one of those treats that everyone just can’t get enough of.
Disclosure: This post contains affiliate links.If you click and make a purchase, I may earn a small commission at no extra cost to you.


Ingredients
Here’s the magic of these cookie bars—it’s made with a handful of ingredients, but the results are nothing short of heavenly. Let’s break it down:
- Peanut Butter: The star of the show. This rich, creamy spread gives the bars that signature nutty flavor that will have you swooning. Whether you go for creamy or chunky, it’s all about that irresistible peanut butter goodness.
- Butter: The secret ingredient that makes everything melt in your mouth. It gives the bars that perfect chewy texture, creating that just-right balance of richness without being too heavy.
- Sugar: Just the right amount to sweeten the deal. You get that classic dessert sweetness that pairs perfectly with the peanut butter.
- Flour: The binding agent, turning all those ingredients into a lovely dough. It gives the bars that perfect structure, so they won’t crumble apart (unless you want them to, of course, but who could resist those chewy bites?).
- Baking Powder: The little lift to make sure the bars don’t end up too dense. A little goes a long way here, so it’s all about finding that perfect balance.
- Eggs: These guys help hold everything together. They also bring a subtle richness that elevates the flavor of the bars.
- Vanilla Extract: A splash of vanilla adds just the right depth of flavor. It complements the peanut butter and brings all the flavors together.
- Optional Toppings (Chocolate Chips, Chopped Peanuts, or a drizzle of peanut butter): Want to take these bars to the next level? Add some chocolate chips, or sprinkle on some chopped peanuts for a satisfying crunch!
(Note: the full ingredients list, including measurements, is provided in the recipe card directly below.)
Instructions
Let’s dive into the steps to create these irresistible peanut butter cookie bars:
Preheat the Oven
Start by preheating your oven to 350°F (175°C). This is the perfect temperature to get those bars golden brown and delicious.
Mix the Wet Ingredients
In a large mixing bowl, cream together your peanut butter and butter until smooth and fluffy. Add in the sugar and beat until combined. Add the eggs one at a time, mixing well after each addition. Then, stir in the vanilla extract to make the flavor pop.
Add the Dry Ingredients
In a separate bowl, whisk together the flour and baking powder. Gradually add this dry mixture to the wet ingredients, stirring until everything is just combined. Don’t overmix—just enough to bring everything together!
Bake the Bars
Spread the dough into a greased baking pan, smoothing it into an even layer. Bake for 20-25 minutes, or until a toothpick inserted into the center comes out clean. The top should be golden and slightly firm to the touch.
Cool and Cut
Allow the bars to cool in the pan for about 10 minutes before cutting them into squares. You’ll want to let them set a little to get the perfect texture.
Optional: Add Toppings
For an extra touch, melt a few tablespoons of peanut butter and drizzle it over the top of the bars, or sprinkle with chocolate chips and chopped peanuts while they’re still warm.
How to Serve Peanut Butter Lunch Lady Cookie Bars
These peanut butter bars are perfect on their own, but if you want to elevate your dessert experience, try serving them with:
- A Tall Glass of Milk: Because who doesn’t love peanut butter and milk? It’s the classic pairing that never gets old.
- Ice Cream: A scoop of vanilla or chocolate ice cream would complement the richness of these bars perfectly.
- Fresh Fruit: A little fresh fruit like berries or banana slices would balance out the sweetness and add a fresh element.
- Coffee or Hot Chocolate: These bars are wonderful with a warm, cozy drink. Perfect for those chill afternoons when you need a little indulgence.
Additional Tips
Here are some tips to make this recipe even better:
- Prep Ahead: You can mix the dough ahead of time and store it in the fridge for up to 24 hours before baking. It’s great for busy days when you want to bake later.
- Make It Extra Peanut Buttery: Stir in some chopped peanuts for added crunch or drizzle more peanut butter on top for a deliciously nutty twist.
- Dietary Adjustments: If you need a gluten-free option, swap out the regular flour for a gluten-free baking flour blend. It works wonderfully with this recipe!
- Storage Tips: These bars keep well in an airtight container at room temperature for up to 5 days. They also freeze beautifully, so make a double batch and stash some away for later.
- Add a Chocolate Drizzle: Melt a bit of chocolate and drizzle it over the top of the bars for an extra layer of flavor.
FAQ Section
Q1: Can I substitute peanut butter with almond butter or another nut butter?
A1: Absolutely! You can substitute the peanut butter with almond butter, cashew butter, or even sunflower seed butter for a fun twist.
Q2: Can I make these bars ahead of time?
A2: Yes! You can make the dough and store it in the fridge for up to 24 hours before baking. Or, bake them in advance and store them at room temperature for a few days.
Q3: How do I store leftovers?
A3: Store leftover bars in an airtight container at room temperature for up to 5 days. They can also be frozen for longer storage.
Q4: Can I freeze these bars?
A4: Yes! Simply freeze the bars in a single layer, then transfer to an airtight container for up to 3 months. Thaw before serving.
Q5: Can I add chocolate chips to the dough?
A5: Yes! Add a handful of chocolate chips to the dough for a delicious chocolate-peanut butter combination.
Q6: How can I make this recipe dairy-free?
A6: Use a dairy-free butter substitute and ensure the peanut butter is free from dairy. You can also use a dairy-free chocolate if you’re adding chips.
Q7: How do I know when the bars are done baking?
A7: The bars should be golden brown on top and a toothpick should come out clean when inserted into the center.
Q8: Can I use crunchy peanut butter?
A8: Yes! Crunchy peanut butter will add a bit of texture to these bars and make them even more delightful.
Q9: What other toppings can I add?
A9: You can add chopped peanuts, M&M’s, or even drizzle on caramel sauce for extra sweetness.
Q10: What’s the best way to reheat these bars?
A10: Reheat in the microwave for about 15-20 seconds for a soft, warm treat!
Conclusion
These Peanut Butter Lunch Lady Cookie Bars are the kind of treat you’ll keep coming back to again and again. They’re easy to make, super satisfying, and have just the right amount of sweetness and peanut butter goodness. Whether you’re baking for yourself or sharing them with loved ones, they’re guaranteed to put a smile on everyone’s face. So, go ahead, make a batch, and enjoy every chewy, peanut buttery bite!
Print
Peanut Butter Lunch Lady Cookie Bars
- Prep Time: 15 minutes
- Cook Time: 20 minutes
- Total Time: 35 minutes
- Yield: 24 servings (approx.)
- Category: Dessert, Cookies, Bars
- Method: Baking
- Cuisine: American
- Diet: Vegetarian
Description
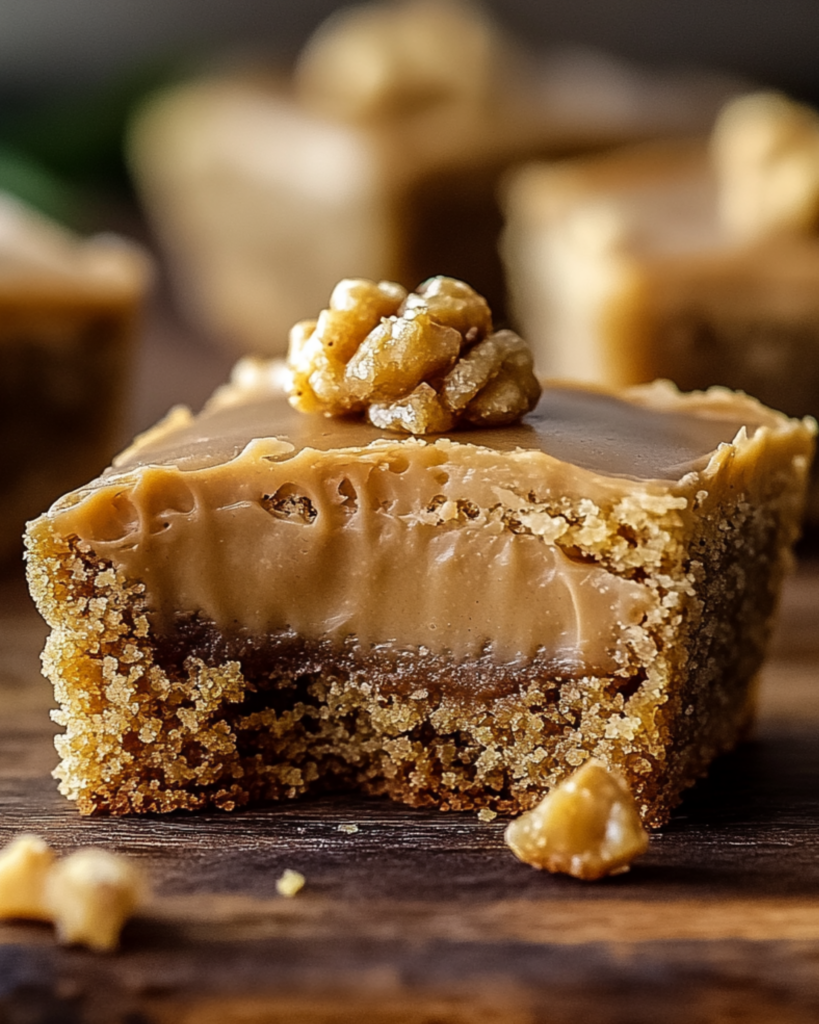
These Peanut Butter Lunch Lady Cookie Bars are rich, creamy, and absolutely irresistible! With a soft peanut butter base topped with a sweet, gooey frosting, they’re perfect for any occasion—whether it’s a family gathering or a school bake sale
Ingredients
- 2 cups flour
- 2 cups sugar
- 1 ½ cups peanut butter
- 3 sticks butter
- 1 tsp baking soda
- 1 tsp vanilla extract
- 1 tsp salt
- 4 cups powdered sugar
- 2 eggs
- ½ cup milk
Instructions
- Preheat the oven to 400°F (200°C). Grease a cookie sheet and set aside.
- Mix dry ingredients: In a large bowl, combine flour, sugar, baking soda, and salt. Set aside.
- Mix wet ingredients: In a separate bowl, whisk together eggs, milk, and vanilla extract. Set aside.
- Combine peanut butter and butter: Melt the butter and peanut butter in a saucepan over low heat. Once melted, mix this with the dry ingredients and then add the egg mixture. Stir until well combined.
- Bake the bars: Spread the batter evenly on the greased cookie sheet. Bake for 20 minutes, or until golden brown. Let cool completely.
- Make the frosting: Melt butter and peanut butter, then mix in milk and powdered sugar to form a smooth frosting.
- Frost the bars: Spread the peanut butter frosting evenly over the cooled bars.
- Let the frosting set for a few minutes before slicing and serving. Enjoy!
Notes
- For extra peanut butter flavor, you can sprinkle some chopped peanuts on top of the frosting.
- Let the bars cool completely before frosting to ensure the frosting doesn’t melt into the bars.
- Store any leftovers in an airtight container at room temperature.
Nutrition
- Serving Size: 1 bar
- Calories: 350
- Sugar: 32g
- Sodium: 220mg
- Fat: 22g
- Saturated Fat: 10g
- Unsaturated Fat: 9g
- Trans Fat: 0g
- Carbohydrates: 38g
- Fiber: 1g
- Protein: 5g
- Cholesterol: 40mg


