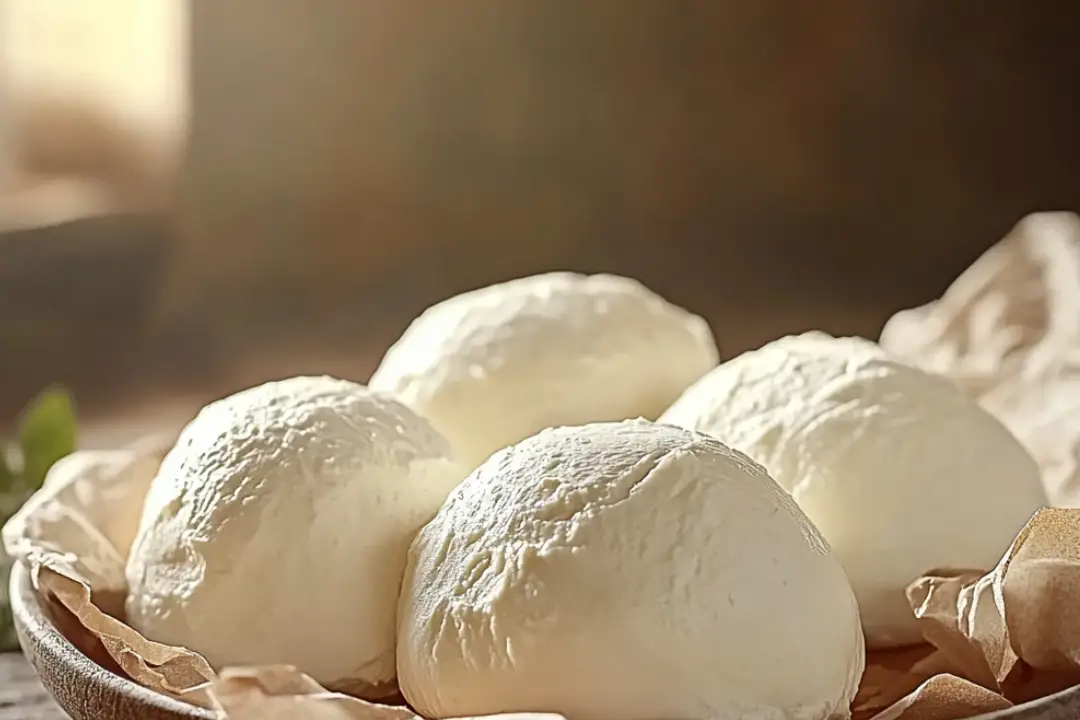
Homemade Mozzarella Cheese Recipe
Oh, the joy of homemade mozzarella cheese! There’s something so magical about pulling apart a fresh batch of mozzarella and tasting the soft, creamy, melt-in-your-mouth goodness. I’m telling you, once you try making your own, store-bought cheese will never taste the same. This recipe is your ticket to a cheesy, creamy indulgence that will have you craving mozzarella like never before. And the best part? It’s surprisingly simple to make, even if you’re a newbie in the kitchen. Trust me, you’re going to love this.
Why You’ll Love Homemade Mozzarella Cheese
This mozzarella isn’t just a recipe—it’s an experience. From the warm stretch of fresh cheese to the indulgent flavor that will transport you to Italy, every bite feels like a treat. Whether you’re hosting a party, impressing friends, or just enjoying a simple night in, this homemade mozzarella has you covered. Here’s why it’s a must-try:
Versatile: Whether you’re tossing it on top of pizza, adding it to a salad, or just snacking on it with some balsamic vinegar, mozzarella is so versatile. It can elevate any meal and make everything feel like a special occasion.
Budget-Friendly: Making mozzarella at home is not only fun, but it’s also wallet-friendly. The ingredients are simple and straightforward, and the payoff is a batch of fresh, delicious cheese that costs a fraction of store-bought versions.
Quick and Easy: It sounds impressive, right? But making mozzarella is surprisingly easy, and you don’t need any fancy equipment. A few steps, a bit of patience, and before you know it, you’ll have gooey mozzarella cheese that you made with your own hands.
Crowd-Pleasing: Everyone loves fresh mozzarella. Whether it’s a snack at a party or a homemade pizza topping, this mozzarella is always a hit. Watch as guests ask for the recipe (and maybe even take some home).

Disclosure: This post contains affiliate links.If you click and make a purchase, I may earn a small commission at no extra cost to you.
Ingredients
Here’s the magic of this mozzarella—it’s made with just a handful of ingredients. But when combined, they create something incredibly delicious and satisfying. Let’s break it down:
Whole Milk: This is the foundation of your cheese, and the quality of the milk will make a huge difference. You want to use whole milk for the best creamy, rich texture.
Citric Acid: This little ingredient helps acidify the milk, which is essential for forming the curds. It’s a game-changer when it comes to creating that perfect cheese consistency.
Rennet: The ingredient that turns your milk into curds. It’s a must-have in mozzarella-making and gives your cheese that perfect texture.
Salt: A simple ingredient that adds flavor and helps preserve the cheese. It’s essential for bringing everything together.
(Note: the full ingredients list, including measurements, is provided in the recipe card directly below.)
Instructions
Let’s dive into the steps that will transform you into a mozzarella-making pro:
1. Prepare the Milk
Start by pouring your milk into a large pot. Heat it slowly over medium heat, stirring occasionally to prevent it from burning. As the milk heats up, mix the citric acid with some cool water and stir it into the milk. This is where the magic begins—watch as it starts to acidify, setting the stage for the curds to form.
2. Add the Rennet
Once your milk has reached the right temperature, it’s time to add the rennet. Dissolve it in a little water, then gently stir it into the milk. This is where the real transformation happens—the milk will begin to turn into curds and whey, and you’ll see the mozzarella start to take shape.
3. Cut the Curds
Let the milk sit for about an hour to allow the curds to fully set. Then, cut the curds into small squares with a knife or spatula. This helps them release the whey and allows the cheese to become firmer.
4. Heat and Stir
Now comes the fun part—heating the curds! Gradually increase the temperature of the curds while gently stirring. This helps the curds firm up and become more cohesive. As the curds heat up, you’ll start to see them come together and get that perfect mozzarella texture.
5. Stretch and Shape
Once the curds have heated to the right temperature, it’s time to stretch the cheese! Use your hands (or a spoon if it’s too hot) to pull the curds into a soft, stretchy ball. Knead and stretch the mozzarella until it’s smooth and shiny. The more you stretch, the creamier and more elastic it will become.
6. Salt and Enjoy
Once your mozzarella is beautifully stretched, sprinkle it with some salt to enhance the flavor. From here, you can enjoy it fresh or store it in a bowl of cool water until you’re ready to serve it.
How to Serve Homemade Mozzarella Cheese
Now that you’ve made the most glorious mozzarella, it’s time to put it to good use! Here are a few ideas on how to enjoy your homemade creation:
On Pizza: The classic way to enjoy mozzarella. Add a few slices to a pizza dough, top with your favorite sauce, and bake to perfection.
Caprese Salad: Layer slices of fresh mozzarella with ripe tomatoes, basil, and a drizzle of olive oil. It’s a refreshing, simple dish that’s full of flavor.
As a Snack: No need to wait for a meal—just grab a chunk of your fresh mozzarella, drizzle it with olive oil, sprinkle with salt, and maybe even a little balsamic vinegar. Pure bliss.
With Crackers or Bread: Serve your mozzarella with crusty bread or crackers as an appetizer. Add a touch of honey for a sweet contrast—it’s the perfect pairing!
Additional Tips
Here are some extra tips to help you get the most out of this mozzarella-making adventure:
Prep Ahead: Make sure to have all your ingredients ready before you begin. Mozzarella is a bit of a hands-on process, so having everything prepped will make the steps go more smoothly.
Experiment with Flavors: Add a little extra twist by mixing in some fresh herbs like basil, oregano, or even garlic to infuse flavor into your mozzarella. You can also make flavored mozzarella by adding chili flakes for a spicy kick.
Dietary Adjustments: You can tweak this recipe to suit specific dietary needs. If you’re lactose intolerant, look for lactose-free whole milk to make a dairy-friendly mozzarella.
Storage Tips: Homemade mozzarella is best enjoyed fresh, but you can store it in an airtight container in the fridge for a couple of days. Just be sure to keep it in a bowl of water to maintain its freshness.
Double the Batch: If you’re making mozzarella for a crowd, feel free to double or even triple the recipe. Fresh mozzarella is always a hit at parties or gatherings.
FAQ Section
Q1: Can I substitute whole milk with a different type of milk?
A1: For the best mozzarella, whole milk is ideal. Using skim or low-fat milk may not give you the same creamy texture, but it’s worth experimenting if you prefer a lighter option.
Q2: Can I make this ahead of time?
A2: Fresh mozzarella is best enjoyed immediately, but you can prepare it a few hours ahead and store it in water to keep it fresh.
Q3: How do I store leftovers?
A3: Store any leftover mozzarella in an airtight container in the fridge, making sure it’s covered with cool water. It should last for a couple of days.
Q4: Can I freeze mozzarella?
A4: While mozzarella can be frozen, it may lose some of its stretchiness once thawed. It’s best to enjoy it fresh!
Q5: How do I reheat mozzarella?
A5: You can reheat mozzarella by gently warming it in the microwave or in a pan. However, it’s best when served fresh for that perfect, stretchy texture.
Q6: Can I double the recipe?
A6: Absolutely! Just make sure to adjust your pot size and curd-cutting technique if you’re making a larger batch.
Q7: Is this recipe suitable for vegetarians?
A7: Yes! Since this mozzarella uses rennet, which is derived from vegetarian sources, it’s perfect for vegetarians.
Q8: What are some good sides to serve with mozzarella?
A8: A fresh green salad, bruschetta, or some antipasto platters with olives and prosciutto pair perfectly with mozzarella.
Q9: How can I make this recipe healthier?
A9: Using low-fat or plant-based milk is a great way to make this mozzarella lighter, though the texture will differ slightly.
Q10: What’s the best equipment for making mozzarella?
A10: You don’t need much—just a large pot, a slotted spoon, a thermometer, and your hands to stretch the cheese! Simple and effective.
Conclusion
Making your own mozzarella is truly a game-changer. The process is fun, surprisingly easy, and incredibly rewarding—especially when you get to enjoy that fresh, creamy cheese right at home. Whether you’re adding it to your favorite dishes or just enjoying it on its own, there’s something so special about creating food from scratch. And once you’ve tasted the difference, store-bought mozzarella just won’t cut it anymore.
So go ahead, give it a try! You’ll not only impress yourself but also anyone lucky enough to try your homemade mozzarella. Remember, it’s all about enjoying the journey—and of course, savoring every stretchy, cheesy bite. Happy cheesemaking, and trust me, this is one recipe you’ll want to make over and over again!
Print
Homemade Mozzarella Cheese Recipe
- Prep Time: 10 minutes
- Cook Time: 20 minutes
- Total Time: 30 minutes
- Yield: Makes about 1–2 balls of mozzarella (depending on size) 1x
- Category: Cheese, Homemade, Snack
- Method: Stovetop, Microwave
- Cuisine: Italian
- Diet: Vegetarian
Description
Making mozzarella cheese at home is surprisingly easy and incredibly rewarding. Fresh, creamy, and perfect for pizza, salads, or snacking, this homemade mozzarella will elevate any dish!
Ingredients
- 8 cups whole milk
- 7 tablespoons white vinegar (or lemon juice)
- 1/3 cup salt
Instructions
- Pour the whole milk into a large pot and heat over medium heat. Stir occasionally to prevent the milk from scorching.
- Heat the milk to about 190°F (88°C). Small bubbles will form around the edges. Be careful not to let the milk boil.
- Once the milk reaches the desired temperature, remove the pot from heat and slowly stir in the vinegar (or lemon juice) to help the milk curdle.
- Let the milk sit for 5-10 minutes for the curds to form, with the curds separating from the whey.
- Use a slotted spoon to scoop the curds into a colander lined with cheesecloth. Let them drain for a few minutes.
- Once drained, sprinkle the salt over the curds and gently knead them together to form a smooth, stretchy dough.
- Heat the curds in the microwave for 20-30 seconds at a time, kneading and stretching after each heating until the cheese becomes smooth and elastic.
- Shape the mozzarella into a ball or log. For extra softness, dip it in ice water for a few minutes.
- Store your mozzarella in a container filled with some of its whey or salted water to keep it fresh.
- Enjoy your homemade mozzarella on pizzas, in sandwiches, or as a delicious snack!
Notes
- You can use lemon juice as a substitute for vinegar, depending on your preference.
- If you prefer firmer mozzarella, you can omit the ice water dip.
- Store the mozzarella in a container with some whey or salted water to keep it fresh for several days.
Nutrition
- Serving Size: 1 ball (approx. 100g)
- Calories: 250
- Sugar: 5g
- Sodium: 400mg
- Fat: 18g
- Saturated Fat: 11g
- Unsaturated Fat: 5g
- Trans Fat: 0g
- Carbohydrates: 6g
- Fiber: 0g
- Protein: 18g
- Cholesterol: 65mg


