

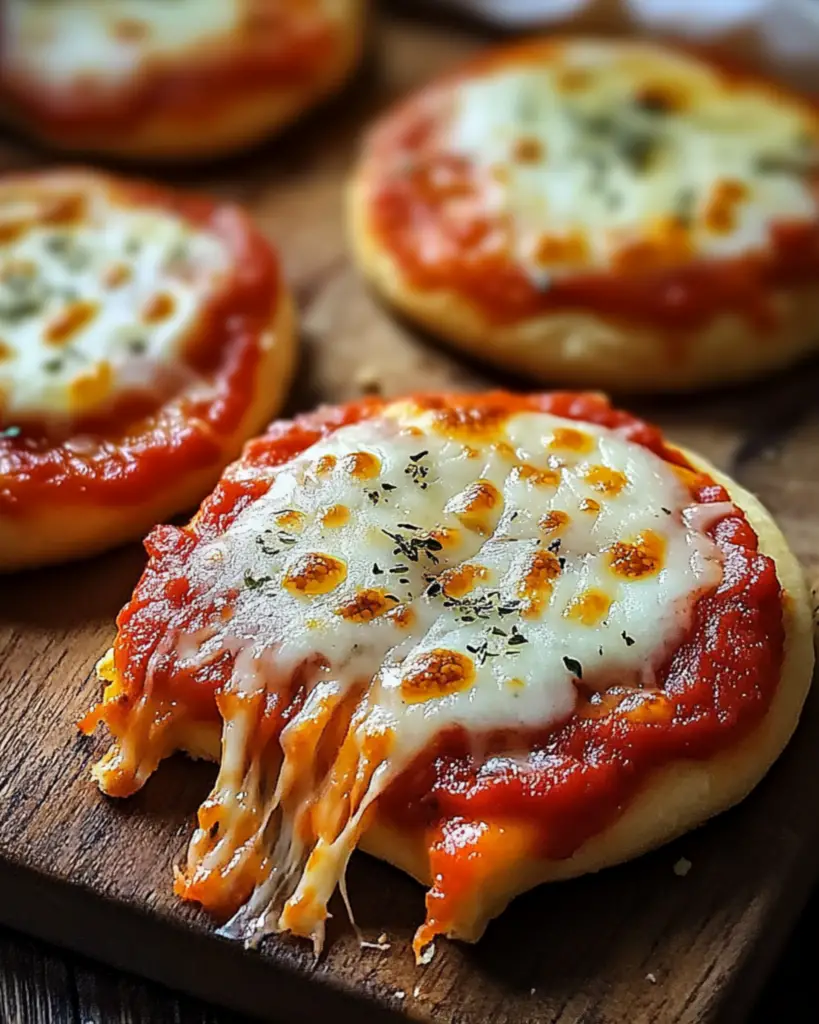
Easy Mini Lunchbox Pizzas
Hey there, pizza lover! If you’re looking for a fun, quick, and totally customizable meal that will make you feel like a kitchen rockstar—then this recipe for Easy Mini Lunchbox Pizzas is just what you need. Picture this: warm, gooey cheese, savory tomato sauce, and your favorite toppings all nestled on crispy, bite-sized bagels. Yes, I said bagels! Trust me, these little mini pizzas will make your taste buds do a happy dance. Whether you’re prepping them for a lunchbox treat or a quick dinner, they’re the perfect solution for busy days when you still want something super satisfying and delicious. Get ready to whip these up in no time and watch your family (or yourself) devour them!
Why You’ll Love Easy Mini Lunchbox Pizzas
These little pizzas aren’t just tasty; they’re packed with convenience and versatility. Here’s why they’re an absolute favorite:
- Versatile: Whether it’s a weeknight dinner or a weekend snack, these mini pizzas are a crowd-pleaser. Plus, they’re perfect for lunchboxes! Your kids (or you) can take them on the go for a tasty, no-fuss lunch.
- Budget-Friendly: Made with everyday ingredients you probably already have in your pantry, these pizzas prove that you don’t need fancy stuff to create something extraordinary.
- Quick and Easy: These mini pizzas are ready in a flash—no long cooking times here. You’ll have dinner (or lunch) on the table in just 20 minutes, no sweat.
- Customizable: The best part? You can customize these pizzas to fit every taste. Add extra cheese, throw on some veggies, or spice things up with pepperoni or sausage. The choice is yours!
- Crowd-Pleasing: Kids love ‘em, adults love ‘em, and they’re always a hit at parties or casual get-togethers. This is a recipe everyone can agree on!
Disclosure: This post contains affiliate links.If you click and make a purchase, I may earn a small commission at no extra cost to you.


Ingredients in Easy Mini Lunchbox Pizzas
Here’s the magic of this dish: a few pantry staples come together to create a seriously satisfying meal. Here’s what you’ll need to get started:
- Bagels: The perfect base for these mini pizzas. The chewy, toasted texture holds up beautifully under the weight of all those toppings.
- Pizza Sauce: This is where all the flavor starts. You can use store-bought or homemade—it’s up to you!
- Shredded Mozzarella Cheese: The gooey, melt-in-your-mouth cheese that turns every bite into a pizza dream come true.
- Toppings of Your Choice: This is where you can get creative! Choose from things like pepperoni, veggies, olives, or even some fresh basil for a pop of flavor.
- Dried Oregano: For that classic pizza taste.
- Olive Oil: A little drizzle helps crisp up the bagels and gives everything a lovely golden finish.
(Note: The full ingredients list, including measurements, is provided in the recipe card directly below.)
Instructions
Now, let’s get into the steps to make these mini pizzas. They’re super simple and fun!
Preheat Your Oven
First things first: Preheat your oven to 375°F (190°C). This ensures the bagels toast perfectly while the cheese melts into gooey perfection.
Prepare the Bagels
Slice your bagels in half, creating two pizza “crusts.” Place them on a baking sheet, cut-side up. If you’re feeling fancy, lightly brush the tops with a bit of olive oil to help them crisp up in the oven.
Add the Pizza Sauce
Spread a generous amount of pizza sauce over each bagel half. Don’t be shy here—it’s all about getting that tangy, flavorful base that will soak into the bagel.
Top with Cheese and Toppings
Now comes the fun part: add a heaping layer of shredded mozzarella cheese on top of the sauce. From here, you can get creative and top them with whatever you like—pepperoni, mushrooms, peppers, olives, or even a sprinkle of dried oregano.
Bake to Perfection
Pop your mini pizzas into the oven and bake for about 10-12 minutes or until the cheese is melted and bubbly and the bagels are nicely toasted.
Serve and Enjoy
Remove the pizzas from the oven and let them cool for a minute or two. Then, serve ‘em up! These little bites of deliciousness are perfect for lunch, dinner, or a snack. Trust me, you’ll want to make these again and again.
How to Serve Easy Mini Lunchbox Pizzas
These mini pizzas are super versatile when it comes to sides and accompaniments. Here are some ideas to elevate your meal:
- Fresh Salads: Pair these pizzas with a light, crispy salad. Try a simple green salad with a tangy vinaigrette for a refreshing contrast to the cheesy goodness.
- Crusty Bread: Serve with a side of garlic bread or a warm baguette to soak up any pizza sauce that escapes.
- Veggie Sides: Roasted vegetables, like carrots, zucchini, or broccoli, are the perfect way to add some extra nutrition to the meal.
- As a Snack: Sometimes, these mini pizzas are so satisfying, you can enjoy them all on their own. Serve with a sprinkle of fresh basil or a dash of chili flakes for a little kick!
Additional Tips
- Prep Ahead: These mini pizzas are perfect for meal prep! You can assemble them ahead of time and pop them in the fridge to bake later. Makes life so much easier on busy days.
- Spice It Up: Add a sprinkle of chili flakes or a drizzle of hot sauce if you like a bit of heat.
- Dietary Adjustments: You can easily make these gluten-free by swapping the bagels for gluten-free alternatives. For a dairy-free version, use vegan cheese.
- Storage Tips: Leftovers? Store them in an airtight container in the fridge for up to 3 days. Reheat them in the oven or microwave for a quick snack.
- Freezer Friendly: These freeze beautifully! Just assemble them, freeze on a baking sheet, and once solid, transfer to a freezer bag. When you’re ready, bake from frozen at 375°F for 12-15 minutes.
FAQ Section
Q1: Can I substitute the bagels with something else?
A1: Absolutely! You can use English muffins, pita bread, or even naan as your base for these mini pizzas. Get creative!
Q2: Can I make these ahead of time?
A2: Yes! You can prep the mini pizzas and store them in the fridge for up to 24 hours. Just bake when you’re ready to enjoy.
Q3: How do I store leftovers?
A3: Store leftover mini pizzas in an airtight container in the fridge for up to 3 days. Reheat in the oven or microwave for the best results.
Q4: Can I freeze these mini pizzas?
A4: Yes! Assemble the pizzas, freeze them on a baking sheet, then transfer them to a freezer bag. When you’re ready, bake them from frozen at 375°F for 12-15 minutes.
Q5: How can I make these healthier?
A5: Swap the bagels for whole wheat or cauliflower bagels, use a light cheese, and add more veggies as toppings. Healthy and delicious!
Q6: Can I double the recipe?
A6: Definitely! Just make sure you have enough space on your baking sheet. Cooking time might need slight adjustments if you’re making a larger batch.
Q7: What side dishes go well with these mini pizzas?
A7: Some great options include a fresh garden salad, roasted veggies, or some crispy sweet potato fries.
Conclusion
There you have it—your new favorite snack or meal! Easy Mini Lunchbox Pizzas are simple to make, utterly delicious, and so much fun to customize. Whether you’re feeding a crowd or just looking for a quick bite, these little pizzas will always hit the spot. Trust me, they’re a total game-changer!
Print
Easy Mini Lunchbox Pizzas
- Prep Time: 10 minutes
- Cook Time: 12–14 minutes
- Total Time: 22–24 minutes
- Yield: 10–12 mini pizzas (depending on size)
- Category: Snack, Lunch, Kid-friendly
- Method: Baking
- Cuisine: Italian
- Diet: Vegetarian
Description
These Easy Mini Lunchbox Pizzas are the perfect quick meal or snack for kids (and adults!) on the go. Made with a simple dough of self-raising flour and Greek yogurt, topped with tomato paste, mozzarella cheese, and pepperoni. They’re baked until golden, making them crispy and delicious. Perfect for lunchboxes or casual meals.
Ingredients
-
Dough:
- 2 cups (300g) self-raising flour
- 1 cup (250g) full-fat plain Greek yoghurt
Toppings:
- ⅓ cup (90g) tomato paste (concentrated puree)
- 1 cup (125g) freshly shredded mozzarella
- ½ cup (80g) pepperoni
Instructions
- Preheat the oven to 200°C (400°F) (or 180°C/350°F fan-forced). Line a baking tray with baking (parchment) paper.
- In a large bowl, combine the self-raising flour and Greek yogurt. Mix with a spoon until the mixture resembles large flakes, then combine with your hands, kneading until a soft dough forms (about 1–2 minutes).
- Lightly flour a clean work surface and roll out the dough to about a 1 cm (1/2 inch) thickness. Use a large mug or cookie cutter to cut out rounds. Combine and re-roll scraps until all dough is used.
- Place the dough rounds on the prepared baking tray. Spread a small amount of tomato paste over each round. Top with shredded mozzarella, followed by the pepperoni.
- Bake for 12–14 minutes, or until the dough is golden and the cheese has melted. Allow to cool slightly on the tray before serving.
Notes
- You can add extra toppings like olives, bell peppers, or mushrooms for variety.
- If you prefer, you can use a store-bought pizza sauce instead of tomato paste for a milder flavor.
- These pizzas can be made ahead and stored in the fridge for up to 3 days, or frozen for longer storage.
Nutrition
- Serving Size: 1 mini pizza
- Calories: 250 kcal
- Sugar: 2g
- Sodium: 400mg
- Fat: 14g
- Saturated Fat: 6g
- Unsaturated Fat: 7g
- Trans Fat: 0g
- Carbohydrates: 24g
- Fiber: 1g
- Protein: 12g
- Cholesterol: 30mg


