

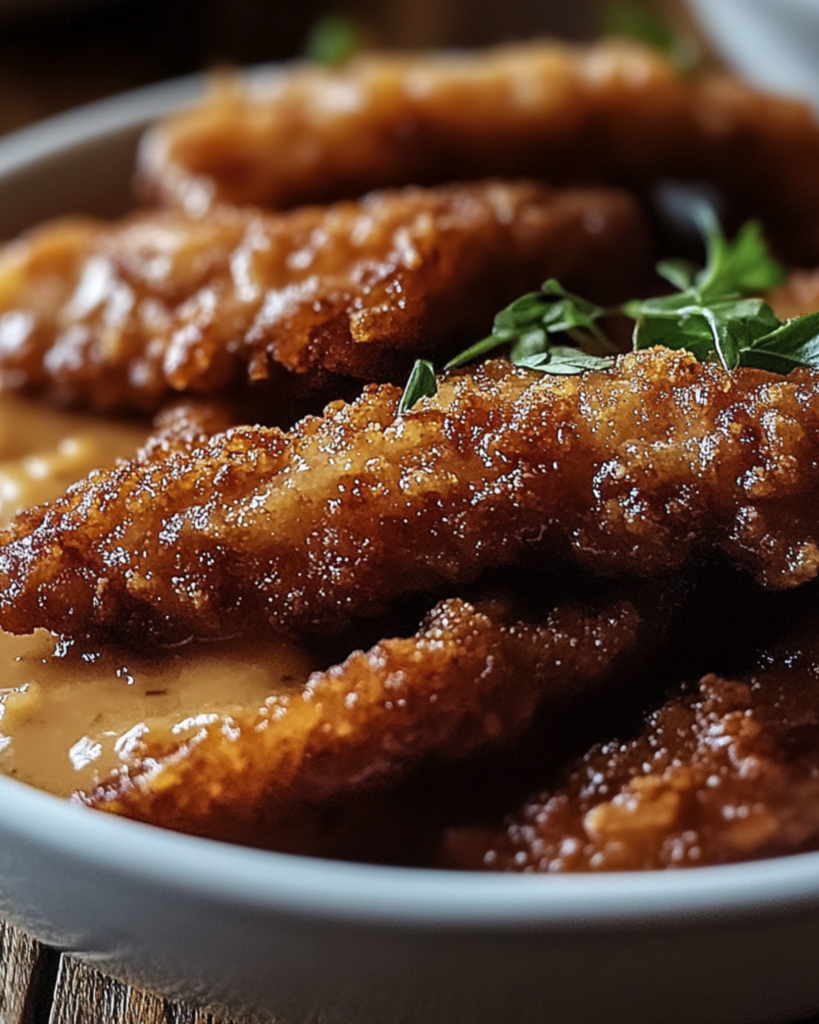
Classic Chicken Fried Steak Fingers
Ah, the irresistible comfort of crispy, golden, and perfectly seasoned chicken fried steak—now in an easy-to-make, finger-friendly format! Trust me, these Classic Chicken Fried Steak Fingers are about to become your new go-to comfort food. They’re everything you love about chicken fried steak but served up in bite-sized pieces that are perfect for dipping, snacking, or pairing with a cozy side dish. Whether you’re enjoying these on a casual weeknight, sharing them at a party, or indulging for a late-night snack, this recipe is one that’ll have everyone asking for more.
These little bites of heaven are crispy on the outside, tender and juicy on the inside, and packed with savory, satisfying flavors. With just the right balance of seasonings and a simple yet foolproof cooking process, you’ll be hooked from the very first bite. And the best part? They’re so much easier to make than you might think. You’re going to love the simplicity and flavor of this dish—trust me on this one!
Why You’ll Love Classic Chicken Fried Steak Fingers
This isn’t just a recipe; it’s a vibe. Whether you’re feeding your family, hosting friends, or just treating yourself to something delicious, these Chicken Fried Steak Fingers hit all the right notes. Let me break it down for you:
- Versatile: This dish is a game-changer for busy weeknights or a showstopper at any get-together. Imagine sitting down with a plate of crispy steak fingers, maybe with a side of fries and a refreshing drink—so good!
- Budget-Friendly: Using everyday pantry ingredients, you’ll whip up something that tastes like it took all day to make—without breaking the bank. Who said comfort food can’t be affordable?
- Quick and Easy: Don’t be intimidated by the “fried” part! These steak fingers are super simple, and the process is forgiving, so even if you’re a beginner cook, you’ll feel like a pro.
- Customizable: Feel free to add your personal touch! Love a bit of heat? Toss in some cayenne pepper or paprika to spice things up. Want a more traditional flavor? Stick to classic seasonings, or drizzle with gravy for that extra comfort factor.
- Crowd-Pleasing: Whether you’re feeding picky eaters or sophisticated foodies, these steak fingers are guaranteed to win everyone over. Kids, adults, friends, and family—everyone will love these.
Disclosure: This post contains affiliate links.If you click and make a purchase, I may earn a small commission at no extra cost to you.


Ingredients
Here’s what you’ll need to create these crispy, golden steak fingers:
- Steak: Choose a cut like cube steak or sirloin. The tender, flavorful pieces of steak are the foundation of this dish.
- Flour: You’ll need this for the crispy coating that gives these steak fingers their satisfying crunch.
- Eggs: For dipping, this helps the coating stick just right.
- Buttermilk: Adds a nice tang to the batter and helps keep the steak juicy.
- Seasonings: A blend of garlic powder, onion powder, paprika, salt, and pepper creates the perfect flavor profile. Feel free to adjust to your taste!
- Oil: For frying! You want something neutral like vegetable oil to get that crispy, golden exterior.
(Note: The full ingredients list, including measurements, is provided in the recipe card directly below.)
Instructions
Let’s break down how to make these crispy, flavorful steak fingers:
1. Preheat Your Pan
Start by heating up your skillet over medium-high heat. You want the oil to be hot enough for frying, but not smoking—aim for around 350°F (175°C). This ensures a crispy, golden exterior without overcooking the steak.
2. Prepare the Breading Station
In one bowl, whisk together the flour and seasonings (garlic powder, onion powder, paprika, salt, and pepper). In another bowl, beat the eggs and pour in the buttermilk. This will be your wet mixture. You’ll dip the steak pieces in the wet mixture first, then coat them in the seasoned flour to get that crispy breading.
3. Coat the Steak Fingers
Take your steak strips and dip each one into the wet mixture, making sure it’s coated well, then dredge them in the seasoned flour mixture. Give them a gentle shake to remove any excess flour—this helps create a crispy, even coating.
4. Fry to Perfection
Carefully drop the coated steak fingers into the hot oil, a few at a time (don’t crowd the pan). Fry for 3-4 minutes on each side, or until golden brown and crispy. Be sure to turn them halfway through to ensure even cooking. You want that beautiful, crispy exterior, but the inside should stay juicy and tender.
5. Drain and Serve
Once your steak fingers are perfectly fried, transfer them to a paper towel-lined plate to drain off any excess oil. This keeps them crispy and light.
6. Serve and Enjoy!
Serve the steak fingers hot with your favorite dipping sauces—gravy, ranch, or even a spicy mayo. Pair them with crispy fries or a simple salad, and you’ve got yourself a winning meal!
How to Serve Classic Chicken Fried Steak Fingers
These crispy little bites are perfect for a casual meal or a party platter. Here are a few ideas for serving:
- Fresh Salads: Pair them with a light, crisp salad to balance the richness of the fried steak fingers. A simple green salad with a tangy vinaigrette works wonders.
- Fries and Onion Rings: Classic steakhouse sides like crispy fries or crunchy onion rings complement the steak fingers perfectly.
- Creamy Dips: Serve with a variety of dips like creamy ranch, spicy buffalo sauce, or even a rich brown gravy.
- Roasted Vegetables: Add some roasted veggies like carrots or asparagus to bring some color and nutrition to your plate.
- As a Standalone: Sometimes, these crispy fingers are hearty enough to be enjoyed solo. Just serve with a sprinkle of fresh herbs like parsley or cilantro to elevate them.
Additional Tips
- Prep Ahead: Cut and bread the steak fingers ahead of time, so you can quickly fry them up when you’re ready to eat.
- Spice It Up: If you like a little heat, add a pinch of cayenne pepper or chili powder to the breading mix for a spicy kick.
- Dietary Adjustments: If you’re gluten-free, swap out the regular flour for a gluten-free flour blend, and you’re good to go!
- Storage Tips: Leftovers can be stored in an airtight container for up to 3 days. Reheat them in the oven to keep them crispy!
- Double the Batch: This recipe is perfect for doubling. You can make a bigger batch and freeze the extra for a rainy day!
FAQ Section
Q1: Can I substitute the steak with chicken?
A1: Yes! You can easily swap out the steak for chicken tenders if you prefer. Just adjust the cooking time as needed to ensure the chicken cooks through.
Q2: Can I make this dish ahead of time?
A2: You can bread the steak fingers ahead of time and store them in the fridge until you’re ready to fry them. This makes for a super easy meal!
Q3: How do I store leftovers?
A3: Store leftover steak fingers in an airtight container in the fridge for up to 3 days. Reheat them in the oven for a crispy finish.
Q4: Can I freeze this dish?
A4: Yes! You can freeze the breaded steak fingers before frying. When you’re ready to eat, fry them straight from the freezer—just add a minute or two to the frying time.
Q5: How do I reheat fried steak fingers?
A5: The best way to reheat them is in the oven at 375°F (190°C) for 10 minutes, or until they’re crispy and heated through.
Q6: Can I double the recipe?
A6: Absolutely! Just make sure your frying pan can accommodate the extra steak fingers. You may need to fry them in batches.
Q7: Are these suitable for a low-carb diet?
A7: Not exactly, but you can make a keto-friendly version by using almond flour or coconut flour instead of regular flour.
Q8: What side dishes go well with this recipe?
A8: A side of mashed potatoes, coleslaw, or even baked beans would complement these steak fingers perfectly!
Q9: Can I make this healthier?
A9: You can air-fry the steak fingers or bake them to cut down on oil. You could also try using leaner cuts of beef.
Q10: What’s the best cookware for this recipe?
A10: A heavy skillet or cast-iron pan works best for frying because it distributes heat evenly, ensuring a crispy, golden crust every time.
Conclusion
These Classic Chicken Fried Steak Fingers are the perfect blend of crispy, juicy, and downright delicious! Whether you’re making them for a quick weeknight meal or serving them at a gathering, they’re sure to become a crowd favorite. So go ahead—get that pan sizzling and treat yourself to a plateful of crispy, comforting goodness. You won’t regret it!
Print
Classic Chicken Fried Steak Fingers
- Prep Time: 10 minutes (plus 2 hours marinating time)
- Cook Time: 15 minutes
- Total Time: 2 hours 25 minutes
- Yield: 4 servings
- Category: Main Course
- Method: Frying
- Cuisine: Southern
- Diet: Vegetarian
Description
These crispy, golden chicken fried steak fingers are marinated to perfection, then fried until tender and juicy. Served with rich, creamy homemade gravy for dipping, this is the ultimate comfort food! Perfect for a family dinner or a special occasion.
Ingredients
-
For the Marinade:
- 4 cube steaks, cut into strips
- 2 cups buttermilk
- 1 tablespoon hot sauce
- 1 tablespoon seasoned salt
For the Flour Mixture:
- 1 cup all-purpose flour
- 1 tablespoon seasoned salt
- 2 teaspoons onion powder
- 2 teaspoons garlic powder
- 1 teaspoon black pepper
For Frying:
- Vegetable oil (for frying)
For the Gravy:
- ¼ cup vegetable oil drippings
- ¼ cup all-purpose flour
- 2 cups whole milk
- Salt & black pepper, to taste
Instructions
-
Prepare the Marinade:
In a medium mixing bowl, whisk together the buttermilk, hot sauce, and seasoned salt. Add the steak strips and ensure they are fully coated. Cover and refrigerate for at least 2 hours or overnight for best results. -
Heat Oil for Frying:
Pour about 1 ½ inches of vegetable oil into a skillet and heat over medium heat. -
Prepare the Flour Mixture:
In a shallow dish, mix together the flour, seasoned salt, onion powder, garlic powder, and black pepper. -
Coat the Steak Strips:
Remove the steak strips from the marinade, allowing the excess liquid to drip off. Dredge each strip in the seasoned flour mixture, ensuring an even coating. -
Fry the Steak Fingers:
Once the oil is hot enough, carefully place 3-4 steak strips in the skillet at a time. Cook for 3-4 minutes per side, or until golden brown and crispy. Transfer to a paper towel-lined plate to drain excess grease. -
Make the Gravy:
For the gravy, reserve ¼ cup of the oil drippings in the skillet over medium heat. Whisk in the flour and cook for 1-2 minutes until lightly golden. Gradually whisk in the milk, stirring constantly until the gravy thickens. Season with salt and black pepper to taste. -
Serve:
Serve the crispy steak fingers warm with the homemade gravy for dipping.
Notes
- Marinating the steak strips overnight enhances the flavor and tenderness.
- Ensure the oil is at the right temperature for frying—too cold, and the coating will absorb excess oil; too hot, and the coating may burn before the steak is fully cooked.
- You can use milk instead of buttermilk for a milder taste, but buttermilk gives the steak a tangy flavor and tenderizes the meat.
Nutrition
- Serving Size: 1 serving (approximately 3-4 steak fingers and 2 tablespoons of gravy)
- Calories: 450 kcal
- Sugar: 3g
- Sodium: 900mg
- Fat: 28g
- Saturated Fat: 8g
- Unsaturated Fat: 16g
- Trans Fat: 1g
- Carbohydrates: 30g
- Fiber: 1g
- Protein: 28g
- Cholesterol: 85mg


