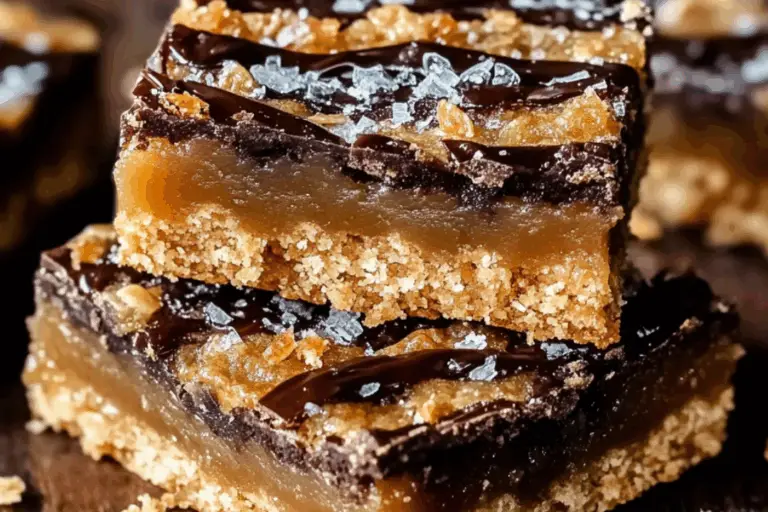
Decadent Oreo Cream Pie for Chocolate Lovers
Indulge yourself in the heavenly layers of an Oreo Cream Pie, where the delightful crunch of Oreo cookies meets a luxuriously creamy filling. This dessert is not just a treat; it’s an experience that will have chocolate lovers swooning with every bite. Whether you’re celebrating a special occasion or just satisfying a sweet craving, this Oreo Cream Pie is sure to impress.
Why You’ll Love This Recipe
- Irresistible Flavor: The combination of rich chocolate and creamy filling creates a taste sensation that is utterly delicious.
- Easy to Make: With simple ingredients and straightforward steps, you’ll have this pie ready in no time.
- Perfect for Any Occasion: Whether it’s a birthday, holiday, or just a casual get-together, this pie is always a hit.
- Customizable: Adjust the ingredients to suit your dietary needs or taste preferences.
- Showstopper Presentation: This pie looks as great as it tastes, making it a stunning centerpiece for any dessert table.
Ingredients You’ll Need
Creating the perfect Oreo Cream Pie requires a handful of simple yet essential ingredients. Each one plays a crucial role in achieving that dreamy, decadent flavor and texture.
- Oreo Cookies: The star of the show, these cookies provide the rich chocolatey base and delightful crunch.
- Butter: Melted butter adds richness and helps bind the crust together.
- Heavy Cream: Whipping cream gives the filling its luxurious texture and lightness.
- Powdered Sugar: This sweetener adds just the right amount of sweetness to the filling without being overpowering.
- Vanilla Extract: A splash of vanilla enhances the flavors and adds depth to the creamy filling.
- Chocolate Pudding Mix: This provides a rich chocolate flavor and creamy consistency to the filling.
Note: The full ingredients list, including measurements, is provided in the recipe card directly below.
Variations for Oreo Cream Pie
This recipe is wonderfully adaptable, allowing you to get creative based on your preferences or dietary requirements. Here are some delicious variations you can try!
- Peanut Butter Delight: Swirl in some creamy peanut butter for an irresistible flavor combo.
- Mint Chocolate: Add mint extract to the filling for a refreshing twist that chocolate lovers will adore.
- Gluten-Free Option: Use gluten-free Oreos to make this dessert suitable for gluten-sensitive friends.
- Vegan Version: Substitute dairy ingredients with coconut cream and vegan butter for a plant-based treat.
- Fruit Topping: Top the pie with fresh berries or banana slices for a fruity contrast to the rich filling.

Disclosure: This post contains affiliate links.If you click and make a purchase, I may earn a small commission at no extra cost to you.
How to Make Oreo Cream Pie
Step 1: Prepare the Crust
Begin by crushing the Oreo cookies into fine crumbs, either in a food processor or with a rolling pin. Mix the crumbs with melted butter until well combined. Press the mixture firmly into the bottom and up the sides of a pie dish to form the crust. Chill in the refrigerator while you prepare the filling.
Step 2: Make the Filling
In a large mixing bowl, whip the heavy cream until soft peaks form. Gradually add in the powdered sugar and vanilla extract while continuing to whip until stiff peaks form. Gently fold in the chocolate pudding mix until completely incorporated. This will create a rich and creamy filling for your pie.
Step 3: Assemble the Pie
Remove the crust from the refrigerator and spoon the creamy filling into the chilled Oreo crust. Smooth the top with a spatula for an even finish. Cover the pie with plastic wrap or aluminum foil and refrigerate for at least four hours, or overnight for best results.
Step 4: Serve and Enjoy
Once set, slice the Oreo Cream Pie into wedges and serve! You can garnish with whipped cream, extra Oreo crumbs, or chocolate shavings for an extra touch of elegance.
Pro Tips for Making Oreo Cream Pie
- Use Cold Ingredients: Start with cold heavy cream for better whipping results.
- Don’t Overmix: When folding in the pudding mix, be gentle to maintain the light and airy texture.
- Chill Properly: Allow the pie to chill for a sufficient time to ensure it sets perfectly.
- Garnish Creatively: Experiment with garnishes for a beautiful presentation that will wow your guests.
- Make it Ahead: This pie can be made a day in advance, making it a great option for gatherings.
How to Serve Oreo Cream Pie
Garnishes
Enhance the visual appeal of your Oreo Cream Pie with simple yet attractive garnishes. A dollop of whipped cream, some chocolate shavings, or a sprinkle of crushed Oreos can add that perfect finishing touch.
Side Dishes
Pair your pie with a scoop of vanilla ice cream or some fresh fruit to lighten the meal. A hot cup of coffee or a glass of milk also complements the rich flavors beautifully.
Creative Ways to Present
Consider serving individual portions in small mason jars for a fun twist. This not only makes for an adorable presentation but also allows guests to enjoy their own little dessert without having to slice the pie.
Make Ahead and Storage
Storing Leftovers
If you find yourself with leftover Oreo Cream Pie, simply cover it tightly with plastic wrap or aluminum foil and store it in the refrigerator. It will stay fresh for up to five days, so you can enjoy it even longer!
Freezing
This pie can also be frozen for longer storage. Wrap it tightly in plastic wrap and then in foil before placing it in the freezer. It will keep well for about two months. Just remember to thaw it in the refrigerator before serving.
Reheating
There’s no need to reheat this dessert, as it is best served chilled. Just remove it from the fridge or freezer, allow it to come to the right temperature, and enjoy its creamy goodness.
FAQs
Can I use different types of cookies for the crust?
Absolutely! While Oreos are traditional, feel free to experiment with other chocolate cookies or even graham crackers for a different flavor.
How long does the Oreo Cream Pie need to set?
For optimal texture, allow the pie to chill in the refrigerator for at least four hours, but overnight is even better.
Can I make this pie vegan?
Yes! You can easily substitute dairy ingredients with non-dairy alternatives like coconut cream and vegan butter.
Is it possible to make this pie gluten-free?
Definitely! Just use gluten-free Oreo cookies, and you’ll have a delightful dessert that everyone can enjoy.
What should I do if my filling is too runny?
If your filling does not set properly, it may be due to overmixing. Be sure to follow the instructions carefully and allow it enough time to chill in the fridge.
Final Thoughts
This Oreo Cream Pie is a must-try for anyone who loves chocolate and creamy desserts. Its delightful combination of flavors and textures will leave you craving more. So gather your ingredients, follow the steps, and treat yourself to this decadent dessert. Happy baking!
Related Posts
- Refreshing Strawberry Pineapple Pound Cake Treat
- No Bake Crispy Snickers Bars for Sweet Tooth Indulgence
- Delightful Gooey Butter Cake Bars You’ll Love

Oreo Cream Pie
- Prep Time: 20 minutes
- Cook Time: 0 minutes
- Total Time: 4 hours 20 minutes
- Yield: 8 servings 1x
- Category: Dessert
- Method: No-bake
- Cuisine: American
- Diet: Vegetarian
Description
Indulge yourself in the heavenly layers of an Oreo Cream Pie, where the delightful crunch of Oreo cookies meets a luxuriously creamy filling. This dessert is not just a treat; it’s an experience that will have chocolate lovers swooning with every bite. Whether you’re celebrating a special occasion or just satisfying a sweet craving, this Oreo Cream Pie is sure to impress.
Ingredients
Oreo Cookies
- 24 Oreo cookies, crushed
Butter
- 1/2 cup melted butter
Heavy Cream
- 2 cups heavy cream
Powdered Sugar
- 1/2 cup powdered sugar
Vanilla Extract
- 1 teaspoon vanilla extract
Chocolate Pudding Mix
- 1 package (3.9 oz) chocolate pudding mix
Instructions
- Prepare the Crust: Begin by crushing the Oreo cookies into fine crumbs, either in a food processor or with a rolling pin. Mix the crumbs with melted butter until well combined. Press the mixture firmly into the bottom and up the sides of a pie dish to form the crust. Chill in the refrigerator while you prepare the filling.
- Make the Filling: In a large mixing bowl, whip the heavy cream until soft peaks form. Gradually add in the powdered sugar and vanilla extract while continuing to whip until stiff peaks form. Gently fold in the chocolate pudding mix until completely incorporated. This will create a rich and creamy filling for your pie.
- Assemble the Pie: Remove the crust from the refrigerator and spoon the creamy filling into the chilled Oreo crust. Smooth the top with a spatula for an even finish. Cover the pie with plastic wrap or aluminum foil and refrigerate for at least four hours, or overnight for best results.
- Serve and Enjoy: Once set, slice the Oreo Cream Pie into wedges and serve! You can garnish with whipped cream, extra Oreo crumbs, or chocolate shavings for an extra touch of elegance.
Notes
- Use cold ingredients for better whipping results.
- Don’t overmix when folding in the pudding mix to maintain the light and airy texture.
- Allow the pie to chill for a sufficient time to ensure it sets perfectly.
- Experiment with garnishes for a beautiful presentation that will wow your guests.
- This pie can be made a day in advance, making it a great option for gatherings.
Nutrition
- Serving Size: 1 slice
- Calories: 350
- Sugar: 20g
- Sodium: 180mg
- Fat: 24g
- Saturated Fat: 12g
- Unsaturated Fat: 8g
- Trans Fat: 0g
- Carbohydrates: 32g
- Fiber: 1g
- Protein: 4g
- Cholesterol: 50mg

