

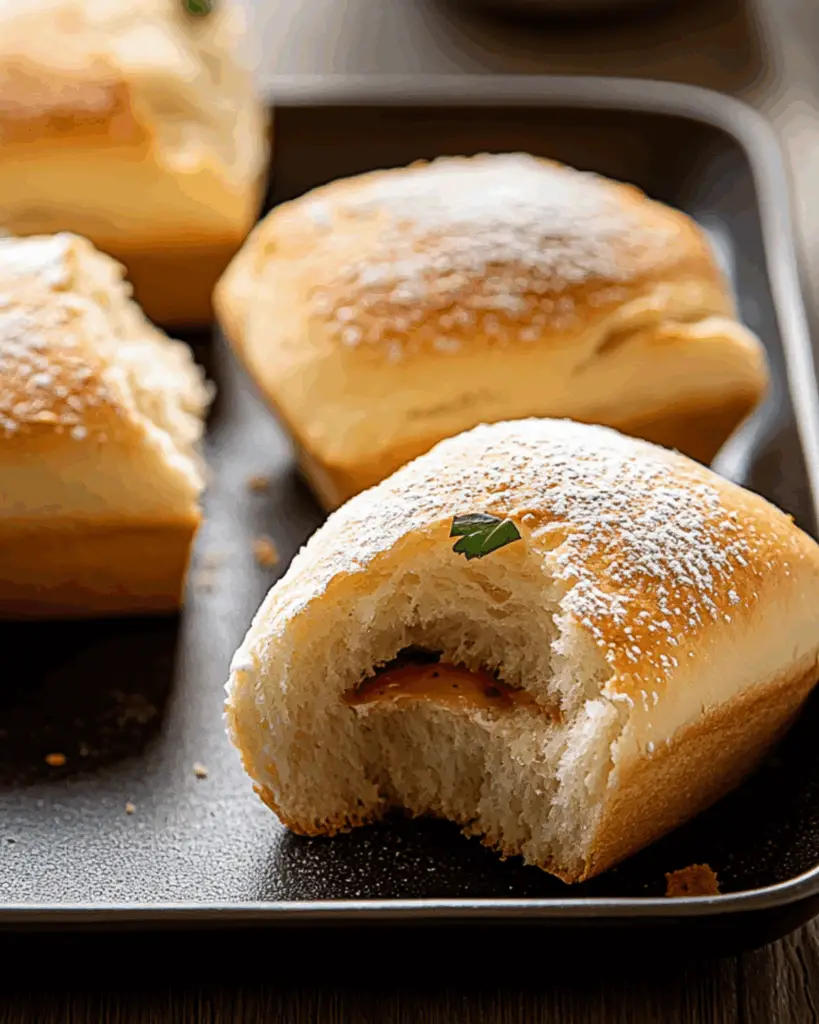
Homemade Ciabatta Rolls
Okay, picture this: you’re sitting down to a cozy meal, and in front of you is a basket of golden, crispy-on-the-outside, soft-and-pillowy-on-the-inside ciabatta rolls. I mean, who can resist the aroma of freshly baked bread wafting through the air, right? Trust me when I say, making your own homemade ciabatta rolls is a total game-changer. Not only do they taste a million times better than anything you can grab off the shelf, but there’s something incredibly satisfying about pulling warm, homemade bread out of the oven. And if you’ve been thinking baking bread is a fancy, difficult thing to do—think again! With a few simple ingredients and a little patience, you’ll be baking like a pro in no time. This is one of those recipes that makes you feel like a rockstar in the kitchen, and your friends and family are going to be seriously impressed.
Why You’ll Love Homemade Ciabatta Rolls
Making ciabatta rolls at home is more than just a baking project—it’s an experience. These little loaves are crispy, airy, and totally satisfying. Here’s why you’re going to fall in love:
- Versatile: You can enjoy these rolls with anything—perfect for sandwiches, as a side to soups, or just dipped in olive oil and balsamic vinegar.
- Budget-Friendly: Flour, yeast, and water—simple ingredients that you probably already have in your pantry. These rolls prove that you don’t need to spend a fortune to get bakery-quality bread.
- Quick and Easy: Despite what it looks like, this recipe is super approachable, even for beginners. I promise you don’t have to be a pro baker to make these.
- Customizable: Add a sprinkle of sea salt, some fresh herbs, or even some roasted garlic to give them a little extra flavor. Your kitchen, your rules!
- Crowd-Pleasing: Whether you’re hosting a dinner party or just baking for yourself, these ciabatta rolls are a guaranteed crowd-pleaser.
Disclosure: This post contains affiliate links.If you click and make a purchase, I may earn a small commission at no extra cost to you.


Ingredients for Homemade Ciabatta Rolls
The beauty of ciabatta is that it’s made with basic pantry ingredients, but together they create magic. Here’s what you’ll need:
- Flour: The foundation of your ciabatta rolls, giving them that soft, airy texture we love.
- Yeast: This is what brings your dough to life, creating all those delicious air pockets.
- Water: Essential for the dough to come together and give it that perfect consistency.
- Olive Oil: Adds richness and flavor to the rolls, creating a tender crumb.
- Salt: To bring all the flavors together.
- Optional Add-ins: Think fresh herbs or a dash of garlic—totally optional but oh-so-delicious if you’re in the mood to get creative!
(Note: Exact measurements can be found in the recipe card.)
Instructions for Homemade Ciabatta Rolls
Let’s dive into the steps to create your new favorite bread. I promise this will be easier than you think—and the result? Totally worth it.
Preheat Your Oven:
Start by preheating your oven to the perfect temperature. This helps your ciabatta rolls bake evenly and gives them that beautiful golden-brown crust we all crave. Preheating your oven is one of those little steps that makes all the difference.
Mix Your Dough:
In a large bowl, combine your flour, yeast, and salt. Slowly add in your warm water and olive oil, and mix until a sticky dough forms. This dough is a bit more hydrated than most, which is key to that light, airy texture. You want it to feel a little sticky—this will create those wonderful pockets of air once it bakes.
Knead the Dough:
Now, it’s time to knead. Don’t worry if you’ve never kneaded before—it’s easy! Just work the dough for about 5 minutes on a lightly floured surface. It’s okay if it’s a little sticky, but make sure to keep kneading until it’s smooth and elastic. You’ll feel the dough change texture as you go, which is pretty fun!
Let It Rise:
Once your dough is kneaded, it’s time for the magic to happen. Cover your bowl with a clean cloth and let the dough rise for about an hour, or until it doubles in size. This is where the yeast works its wonders, and you’ll start to see that beautiful fluffy dough form.
Shape the Rolls:
When the dough has risen, gently punch it down to release any air bubbles, then transfer it onto a lightly floured surface. Divide the dough into portions and shape each one into an oblong shape, like traditional ciabatta rolls. Don’t worry about making them perfect—imperfections just add to their charm!
Second Rise:
Place your shaped rolls onto a baking sheet lined with parchment paper and cover them with a clean towel. Let them rise again for about 30 minutes, so they puff up beautifully before baking. During this second rise, the dough will get even fluffier.
Bake to Perfection:
Pop your rolls into the preheated oven and bake until they’re golden brown and sound hollow when tapped on the bottom (about 20-25 minutes). The smell will be absolutely mouthwatering, so don’t be afraid to open the oven and sneak a peek!
Cool and Enjoy:
Once they’re baked to perfection, let the rolls cool on a wire rack. I know it’s tempting to dig in right away, but letting them cool for just a bit allows the texture to set perfectly. Trust me, you’ll be glad you waited!
How to Serve Homemade Ciabatta Rolls
These ciabatta rolls are as versatile as they come! Here are a few ideas to elevate your meal:
- With Olive Oil and Balsamic Vinegar: Tear into the warm rolls and dip them into a rich balsamic vinegar and olive oil blend. It’s the simplest way to enjoy them, but oh-so-tasty.
- Sandwiches: Layer your favorite fillings—think turkey, cheese, veggies, or even a crispy chicken cutlet—for the perfect sandwich.
- As a Side to Soups: Serve alongside a bowl of tomato soup, minestrone, or any hearty stew. The rolls are perfect for dipping.
- With Cheese: Ciabatta rolls and cheese are a match made in heaven. Serve them with your favorite cheese for a simple snack or appetizer.
- As a Standalone Treat: Sometimes, the best way to enjoy them is on their own, just fresh from the oven with a little butter or jam.
Additional Tips
- Prep Ahead: You can make the dough the night before and let it rise overnight in the fridge for extra flavor.
- Spice It Up: Try adding a little garlic powder, rosemary, or thyme to the dough for a fragrant twist.
- Storage Tips: Store your homemade ciabatta rolls in an airtight container at room temperature for up to 3 days. They’re best enjoyed fresh but still delicious the next day.
- Double the Batch: These rolls freeze beautifully, so go ahead and make a double batch. Just freeze them after baking and thaw them when you’re ready to enjoy!
FAQ Section
Q1: Can I substitute regular flour with whole wheat flour? A1: You can definitely try! Just keep in mind that whole wheat flour will change the texture a bit and might make the rolls denser.
Q2: How do I store leftovers? A2: Store leftover ciabatta rolls in an airtight container at room temperature for up to 3 days. You can also freeze them for up to 3 months!
Q3: Can I make these rolls without a stand mixer? A3: Absolutely! You can knead the dough by hand—it might take a bit more effort, but it’s totally doable.
Q4: How can I make these rolls fluffier? A4: The key to super fluffy ciabatta is the hydration in the dough, so be sure to use enough water and don’t skip the resting times for the dough to rise.
Q5: Can I use this recipe for other bread shapes? A5: Yes! You can shape this dough into baguettes or round loaves. Just keep an eye on the baking time if you change the shape.
Conclusion
Homemade ciabatta rolls are a total treat—and they’re way easier than you might think. With a little patience and the right ingredients, you’ll be baking up these delicious rolls in no time. So, grab your apron and get ready to create some bread-baking magic—you’re going to love how these turn out! Enjoy every warm, fluffy bite.
Print
Homemade Ciabatta Rolls
- Prep Time: 2 hours 15 minutes
- Cook Time: 20-25 minutes
- Total Time: 2 hours 35 minutes
- Yield: 6–8 rolls 1x
- Category: Bread
- Method: Baking
- Cuisine: American
- Diet: Vegetarian
Description
These Homemade Ciabatta Rolls are light, fluffy, and perfect for making sandwiches or enjoying with soup. With a crispy crust and soft, airy interior, they’re the ideal bread for any occasion. This simple recipe is a must-try for homemade bread lovers.v
Ingredients
-
½ Tbsp sea salt
-
1 packet active dry yeast (about 2 ¼ teaspoons)
3 cups bread flour
1 ½ cups hot water
2 Tbsp extra virgin olive oil
Instructions
-
Prepare the Dough:
In a large bowl, combine the bread flour and sea salt. Whisk to combine.
Measure the hot water and let it rest for a minute or two. Add the yeast and whisk to activate the yeast for 30 seconds to 1 minute.
Pour the yeast mixture over the flour and gently mix with a spatula. The dough will be shaggy and sticky.
Add the olive oil and fold it into the dough gently, ensuring not to press the dough down too much. -
Rest the Dough:
Cover the dough with a kitchen towel and let it rest in a warm spot (out of direct sunlight) for 1 hour and 30 minutes. -
Fold the Dough:
After 1 ½ hours, uncover the dough. Gently lift the dough from the bottom and fold it over the top. Repeat this process 4 times, folding all sides of the dough.
Let the dough rest for another 30 minutes.
Repeat this folding process two more times, for a total of 3 sets of 30-minute rests. -
Shape the Rolls:
Lightly flour a piece of parchment paper. Gently roll the dough out of the bowl and stretch it into a rectangle shape, avoiding kneading or pulling from the top to keep the air in the dough.
Use a dough cutter to slice the dough lengthwise, then cut into individual rolls (6–8 rolls depending on size and preference).
Gently separate the rolls from each other and pull the parchment paper with the rolls onto a baking sheet. -
Final Rest and Baking:
Cover the rolls and let them rest for another 30-50 minutes. Meanwhile, preheat the oven to 420°F (215°C) and place a rimmed baking sheet on the lower rack of the oven.
Once the rolls have rested, uncover them and lightly spray the tops with water.
Place the rolls in the oven, adding about ½ cup of water to the rimmed baking sheet to create steam. Bake for 20-25 minutes, until golden brown.
-
Cooling:
Remove the rolls from the oven and let them rest for 1 hour before serving.
Notes
-
For the best results, ensure you let the dough rest in a warm area and follow the folding steps to keep the dough airy.
-
You can store these rolls in a paper bag or wrap them in a kitchen towel for freshness.
Nutrition
- Serving Size: 1 roll
- Calories: 160 kcal
- Sugar: 0g
- Sodium: 200mg
- Fat: 3g
- Saturated Fat: 0.5g
- Unsaturated Fat: 2g
- Trans Fat: 0g
- Carbohydrates: 28g
- Fiber: 1g
- Protein: 5g
- Cholesterol: 0mg


