

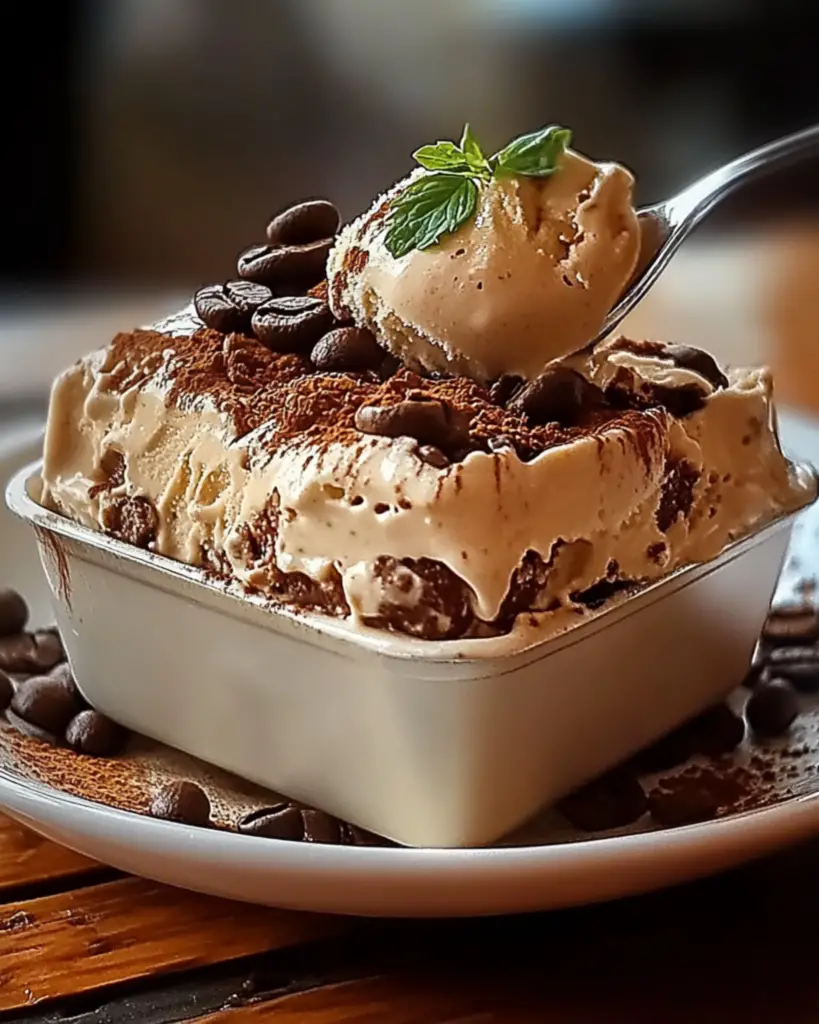
Homemade Coffee Ice Cream Bliss
Okay, coffee lovers—this one’s for you. Imagine your favorite creamy scoop of ice cream… now imagine it infused with that deep, roasted coffee flavor that feels like a warm hug in frozen form. That’s exactly what we’re diving into with this homemade coffee ice cream. It’s smooth, it’s bold, and it’s got that just-sweet-enough balance that keeps you coming back for just one more spoonful (which turns into four, but who’s counting?).
This isn’t your average grocery store pint. This is next-level indulgence—made right in your kitchen, no weird ingredients, no fancy gadgets needed. Just pure, creamy comfort with a coffee kick that hits all the right notes. And honestly? It’s kind of a vibe. Scoop it into a waffle cone, pile it high in a bowl with a drizzle of chocolate sauce, or sneak a few bites straight from the container (zero judgment here).
Trust me, once you taste this, store-bought won’t cut it anymore. Let’s get into it.
Why You’ll Love Velvet Buzz: Homemade Coffee Ice Cream Bliss
This recipe isn’t just about the ingredients—it’s about creating moments. Whether you’re cooking for a casual family dinner, hosting a get-together with friends, or simply indulging in some comforting flavors for yourself, this dish is versatile enough to fit the occasion. Here’s why it’s a favorite:
Versatile: Perfect for late-night treats, summer BBQs, or a sophisticated after-dinner dessert. You can scoop it into cones for the kids or pair it with a shot of espresso for an affogato that’ll blow your mind.
Budget-Friendly: Uses ingredients you likely already have in your kitchen. No need for fancy machines or obscure syrups. Just pantry staples working magic.
Quick and Easy: Straightforward steps that even beginners can follow. You don’t need to be a pastry chef to churn out this dreamy dessert.
Customizable: Craving texture? Add in chocolate chunks, crushed Oreos, or a swirl of caramel. Want it dairy-free? Swap out the milk and cream—easy!
Crowd-Pleasing: Coffee fans and ice cream lovers unite! This flavor combo is a total win, and it’s always the first to disappear from the freezer.
Disclosure: This post contains affiliate links.If you click and make a purchase, I may earn a small commission at no extra cost to you.


Ingredients in Velvet Buzz: Homemade Coffee Ice Cream Bliss
Here’s where the magic begins. With just a few flavorful ingredients, we’re creating something seriously special—smooth, rich, and packed with that signature coffee flavor.
Heavy Cream: The secret to that luscious, velvety texture that melts beautifully on your tongue.
Whole Milk: Balances out the richness while keeping everything creamy and smooth.
Egg Yolks: Give the ice cream body and silkiness—like custard in frozen form.
Sugar: Just the right amount to sweeten things up without overpowering the coffee.
Instant Coffee or Espresso Powder: The bold flavor star. Go strong or go subtle—it’s totally up to you.
Vanilla Extract: Adds depth and rounds out the coffee with warm, mellow notes.
Salt: Just a pinch to enhance every other flavor. It’s the quiet hero of this dessert.
(Note: the full ingredients list, including measurements, is provided in the recipe card directly below.)
Instructions
Let’s dive into the steps to create this flavorful masterpiece:
Preheat Your Equipment
Start by setting up your ice cream maker according to its instructions, or place your freezer-safe container in the freezer if you’re going no-churn. Chilling tools ahead of time helps everything set up properly later.
Combine Ingredients
In a saucepan, whisk together the milk, cream, and sugar over medium heat. Stir in the coffee or espresso powder and a pinch of salt. Warm until it’s steaming but not boiling.
Prepare Your Cooking Vessel
In a separate bowl, whisk your egg yolks. Slowly pour a bit of the warm cream mixture into the yolks to temper them—this keeps the eggs from scrambling. Then pour everything back into the pan.
Assemble the Dish
Cook the custard gently until it thickens enough to coat the back of a spoon. Remove from heat and stir in the vanilla. Strain through a fine mesh sieve for extra creaminess.
Cook to Perfection
Let the custard cool to room temperature, then cover and chill in the fridge for a few hours (or overnight). When ready, churn in your ice cream maker or pour into a container and freeze, stirring every hour for a no-churn version.
Finishing Touches
Once frozen to your desired consistency, it’s ready to go! If you’re feeling fancy, swirl in ribbons of chocolate or espresso caramel just before the final freeze.
Serve and Enjoy
Scoop it up and savor every bite! Whether you serve it in a cone, a bowl, or as part of a dessert plate, this coffee ice cream is the moment.
How to Serve Velvet Buzz: Homemade Coffee Ice Cream Bliss
This dish pairs wonderfully with various sides and accompaniments. Here are a few serving suggestions to enhance your dining experience:
Chocolate Everything: Serve with chocolate shavings, drizzle with fudge sauce, or sandwich it between two chocolate chip cookies.
A Shot of Espresso: Make an affogato by pouring hot espresso over a scoop—pure elegance in a cup.
Fresh Berries: Add a pop of color and a tart contrast with raspberries or strawberries.
Waffle Cone Crunch: Crush waffle cones or sprinkle with cookie crumbs for a bit of texture and flair.
As a Standalone: Honestly, it’s perfect all by itself. Scoop, spoon, and savor.
Presentation matters too! Use a pretty scoop, a chilled bowl, or a sprinkle of cocoa powder on top to give it that “just from the café” touch.
Additional Tips
Prep Ahead: Make the base the night before to let the flavors deepen and the mixture chill fully.
Spice It Up: Add cinnamon, cardamom, or even a splash of Kahlúa for a grown-up twist.
Dietary Adjustments: Use coconut cream and a plant-based milk for a delicious dairy-free option.
Storage Tips: Store in an airtight container with a layer of parchment on top to prevent freezer burn. Lasts up to 2 weeks (if it doesn’t disappear before then!).
Double the Batch: Ice cream goes fast—just sayin’. You’ll thank yourself later.
FAQ Section
Q1: Can I use brewed coffee instead of instant?
A1: You can, but it may water down the base. Stick with espresso powder or reduce brewed coffee to a concentrate for best results.
Q2: Do I need an ice cream maker?
A2: Nope! You can totally make a no-churn version by freezing and stirring the mixture every hour for a few hours.
Q3: How strong is the coffee flavor?
A3: You’re in control! Start with less coffee for a lighter flavor or amp it up if you like bold, café-style richness.
Q4: Can I make it egg-free?
A4: Yes! Use cornstarch or a custard-free base with sweetened condensed milk and whipped cream for a no-egg option.
Q5: How do I prevent ice crystals?
A5: Make sure your base is fully chilled before freezing and cover it well to minimize air exposure.
Q6: What can I add for texture?
A6: Chocolate chips, crushed cookies, caramel swirls, or toffee bits are so good here.
Q7: Is this recipe gluten-free?
A7: Yes, the base recipe is naturally gluten-free—just double-check your flavor additions to be sure.
Q8: Can I use flavored coffee?
A8: Totally! Hazelnut, vanilla, or mocha-flavored instant coffee adds an extra layer of fun.
Q9: How long does homemade ice cream last?
A9: It’s best within 1–2 weeks for top flavor and texture. Store it tightly covered.
Q10: What’s the best container for freezing?
A10: Use a shallow, airtight container—metal or glass work great—and press parchment on top before sealing.
Conclusion
And there you have it—Velvet Buzz, your new favorite frozen treat that’s smooth, bold, and full of personality. It’s the kind of dessert that feels like a hug in every scoop, with that rich coffee flavor delivering café vibes straight from your freezer.
Whether you’re an ice cream enthusiast or just coffee-curious, this recipe is easy, fun, and endlessly satisfying. So grab a spoon (or two), pop on your favorite playlist, and whip up a batch of something deliciously cool.
Print
Homemade Coffee Ice Cream Bliss
- Prep Time: 10 minutes
- Cook Time: 0 minutes
- Total Time: 10 minutes (plus freezing time)
- Yield: 6 servings 1x
- Category: Dessert
- Method: No-Churn, Freezer
- Cuisine: International
- Diet: Vegetarian
Description
This no-churn Coffee Ice Cream is creamy, rich, and packed with bold coffee flavor. Made with just 4 ingredients, it’s the perfect frozen treat for coffee lovers. No ice cream maker required
Ingredients
350 ml whipping cream
3 tablespoons soluble coffee
290 ml sweetened condensed milk
Chocolate (to decorate)
Instructions
Pour the cream and coffee into a mixing bowl. Beat until stiff peaks form.
Gently fold in the sweetened condensed milk until fully combined.
Transfer the mixture to a large freezer-safe container. Freeze for at least 24 hours.
Scoop and serve with chocolate drizzled on top.
Notes
For best results, chill the mixing bowl and beaters in the fridge before whipping the cream. Use instant espresso for a stronger flavor. You can also swirl in chocolate chips or crushed cookies before freezing.
Nutrition
- Serving Size: 1/6 of recipe
- Calories: 280
- Sugar: 23g
- Sodium: 60mg
- Fat: 18g
- Saturated Fat: 11g
- Unsaturated Fat: 6g
- Trans Fat: 0g
- Carbohydrates: 25g
- Fiber: 0g
- Protein: 3g
- Cholesterol: 55mg


