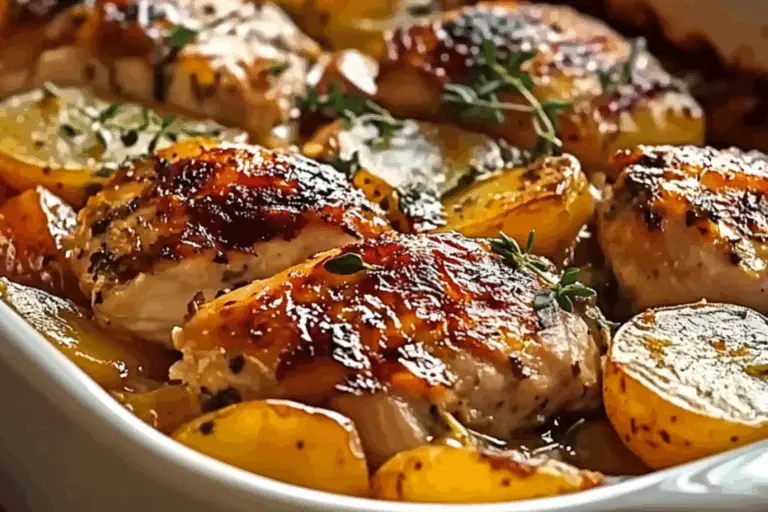
Baked Cauliflower
Trust me, you’re going to fall head over heels for this Baked Cauliflower recipe! If you think cauliflower is just a bland vegetable that gets overlooked, think again. When roasted and baked to perfection, cauliflower transforms into a savory, slightly caramelized, and ultra-tender delight. With crispy edges and a creamy inside, it’s a dish that’s totally satisfying, yet light enough to enjoy as a side or even as a main!
Picture this: golden, crispy florets bursting with flavor from a blend of simple seasonings, a touch of olive oil, and just the right amount of heat from the oven. Whether you’re cozying up for a solo dinner or sharing it at a gathering with friends and family, this baked cauliflower is sure to steal the show. It’s comforting, healthy, and truly so easy to make—like a warm hug in veggie form.
Why You’ll Love Baked Cauliflower
This baked cauliflower is more than just a side dish—it’s a game-changer. Let’s talk about why this one’s going to be your new go-to:
Versatile:
This dish is perfect for any occasion. Whether you’re whipping it up for a casual weeknight dinner, serving it alongside your favorite proteins, or offering it as a delicious snack at your next gathering, this cauliflower is up to the task.
Budget-Friendly:
You don’t need to break the bank to create something amazing! Cauliflower is one of those affordable veggies that can shine in any recipe, and this one’s no exception.
Quick and Easy:
No need to stress—this is a simple, foolproof recipe. With just a few steps, you’ll have a dish that looks and tastes like you spent hours on it. Plus, it’s easy enough for beginners, so anyone can feel confident in the kitchen.
Customizable:
If you’re a fan of spice, you can amp up the heat with some chili flakes or paprika. Want a bit more cheese? Go ahead and sprinkle on some parmesan! It’s totally adaptable to your taste.
Crowd-Pleasing:
I can’t think of a soul who wouldn’t enjoy a bite of this! Whether it’s a picky eater or someone who swears they don’t like cauliflower, this recipe will surprise and delight everyone at the table.

Disclosure: This post contains affiliate links.If you click and make a purchase, I may earn a small commission at no extra cost to you.
Ingredients in Baked Cauliflower
Here’s what you’ll need for this crowd-pleasing cauliflower dish:
Cauliflower Florets:
These are the heart and soul of the recipe, and when roasted, they get crispy and flavorful while keeping a nice tender bite.
Olive Oil:
For a little golden touch and that perfectly roasted texture.
Garlic Powder:
This gives the cauliflower that aromatic, savory flavor we all love.
Salt and Pepper:
Simple, but essential. They balance out all the other flavors and enhance the cauliflower’s natural sweetness.
Fresh Herbs (optional):
A sprinkle of parsley, thyme, or rosemary for a bit of fresh flavor and color to make the dish extra pretty.
Parmesan (optional):
If you want to take this dish over the top, a little parmesan goes a long way in adding a savory, cheesy crust.
(Note: the full ingredient list, including measurements, is provided in the recipe card directly below.)
Instructions for Baked Cauliflower
Let’s get cooking and create this crispy, golden cauliflower perfection!
Preheat Your Oven:
Start by preheating your oven to 400°F (200°C). This will help ensure even roasting and that perfectly crispy texture.
Prep the Cauliflower:
Cut your cauliflower into bite-sized florets. You want them all about the same size to ensure they cook evenly.
Season the Cauliflower:
In a large bowl, toss the cauliflower florets with olive oil, garlic powder, salt, and pepper. You want to coat them evenly so every floret gets that savory goodness.
Arrange on a Baking Sheet:
Spread the cauliflower out in a single layer on a baking sheet. Make sure they’re not overcrowded, as this will help them crisp up nicely.
Roast to Perfection:
Pop the baking sheet into the oven and roast for 25-30 minutes, flipping the cauliflower halfway through. Keep an eye on it, and when the edges turn golden and crispy, it’s time to take them out.
Optional: Add Parmesan:
If you want a cheesy kick, sprinkle some parmesan over the cauliflower in the last 5 minutes of roasting. Let it melt into a delicious, golden crust.
Finishing Touches:
Once the cauliflower is perfectly roasted and tender, remove from the oven. Sprinkle with fresh herbs if desired, and serve!
Serve and Enjoy:
That’s it! Serve your baked cauliflower warm as a side dish or a healthy snack. It’s sure to impress with its crispy edges and rich flavor
How to Serve Baked Cauliflower
This baked cauliflower is so versatile—it can stand alone or complement other dishes perfectly.
Fresh Salads:
Pair it with a light, crisp salad to add some refreshing crunch to your meal.
Grains:
Serve it alongside rice, quinoa, or couscous for a satisfying and balanced plate.
Dips:
You can even dip your cauliflower in a creamy dressing like ranch, tzatziki, or garlic aioli for an added layer of flavor.
As a Snack:
Enjoy it as a simple and healthy snack on its own. It’s great for munching in between meals!
Additional Tips
Here are a few bonus tips to make your baked cauliflower even better:
Prep Ahead:
To make life even easier, you can chop and season the cauliflower the night before. Just store it in the fridge, and when you’re ready to cook, it’ll be all set to go!
Spice It Up:
Feel free to experiment with spices like paprika, cumin, or even a little curry powder for a more exotic twist.
Diet Adjustments:
This dish is naturally vegetarian and gluten-free, but it can easily be made vegan by omitting the parmesan or using a dairy-free alternative.
Storage Tips:
Store leftovers in an airtight container in the fridge for up to 3 days. Reheat in the oven for the best texture!
Double the Batch:
This recipe can be easily doubled to feed a crowd! Just make sure to use two baking sheets so the cauliflower can cook evenly.
FAQ Section
Q1: Can I substitute the cauliflower with another vegetable?
A1: Absolutely! Try broccoli or Brussels sprouts for a similar roasted effect. You can adjust the roasting time depending on the veggie you choose.
Q2: Can I make this ahead of time?
A2: Yes! You can prep the cauliflower and store it in the fridge until you’re ready to bake. Roast it just before serving for the best texture.
Q3: How do I store leftovers?
A3: Keep leftovers in an airtight container in the fridge for up to 3 days. Reheat in the oven to maintain the crispiness.
Q4: Can I freeze this dish?
A4: It’s best served fresh, but if you have leftovers, you can freeze them in a sealed container for up to a month. Reheat in the oven to get them crispy again!
Q5: How do I make this spicier?
A5: Add some red pepper flakes, smoked paprika, or even a drizzle of hot sauce before roasting for a spicy kick!
Q6: Is this recipe suitable for keto?
A6: Yes! This baked cauliflower recipe is low-carb and perfect for a keto diet.
Q7: Can I use frozen cauliflower instead of fresh?
A7: Yes, but fresh cauliflower will give you a better texture. If using frozen, make sure to thaw and drain it well before seasoning and roasting.
Q8: What’s the best way to reheat this?
A8: Reheat your leftover baked cauliflower in the oven at 375°F for 5-10 minutes, or until it’s crispy and hot again.
Q9: How do I make this even more flavorful?
A9: Try drizzling with balsamic glaze or lemon juice after roasting for an extra flavor boost!
Q10: Can I double the recipe?
A10: Yes! Just make sure to use two baking sheets so the cauliflower can cook evenly. You may need to extend the cooking time slightly.
Conclusion
And there you have it—your new go-to side dish that’s as simple as it is delicious! Baked Cauliflower is the kind of recipe that will make your taste buds dance, and it’s perfect for any occasion, whether you’re cooking for yourself, your family, or friends. The crispy edges and tender inside are a match made in heaven, and it’s so versatile, you’ll find yourself making it over and over again.
So, don’t wait—give this recipe a try and let it elevate your meals in the easiest, most flavorful way possible. Trust me, once you’ve tasted this, it’ll be hard to imagine a meal without it. Enjoy every bite, and happy cooking!
Print
Baked Cauliflower
- Prep Time: 10 minutes
- Cook Time: 25 minutes
- Total Time: 35 minutes
- Yield: 4 servings 1x
- Category: Side Dish, Vegetarian, Low Carb
- Method: Baking
- Cuisine: American
- Diet: Vegetarian
Description
A delicious and healthy side dish, this Baked Cauliflower is roasted to perfection with garlic powder, paprika, and Parmesan cheese for a flavorful crunch! It’s the perfect guilt-free snack or side.
Ingredients
- 1 medium head of cauliflower, cut into bite-sized florets
- 3 tablespoons olive oil
- 1/2 cup grated Parmesan cheese
- 1 teaspoon garlic powder
- 1/2 teaspoon paprika
- 1/2 teaspoon salt
- 1/4 teaspoon black pepper
- Fresh parsley, chopped (for garnish)
Instructions
- Preheat the Oven: Preheat your oven to 400°F (200°C). Line a baking sheet with parchment paper or a silicone baking mat.
- Prepare the Cauliflower: In a large bowl, toss the cauliflower florets with olive oil until evenly coated.
- Season the Cauliflower: In a separate bowl, mix the Parmesan cheese, garlic powder, paprika, salt, and black pepper. Sprinkle this mixture over the cauliflower and toss to coat thoroughly.
- Arrange on the Baking Sheet: Spread the seasoned cauliflower florets in a single layer on the prepared baking sheet.
- Bake: Bake in the preheated oven for 25-30 minutes, or until the cauliflower is tender and golden brown, stirring halfway through for even cooking.
- Garnish and Serve: Sprinkle the baked cauliflower with fresh parsley and serve warm. Pair it with your favorite dipping sauce for extra flavor!
Notes
- Feel free to add extra seasonings such as red pepper flakes or onion powder to suit your taste.
- For extra crispiness, broil for 1-2 minutes at the end of baking.
- This recipe is also great for meal prep!
Nutrition
- Serving Size: 1/4 of the recipe
- Calories: ~150
- Sugar: 2g
- Sodium: 450mg
- Fat: 11g
- Saturated Fat: 2g
- Unsaturated Fat: 8g
- Trans Fat: 0g
- Carbohydrates: 10g
- Fiber: 4g
- Protein: 6g
- Cholesterol: 6mg

