

Velvet-Smooth Dream: Homemade Crema Pasticcera Delight
If you’ve never made crema pasticcera from scratch before, you’re in for an absolute treat. This isn’t just a custard—it’s a silky, spoonable hug. Rich yet light, sweet but not cloying, and so versatile you’ll find yourself dreaming up excuses to use it. Whether you’re filling a flaky tart, layering it in a trifle, or just sneaking spoonfuls straight from the bowl (no judgment here!), this recipe is one you’ll come back to again and again.
The scent alone—vanilla swirling through warm milk—feels like being wrapped in your coziest blanket. And when it cools into that perfect, glossy texture? Oh, trust me, you’re going to love this. It’s luxurious, yes, but surprisingly simple to pull together, even if you’re not usually the dessert-making type. Think of this as your dessert secret weapon—elegant, comforting, and endlessly crowd-pleasing.
Why You’ll Love Velvet-Smooth Dream: Homemade Crema Pasticcera Delight
This recipe isn’t just about the ingredients—it’s about creating moments. Whether you’re whipping this up for a fancy dinner party or just craving something deliciously nostalgic, it’s a sweet celebration in every spoonful.
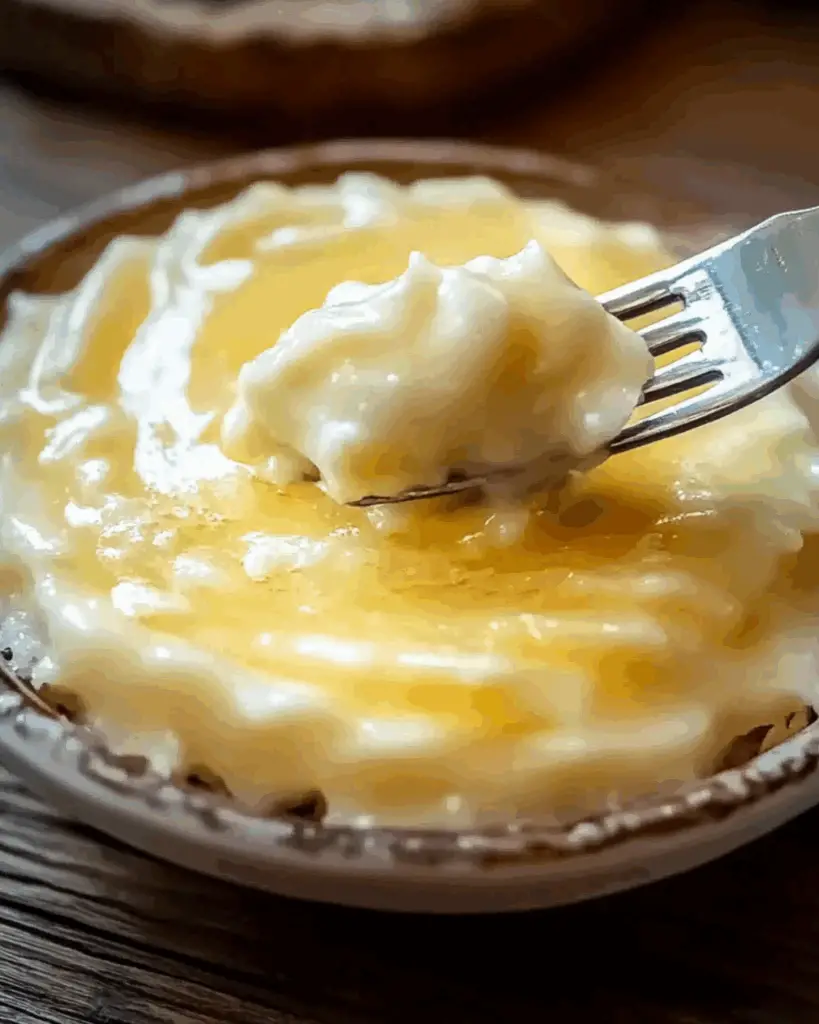
Velvety Texture: Silky-smooth, glossy, and indulgently creamy—this custard sets to perfection and melts on your tongue.
Simple Ingredients: You probably already have everything you need in your kitchen. No fancy gadgets or rare ingredients required.
Foolproof Method: The steps are easy to follow, even if you’re new to making custards.
Versatile Use: Use it as a tart filling, cake layer, eclair filling, or a luxurious dessert base.
Comfort in a Bowl: It brings old-school bakery charm into your home. Every bite feels like a warm memory.
Disclosure: This post contains affiliate links.If you click and make a purchase, I may earn a small commission at no extra cost to you.


Ingredients in Velvet-Smooth Dream: Homemade Crema Pasticcera Delight
Here’s the beauty of this Italian classic—it’s made with humble ingredients that work together to create something extraordinary.
Whole Milk
The creamy base that brings everything together. Using whole milk gives the custard that rich, luscious mouthfeel.
Egg Yolks
These golden gems provide the luxurious thickness and smooth texture. They’re the secret to that signature custard richness.
Granulated Sugar
Sweetens the deal without overwhelming the delicate vanilla flavor. It balances the richness of the yolks perfectly.
Cornstarch
Helps to thicken the custard without making it heavy. It keeps the texture silky instead of stodgy.
Unsalted Butter
Adds a glossy finish and rounds out the flavor with just a touch of richness.
Vanilla Bean or Extract
Infuses the custard with warm, aromatic notes. If you have vanilla bean, it’s a game-changer—but high-quality extract works beautifully too.
Instructions
Let’s dive into the steps to create this spoonful-of-heaven masterpiece:
Heat the Milk
In a saucepan over medium heat, warm the milk just until it begins to steam. Don’t let it boil—you’re coaxing out flavor, not scalding it.
Whisk the Yolks and Sugar
In a separate bowl, whisk the egg yolks and sugar together until the mixture is pale and creamy. This step adds air and helps create that dreamy texture.
Add the Cornstarch
Whisk the cornstarch into the egg-sugar mixture until smooth and lump-free. It should look like a glossy cake batter.
Temper the Eggs
Slowly drizzle the warm milk into the egg mixture, whisking constantly to avoid curdling. This gently brings the eggs up to temperature.
Cook the Custard
Pour the mixture back into the saucepan and cook over medium heat, stirring constantly. Watch as it thickens into custardy goodness. Once it starts to bubble, let it cook for about a minute more to eliminate any starchy taste.
Add Butter and Vanilla
Remove from heat and stir in the butter and vanilla. The butter adds richness and sheen, while the vanilla brings everything together with that cozy, comforting aroma.
Strain and Chill
For ultra-smooth results, strain the custard through a fine mesh sieve. Then, cover with plastic wrap directly on the surface to prevent a skin from forming and chill completely.
Enjoy
Use it as a filling, a dip, or enjoy it by the spoonful. Either way, you’ve just made magic.
How to Serve Velvet-Smooth Dream: Homemade Crema Pasticcera Delight
This dreamy custard is the ultimate multitasker. Here are some of the best ways to serve it:
In Pastries: Pipe it into cream puffs, éclairs, or cannoli for a bakery-worthy treat.
As a Tart Filling: Spread it into a baked tart shell and top with fresh berries for a show-stopping dessert.
With Fruit: Serve it with poached pears or grilled peaches for a light yet decadent pairing.
Layered in Trifles: Alternate with sponge cake, fruit, and whipped cream for a stunning layered dessert.
Simply in a Bowl: Sprinkle with a bit of cinnamon or cocoa and enjoy it warm or chilled—sometimes simple is best.
Additional Tips
Want to take your crema pasticcera to the next level? Here are a few extra secrets to success:
Whisk Constantly: This helps prevent lumps and ensures even cooking.
Low and Slow: Don’t rush the cooking process. Gentle heat is key.
Use Fresh Ingredients: Fresh eggs and quality milk make all the difference.
Flavor Boosts: Add citrus zest, a splash of liqueur, or almond extract for variations.
Storage: Store in the fridge with plastic wrap touching the surface for up to 3 days.
FAQ Section
Q1: Can I make crema pasticcera ahead of time?
A1: Absolutely! It actually improves with a little chill time. Make it up to 2–3 days in advance.
Q2: How do I prevent lumps in the custard?
A2: Constant whisking and proper tempering are key. Also, straining at the end ensures a flawless finish.
Q3: Can I use plant-based milk?
A3: You can, but the texture may be slightly different. Choose a creamy option like oat or soy for best results.
Q4: What can I use instead of cornstarch?
A4: You can use all-purpose flour or potato starch, though cornstarch gives the silkiest texture.
Q5: Can I freeze crema pasticcera?
A5: Not recommended. Freezing can break the texture. It’s best enjoyed fresh or chilled from the fridge.
Q6: Can I use it warm?
A6: Yes! It’s divine warm over fresh cake or fruit. Just be cautious not to overheat when reheating.
Q7: How long does it last in the fridge?
A7: Up to 3 days, tightly covered with plastic wrap on the surface to prevent skin formation.
Q8: Can I add chocolate?
A8: Definitely! Stir in chopped dark chocolate at the end while it’s still warm for a luxurious twist.
Q9: Is this gluten-free?
A9: Yes, as long as you use cornstarch and ensure all ingredients are certified gluten-free.
Q10: What’s the best way to reheat?
A10: Gently in a saucepan over low heat, stirring constantly. Add a splash of milk if needed to loosen it up.
Conclusion
And there you have it, my friend—your homemade Crema Pasticcera, silky-smooth and bursting with that warm, vanilla-kissed richness that’s pure comfort in every spoonful. Whether you’re layering it into a stunning trifle, piping it into éclairs, or just sneaking a spoonful straight from the bowl (hey, no judgment here!), this luscious pastry cream is a total game-changer. It’s one of those go-to recipes that feels fancy but is secretly so simple. Trust me, once you’ve tasted it fresh, you’ll never settle for the store-bought stuff again.
Print
Velvet-Smooth Dream: Homemade Crema Pasticcera Delight
- Prep Time: 10 minutes
- Cook Time: 10 minutes
- Total Time: 2 hours 30 minutes (includes chilling)
- Yield: About 2 1/2 cups
- Category: Dessert
- Method: Stovetop
- Cuisine: Italian
- Diet: Vegetarian
Description
This silky-smooth Crema Pasticcera is the heart of so many Italian desserts—rich, velvety, and just sweet enough. Use it in tarts, layer cakes, filled pastries, or enjoy it by the spoonful. #CremaPasticcera #ItalianPastryCream #CustardFilling
Ingredients
Dairy Base
- 1 cup whole or 2% milk, divided
- 1 cup heavy whipping cream
Sweeteners
- 2/3 cup granulated sugar (for a lightly sweet version, use 1/2 cup)
Egg Mixture
- 5 large egg yolks, room temperature
- 1/2 tablespoon all-purpose flour
- 2 tablespoons cornstarch
Finishers
- 2 tablespoons salted butter
- 1/2 teaspoon vanilla extract
Instructions
- Heat milk and sugar: In a medium saucepan, whisk together 1/2 cup of the milk, the heavy cream, and the sugar. Heat over medium heat, stirring constantly, until the mixture steams and is just about to boil (4–5 minutes). Remove from heat and set aside.
- Whisk egg mixture: In a large bowl, whisk the egg yolks, flour, and cornstarch with the remaining 1/2 cup of milk until smooth and lump-free.
- Temper the eggs: To avoid scrambling the yolks, whisk a few tablespoons of the hot milk mixture into the egg mixture. Stir constantly to combine.
- Strain and combine: Pour the tempered egg mixture through a fine mesh sieve into the saucepan with the hot milk, whisking to fully incorporate.
- Cook until thick: Return the pan to medium heat and cook, stirring constantly, until the mixture comes to a simmer—about 5 minutes. Let it simmer for 1 minute until thickened.
- Cool quickly: Immediately strain the pastry cream through a fine mesh strainer into a clean bowl set over an ice bath to stop the cooking.
- Add butter and vanilla: Stir in the butter and vanilla extract until fully melted and incorporated.
- Chill: Press plastic wrap directly against the surface of the custard (to prevent a skin) and refrigerate until completely cooled, about 2–3 hours.
- Store: Keep in an airtight container in the refrigerator and use within 5 days.
Notes
- Use this custard in fruit tarts, cream puffs, éclairs, layer cakes, or as a filling for croissants.
- Always strain your custard—it ensures a perfectly smooth texture every time.
- For a citrus twist, add lemon zest with the vanilla.
Nutrition
- Serving Size: 1/4 cup
- Calories: 160
- Sugar: 13g
- Sodium: 35mg
- Fat: 11g
- Saturated Fat: 7g
- Unsaturated Fat: 3g
- Trans Fat: 0g
- Carbohydrates: 14g
- Fiber: 0g
- Protein: 2g
- Cholesterol: 110mg


