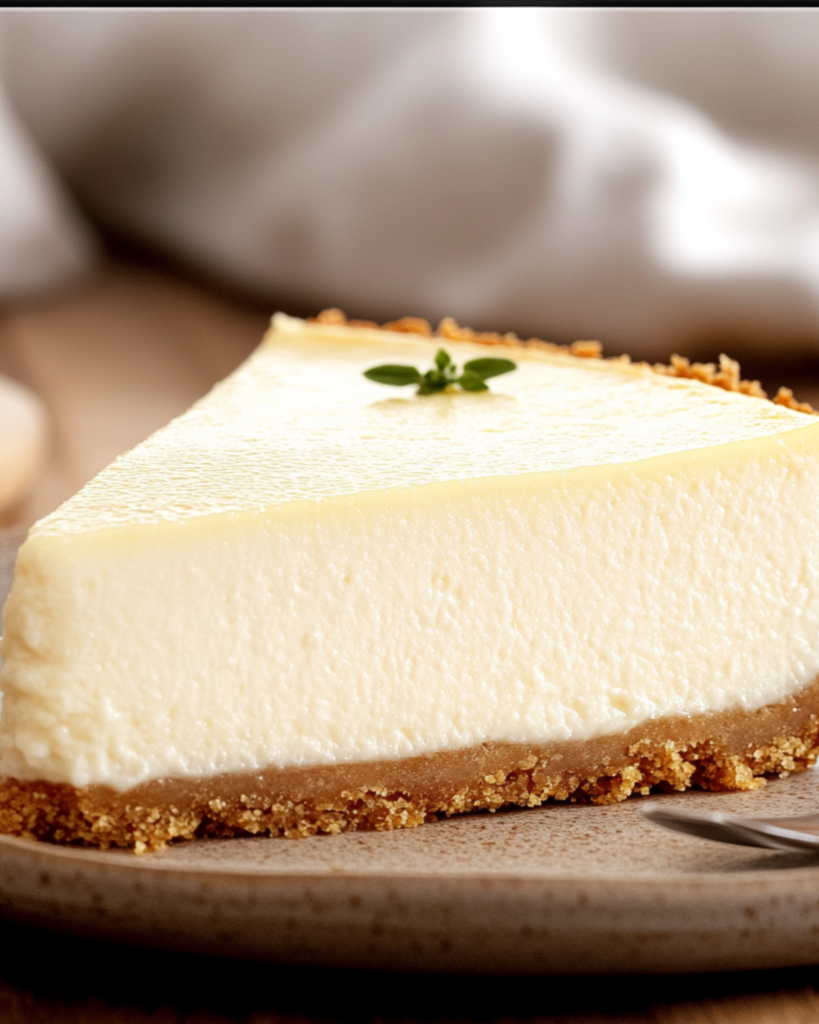
Vanilla Bean Cheesecake with a Vanilla Wafer Crust
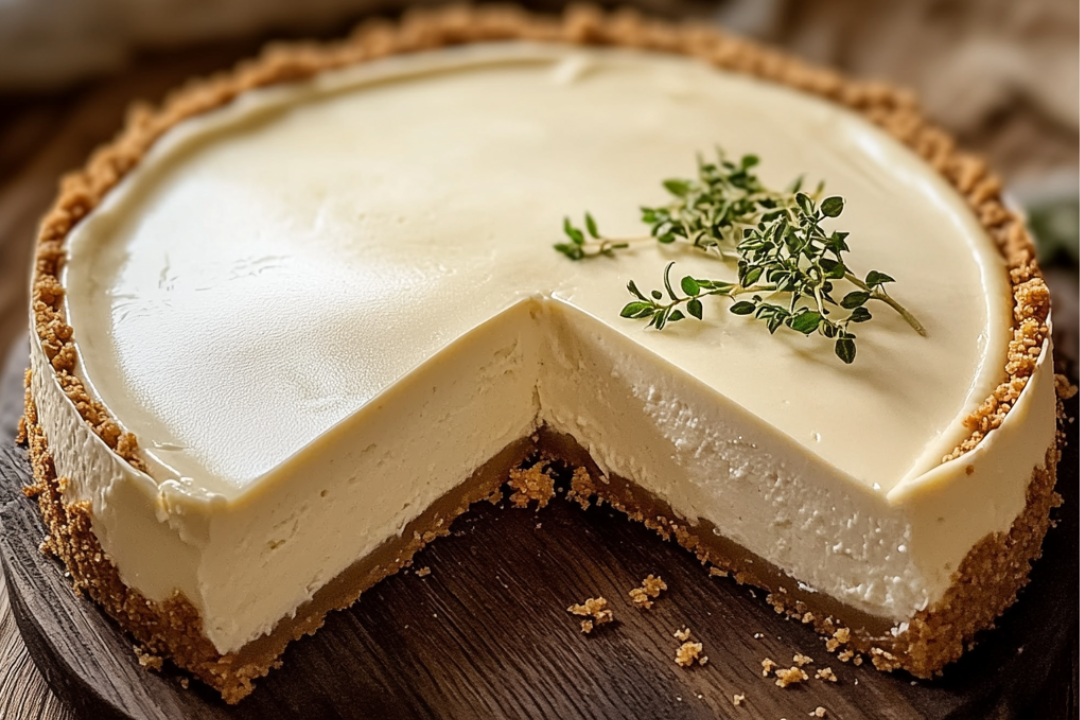
If you’re looking for a dessert that oozes elegance and indulgence, look no further! This Vanilla Bean Cheesecake with a Vanilla Wafer Crust is exactly what you need. Imagine biting into a velvety, creamy cheesecake that’s rich with the flavor of real vanilla beans, sitting perfectly on top of a crisp, buttery vanilla wafer crust. It’s decadent, it’s comforting, and trust me, you’re going to love every bite. Whether you’re serving it for a special occasion or just because you deserve a treat, this cheesecake is sure to steal the show!
Why You’ll Love Vanilla Bean Cheesecake with a Vanilla Wafer Crust
This cheesecake is so much more than just a dessert—it’s an experience. From the delicate vanilla bean specks throughout the smooth filling to the crunchy, golden crust, every bite is an explosion of flavor and texture. Here’s why it’s a go-to favorite:
Versatile: Perfect for special celebrations like birthdays and holidays, but also great as an everyday treat. It’s a crowd-pleaser that fits any occasion.
Budget-Friendly: With just a few pantry staples like cream cheese, eggs, and vanilla wafers, you can create a masterpiece that feels incredibly indulgent without breaking the bank.
Quick and Easy: No need for a complicated process. This cheesecake is easy to prepare with simple steps, and though it requires time to set, the active cooking time is minimal.
Customizable: You can tweak it however you like! Add a fruit topping, drizzle with caramel, or even mix in chocolate chips for a twist on the classic.
Crowd-Pleasing: Cheesecake is one of those desserts that always makes a lasting impression. Whether it’s kids or adults, everyone loves a slice of this creamy goodness!
Disclosure: This post contains affiliate links.If you click and make a purchase, I may earn a small commission at no extra cost to you.
Ingredients
Here’s what you need for this dreamy cheesecake:
For the Crust:
- Vanilla Wafer Cookies: The buttery base that gives this cheesecake its crunchy, melt-in-your-mouth crust. These cookies are the perfect balance of sweetness and flavor.
- Butter: Helps hold the crust together and adds richness. It gives that slightly toasted flavor to the crust when baked.
For the Cheesecake:
- Cream Cheese: The main base of the cheesecake. It makes the filling smooth, rich, and ultra-creamy.
- Granulated Sugar: Adds the right amount of sweetness to the cheesecake without overwhelming it.
- Vanilla Beans: This is where the magic happens. Real vanilla beans bring an aromatic depth that elevates the flavor and makes this cheesecake feel extra special. You can also use vanilla extract if you’re in a pinch.
- Sour Cream: Adds a touch of tanginess, which balances the richness of the cream cheese.
- Eggs: They help set the cheesecake and give it structure, while keeping the texture smooth and creamy.
- Vanilla Extract: For that extra vanilla punch to complement the beans and round out the flavor.
(Note: The full ingredient measurements are provided in the recipe card above.)
Instructions
Let’s dive into the steps to create this creamy masterpiece:
Preheat Your Oven:
Start by preheating your oven to 325°F (163°C). This ensures the cheesecake bakes evenly and slowly.
Prepare the Crust:
In a food processor or by hand, crush the vanilla wafer cookies into fine crumbs. Then, melt the butter and combine it with the crumbs. Press the mixture firmly into the bottom of a 9-inch springform pan, creating an even crust. Bake for 8-10 minutes, then set it aside to cool.
Make the Cheesecake Filling:
In a large mixing bowl, beat the cream cheese until smooth and creamy. Gradually add in the sugar, and continue to beat until it’s fluffy and well-combined. Add the vanilla bean seeds (scraped from the pod) and vanilla extract, followed by the sour cream. Finally, mix in the eggs one at a time, making sure everything is fully incorporated without overmixing.
Assemble the Cheesecake:
Pour the cheesecake filling over the cooled crust, spreading it out evenly. Tap the pan gently on the counter to remove any air bubbles.
Bake the Cheesecake:
Bake in the preheated oven for 55-60 minutes, or until the center is set but slightly jiggly. It’s okay if the edges are golden—just be sure the center isn’t too firm.
Cool and Chill:
Turn off the oven, crack the door, and let the cheesecake cool in the oven for 1 hour. Afterward, refrigerate it for at least 4 hours, preferably overnight, to allow it to set completely.
Serve and Enjoy:
Once chilled, remove the cheesecake from the springform pan and transfer it to a serving platter. Slice it up and garnish with fresh berries, whipped cream, or a drizzle of caramel. It’s ready to impress!
Nutrition Facts
Servings: 1 slice
Calories per serving: 450
How to Serve Vanilla Bean Cheesecake with a Vanilla Wafer Crust
This cheesecake pairs beautifully with a variety of sides and toppings:
- Fresh Berries: Berries like strawberries, blueberries, or raspberries are a light and tart contrast to the rich, creamy cheesecake.
- Whipped Cream: A dollop of freshly whipped cream adds a fluffy and sweet touch to each slice.
- Caramel Sauce: Drizzle a little caramel sauce over the top for a rich and indulgent finish.
- Chocolate Ganache: A decadent chocolate drizzle is always a good idea if you’re a chocolate lover.
Presentation is key! Serve your cheesecake on a beautiful platter with a sprig of mint for a pop of color.
Additional Tips
- Prep Ahead: You can make this cheesecake the day before and store it in the fridge to save time. The flavors will only get better as it sets.
- Spice It Up: Try adding a little cinnamon or nutmeg to the crust for an extra layer of flavor.
- Dietary Adjustments: For a gluten-free version, use gluten-free vanilla wafers for the crust.
- Storage Tips: Store leftovers in an airtight container in the fridge for up to 5 days. If you want to freeze it, slice and wrap each piece individually in plastic wrap and foil, then freeze for up to 2 months.
- Double the Batch: You can make a larger batch for a bigger crowd by doubling the recipe and using a 10-inch springform pan.
FAQ Section
Q1: Can I substitute vanilla extract for vanilla beans?
A1: Yes, you can! Use about 1 tablespoon of high-quality vanilla extract for every vanilla bean. It won’t have the same richness, but it still works beautifully.
Q2: How do I prevent cracks in my cheesecake?
A2: To prevent cracks, bake your cheesecake in a water bath and avoid overmixing the batter. Let the cheesecake cool gradually in the oven before chilling.
Q3: Can I make this cheesecake gluten-free?
A3: Yes! Simply use gluten-free vanilla wafers for the crust.
Q4: What size pan should I use for this cheesecake?
A4: A 9-inch springform pan is perfect for this recipe. It allows for even baking and easy removal once cooled.
Q5: How long should I chill the cheesecake before serving?
A5: Chill it for at least 4 hours, but overnight is best for the cheesecake to fully set and allow the flavors to develop.
Q6: Can I freeze this cheesecake?
A6: Absolutely! Wrap the cheesecake tightly and freeze for up to 2 months. Thaw in the fridge before serving.
Q7: What toppings are best for this cheesecake?
A7: Fresh berries, whipped cream, caramel sauce, or chocolate ganache all complement the creamy texture of this cheesecake.
Q8: How do I prevent my cheesecake from being too dense?
A8: Don’t overmix the batter, and make sure your cream cheese is at room temperature. This ensures a smooth, creamy texture.
Q9: Can I double the recipe?
A9: Yes, you can! Just use a larger pan (10-12 inches) and adjust the baking time slightly.
Q10: How can I make this cheesecake more decadent?
A10: Add a swirl of fruit preserves to the batter or top with caramel, chocolate, or a mix of nuts for added crunch.
Conclusion
This Vanilla Bean Cheesecake with a Vanilla Wafer Crust is a dessert that truly impresses without being overly complicated. It strikes the perfect balance between rich, creamy goodness and a buttery, crunchy crust. Whether you’re serving it for a special celebration or enjoying it as a little indulgence for yourself, this cheesecake is sure to become a favorite. The combination of real vanilla beans, creamy filling, and the crisp crust creates a dessert that’s both timeless and irresistible. So go ahead—take that first bite, savor the flavors, and know that you’ve just created something extraordinary. Enjoy every single slice!
Print
Vanilla Bean Cheesecake with a Vanilla Wafer Crust
- Prep Time: 20 minutes
- Cook Time: 1 hour 10 minutes
- Total Time: 8 hours 30 minutes
- Yield: 12 slices
- Category: Dessert
- Method: Baking
- Cuisine: American
- Diet: Vegetarian
Description
Indulge in this luxurious Vanilla Bean Cheesecake with a buttery vanilla wafer crust. It’s creamy, rich, and infused with the sweet aroma of real vanilla bean. Perfect for any special occasion or simply to treat yourself.
Ingredients
-
For the Crust:
- 2 cups vanilla wafer crumbs (about 50 wafers) — Sweet and crunchy base
- 1/3 cup unsalted butter, melted — Helps bind the crust together
- 2 tablespoons granulated sugar — Adds a touch of sweetness
For the Cheesecake Filling:
- 3 (8-ounce) packages cream cheese, softened — Creates a rich, creamy texture
- 1 cup granulated sugar — Adds sweetness to the filling
- 1 cup sour cream — Adds tangy richness
- 1 tablespoon pure vanilla extract — Infuses warm vanilla flavor
- 1 vanilla bean (or 1 tsp vanilla bean paste) — For those aromatic specks
- 3 large eggs — Binds the filling together
- 2 tablespoons all-purpose flour — Helps stabilize the cheesecake
- 1/4 cup heavy cream — Ensures a silky texture
For the Topping (Optional):
- Fresh whipped cream — Light and fluffy garnish
- Vanilla bean specks — For an elegant touch
Instructions
1. Make the Crust:
- Preheat your oven to 325°F (160°C).
- Crush vanilla wafers into fine crumbs using a food processor or by placing them in a resealable bag and crushing with a rolling pin.
- In a medium bowl, mix the wafer crumbs, melted butter, and sugar until combined.
- Press the mixture firmly into the bottom of a 9-inch springform pan, going slightly up the sides if desired.
- Bake for 10 minutes, then set aside to cool.
2. Prepare the Cheesecake Filling:
- In a large mixing bowl, beat the softened cream cheese with sugar until smooth and creamy, about 2–3 minutes.
- Mix in the sour cream, vanilla extract, and seeds from the vanilla bean (split the vanilla bean lengthwise and scrape out the seeds).
- Add eggs one at a time, beating just until combined after each addition (avoid overmixing).
- Stir in the flour and heavy cream until smooth and evenly blended.
3. Assemble and Bake:
- Pour the cheesecake filling over the cooled crust.
- Place the springform pan on a baking sheet and bake in the preheated oven for 60–70 minutes, or until the edges are set and the center is slightly jiggly.
- Turn off the oven, crack the door open, and let the cheesecake cool in the oven for 1 hour (this prevents cracking).
4. Cool and Chill:
- Remove the cheesecake from the oven, run a knife around the edges, and let it cool completely at room temperature.
- Cover and refrigerate for at least 6 hours or overnight for the best flavor and texture.
5. Serve:
- Remove the cheesecake from the springform pan.
- Top with fresh whipped cream and sprinkle with vanilla bean specks if desired.
- Slice and enjoy the rich, velvety goodness!
Notes
- For an extra pop of flavor, consider drizzling caramel or chocolate sauce over the cheesecake before serving.
- Always bring the cream cheese to room temperature for a smoother filling.
Nutrition
- Serving Size: 1 slice
- Calories: 450
- Sugar: 28g
- Sodium: 240mg
- Fat: 32g
- Saturated Fat: 18g
- Unsaturated Fat: 12g
- Trans Fat: 0g
- Carbohydrates: 35g
- Fiber: 0g
- Protein: 6g
- Cholesterol: 130mg

