

Ultimate Festive Peppermint Ice Cream Cake
You know that moment when you just need something sweet, something festive, something perfect to round off a cozy dinner or impress at a holiday party? Well, trust me, this Ultimate Festive Peppermint Ice Cream Cake is exactly what you’ve been waiting for. Picture this: layers of creamy, dreamy peppermint ice cream, a rich chocolatey base, and a hint of minty magic in every bite. It’s like a holiday in your mouth—refreshing, indulgent, and so much fun. And guess what? You don’t even need to be a pro in the kitchen to pull it off! It’s one of those desserts that will make everyone think you’ve spent hours crafting it, but really, it’s all about the layers and the love you put into it. Trust me—you’re going to love this!
Why You’ll Love Ultimate Festive Peppermint Ice Cream Cake
This recipe isn’t just about the ingredients—it’s about creating moments that you’ll remember. Whether it’s for a festive get-together, a special birthday, or a cozy night in, this cake brings the perfect blend of cool, creamy, and sweet, with a dash of holiday cheer. Here’s why it’s a total favorite:
- Versatile: It’s perfect for almost any occasion. Whether you’re celebrating with family or impressing your friends at a holiday party, this cake is your new go-to. Imagine seeing your guests’ faces when you bring this beauty to the table!
- Budget-Friendly: No need to splurge on fancy ingredients. Most of what you need is already in your pantry, which means you get an extravagant dessert without breaking the bank.
- Quick and Easy: No complicated steps here, just layer, freeze, and indulge! Even if you’re not the most experienced baker, you can still nail this one.
- Customizable: Love chocolate more than peppermint? Feel free to adjust the ratio to your taste. Want a bit more crunch? Add some crushed cookies or a drizzle of caramel on top for an extra flair!
- Crowd-Pleasing: From kids to adults, everyone’s going to love this. It’s the kind of dessert that sparks joy—and maybe even a little bit of that “extra slice” feeling!
Disclosure: This post contains affiliate links.If you click and make a purchase, I may earn a small commission at no extra cost to you.


Ingredients in Ultimate Festive Peppermint Ice Cream Cake
Here’s the magic of this ice cream cake—it combines a few simple ingredients, but the result is something truly special. Let’s break it down:
Chocolate Crust:
- Crushed chocolate cookies: The foundation of your cake—crispy, chocolaty, and the perfect contrast to the creamy ice cream.
- Melted butter: This is the glue that holds the crust together, giving it that perfect buttery crunch.
Peppermint Ice Cream:
- Peppermint ice cream: The star of the show! Smooth, rich, and refreshing with that perfect minty bite.
- Whipped cream: To make it extra creamy and dreamy.
- Crushed peppermint candies or candy canes: A crunchy, sweet, and peppermint-y kick that adds texture and that holiday charm.
Chocolate Ganache Topping:
- Heavy cream: For that luscious, silky ganache texture.
- Semi-sweet chocolate: The rich and melty topping that brings everything together.
(Note: The full ingredients list, including measurements, is provided in the recipe card directly below.)
Instructions
Let’s dive into the steps to create this showstopper:
Step 1: Prepare the Crust
Start by crushing your chocolate cookies into fine crumbs. You can use a food processor or place them in a Ziploc bag and smash them with a rolling pin—whatever works for you. Mix the crumbs with the melted butter until everything’s evenly coated. Then, press the mixture firmly into the bottom of a springform pan or any cake pan you like. Pop it into the freezer while you work on the next steps.
Step 2: Layer the Peppermint Ice Cream
Let the peppermint ice cream soften a bit on the counter for about 5-10 minutes. This makes it easier to spread. Once it’s nice and soft, spread it evenly over the chilled cookie crust. Smooth it out with a spatula to get an even layer, and then sprinkle crushed peppermint candies or candy canes on top. The crunch from the candy adds a delightful texture to each bite!
Step 3: Freeze Until Firm
Once the peppermint layer is spread and sprinkled, cover the pan with plastic wrap and place it in the freezer. Let it freeze for at least 2 hours or until the ice cream is completely set. This ensures that it’s firm and ready for the final chocolate ganache layer.
Step 4: Prepare the Ganache Topping
While the ice cream layer is freezing, make the chocolate ganache. Heat the heavy cream in a small saucepan over medium heat until it’s just about to boil. Pour the hot cream over the semi-sweet chocolate (either chopped or in chips) and let it sit for a minute. Stir gently until the chocolate is melted and smooth. Let the ganache cool for a bit before pouring it over the frozen ice cream layer.
Step 5: Final Freezing & Serving
Once your ganache has cooled slightly, pour it over the frozen ice cream and spread it evenly. Place the cake back into the freezer for another 30-60 minutes to let the ganache set. When ready, remove from the pan, slice, and serve!
How to Serve Ultimate Festive Peppermint Ice Cream Cake
This peppermint ice cream cake is decadent enough to stand on its own, but here are a few ideas to take it up a notch:
- With a Hot Beverage: Pair it with a warm cup of hot chocolate, coffee, or even spiced tea to balance out the cool, creamy texture.
- Whipped Cream: A dollop of fresh whipped cream on top for extra fluff and sweetness always goes a long way!
- Chocolate Drizzle: For that extra touch, drizzle some more melted chocolate ganache or caramel sauce on top.
- Holiday Fruit: Fresh berries like raspberries or strawberries would provide a fresh and slightly tangy contrast to the rich flavors.
Additional Tips
Here are some extra tips to make this ice cream cake even more amazing:
- Prep Ahead: Make the cake the day before and freeze overnight. This makes it a perfect option for busy days when you still want to wow your guests.
- Mix It Up: Try using a different ice cream flavor, like chocolate or vanilla, for a new twist on the classic.
- Decorate: Add some extra festive decorations like chocolate shavings, a dusting of powdered sugar, or even some sprinkles for extra holiday cheer.
FAQ Section
Q1: Can I substitute peppermint ice cream with a different flavor?
A1: Absolutely! If you’re not a fan of peppermint, try using chocolate, vanilla, or even coffee ice cream for a unique spin.
Q2: Can I make this cake ahead of time?
A2: Yes! In fact, it’s a great make-ahead dessert. Just freeze it until you’re ready to serve.
Q3: How do I store leftovers?
A3: Store leftovers in an airtight container or wrap them tightly in plastic wrap, then freeze for up to a week.
Q4: Can I freeze the cake?
A4: Yes! The cake freezes beautifully. Just make sure to cover it well and let it sit at room temperature for a few minutes before slicing when you’re ready to serve.
Q5: Can I double the recipe?
A5: Of course! Just make sure you have a larger pan and adjust the freezing times as needed.
Q6: Is this recipe suitable for [specific diet]?
A6: With a few tweaks, it can be! For example, use dairy-free ice cream to make it vegan, or swap in gluten-free cookies for a gluten-free version.
Conclusion
This Ultimate Festive Peppermint Ice Cream Cake is everything you need in a holiday dessert: sweet, creamy, refreshing, and so fun to make! Whether you’re enjoying it for a quiet night in or serving it at a holiday bash, this cake will definitely steal the show. So go ahead, treat yourself (and your guests) to something truly unforgettable—you’re going to love it!
Print
Ultimate Festive Peppermint Ice Cream Cake
- Prep Time: 15 minutes (plus 4 hours freezing time)
- Cook Time: None (no baking required)
- Total Time: 15 minutes + 4 hours freezing time
- Yield: 12 servings
- Category: Dessert, Holiday, Frozen Dessert
- Method: No-Bake, Freezer
- Cuisine: American
- Diet: Vegetarian
Description
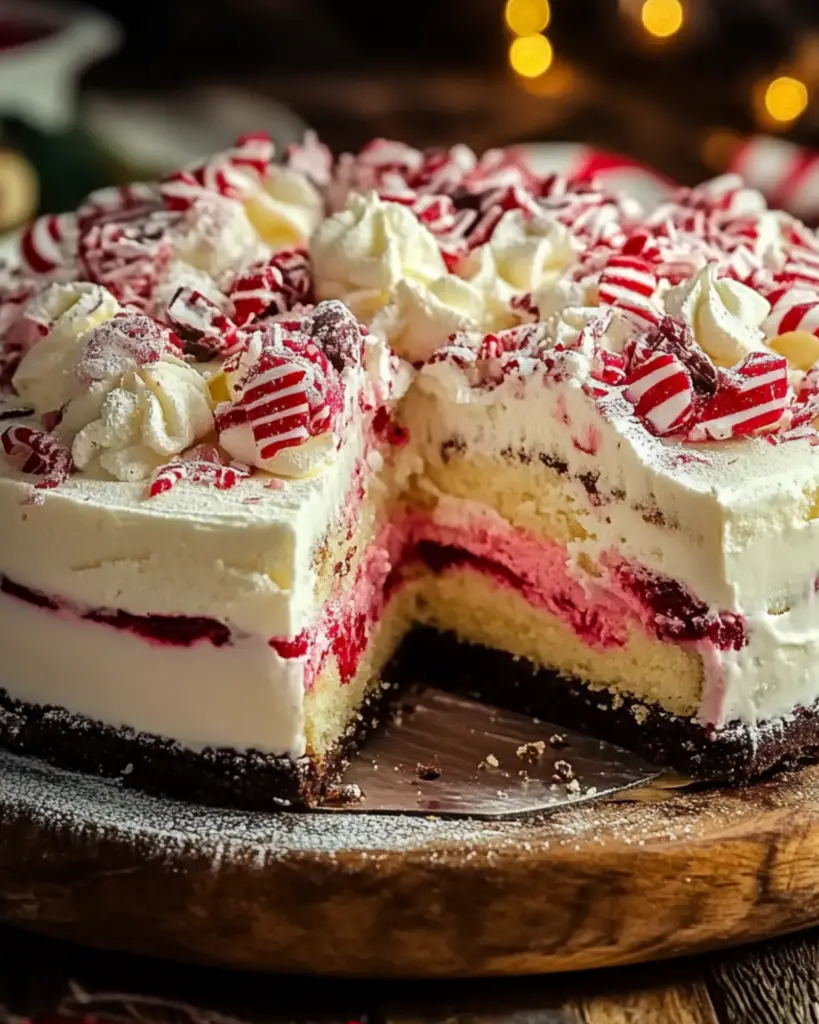
A delightful holiday treat, this Ultimate Festive Peppermint Ice Cream Cake is packed with festive flavor. With layers of chocolate cookie crust, creamy peppermint ice cream, and fluffy whipped topping, it’s a showstopper dessert for any celebration
Ingredients
-
For the Crust:
- 2 cups (200g) chocolate cookie crumbs (e.g., Oreos, without filling)
- 6 tbsp (85g) unsalted butter, melted
For the Ice Cream Layer:
- 1 ½ quarts (1.4 liters) peppermint ice cream, slightly softened
- ½ cup (50g) crushed peppermint candies or candy canes
For the Whipped Topping:
- 2 cups (480ml) heavy whipping cream
- 3 tbsp powdered sugar
- ½ tsp vanilla extract
For Garnish:
- Crushed candy canes or peppermint candies
- Chocolate shavings or mini chocolate chips
Instructions
-
Prepare the Crust:
- Grease a 9-inch springform pan or line it with parchment paper.
- Mix the chocolate cookie crumbs with the melted butter until well combined.
- Press the mixture firmly into the bottom of the pan and freeze for 15 minutes.
-
Add the Ice Cream Layer:
- Spread the softened peppermint ice cream evenly over the crust.
- Sprinkle crushed peppermint candies or candy canes on top of the ice cream for added crunch.
- Cover the pan with plastic wrap and freeze for at least 4 hours, or until the ice cream is firm.
-
Make the Whipped Topping:
- In a chilled bowl, whip the heavy cream, powdered sugar, and vanilla extract together until stiff peaks form.
-
Assemble the Cake:
- Spread the whipped topping evenly over the frozen ice cream layer.
- Garnish with additional crushed candy canes or peppermint candies, and sprinkle chocolate shavings or mini chocolate chips on top for extra decoration.
- Freeze the cake for an additional hour to set the whipped topping.
-
Serve and Enjoy:
- Slice and serve this festive peppermint ice cream cake straight from the freezer for a cool, creamy holiday treat
Notes
- For a quicker prep, use store-bought peppermint ice cream, or feel free to make your own if you prefer!
- You can add chocolate syrup or drizzle caramel sauce over individual slices for an extra treat.
- The cake can be made ahead and stored in the freezer for up to a week. Just make sure to cover it properly to prevent freezer burn.
Nutrition
- Serving Size: 1 slice (1/12 of the cake)
- Calories: 310 kcal
- Sugar: 28g
- Sodium: 120mg
- Fat: 21g
- Saturated Fat: 13g
- Unsaturated Fat: 6g
- Trans Fat: 0g
- Carbohydrates: 32g
- Fiber: 2g
- Protein: 3g
- Cholesterol: 55mg


