

The Ultimate No-Bake Chocolate Pudding Pie
Oh, boy, do I have a treat for you today! If you’re a chocolate lover (and let’s be honest, who isn’t?), this No-Bake Chocolate Pudding Pie is going to steal your heart. Imagine silky, velvety chocolate pudding tucked inside a buttery, crumbly pie crust, then topped with a fluffy layer of whipped cream. It’s the dessert that practically makes itself, and trust me, you’ll be getting requests for this one every time you bring it to the table. The best part? No oven required!
This dessert is a game-changer, perfect for those busy days when you want something decadent but don’t want to spend hours in the kitchen. Ready to dive in? Let’s get started!
Why You’ll Love No-Bake Chocolate Pudding Pie
This recipe isn’t just about the ingredients—it’s about creating moments. Whether you’re cooking for a casual family dinner, hosting a get-together with friends, or simply indulging in some comforting flavors for yourself, this dish is versatile enough to fit the occasion. Here’s why it’s a favorite:
Versatile
Perfect for any occasion—whether it’s a cozy night in, a holiday gathering, or a weekend barbecue. It’s so simple, yet it feels special enough to serve as the star of the show.
Budget-Friendly
This pie uses common pantry staples, meaning you can whip it up without breaking the bank. It’s one of those recipes where you don’t need fancy ingredients to create something that tastes downright indulgent.
Quick and Easy
If you love desserts but dread complicated recipes, this one’s for you! With just a few steps, you’ll have a pie that looks (and tastes) like it took hours to make. No baking, no fuss.
Customizable
Add your own twist! Want a little extra crunch? Sprinkle some crushed nuts or chocolate shavings on top. Or, layer it with fresh berries for a burst of fruity goodness. The options are endless!
Crowd-Pleasing
This pie is a guaranteed hit with everyone. The chocolate is rich, the texture is smooth, and the whipped cream topping? Perfection. It’s impossible not to love.
Disclosure: This post contains affiliate links.If you click and make a purchase, I may earn a small commission at no extra cost to you.


Ingredients in No-Bake Chocolate Pudding Pie
Here’s the magic of this pie—it’s made with just a few simple ingredients, but the result is so much more than the sum of its parts. Let’s break it down:
Pie Crust
The base of the pie is a buttery, crumbly crust that gives the perfect contrast to the creamy chocolate pudding filling. You can use a pre-made graham cracker crust or make your own if you’re feeling extra ambitious!
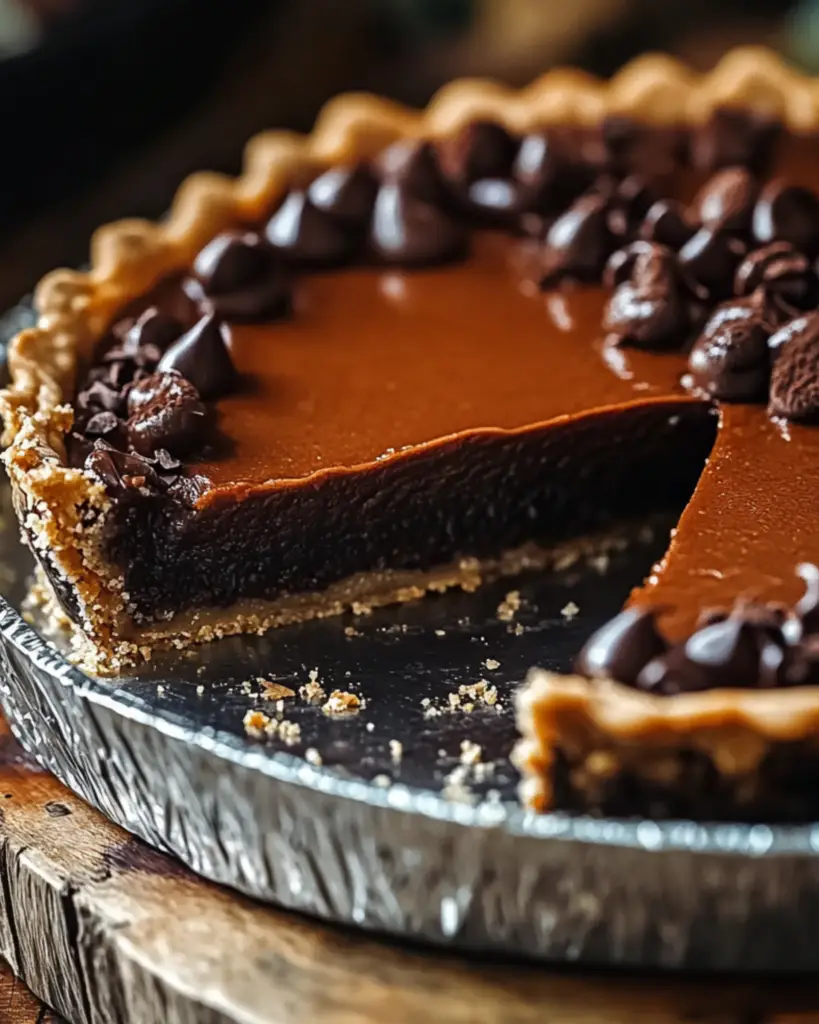
Chocolate Pudding
The heart of the pie, this luscious chocolate pudding is rich and silky. You’ll combine simple ingredients to make a homemade pudding that sets perfectly and tastes just like the real deal.
Whipped Cream
A fluffy, sweet whipped cream topping is the finishing touch. It’s light and airy and adds the perfect contrast to the rich pudding.
(Note: the full ingredient list, including measurements, is provided in the recipe card directly below.)
Instructions
Let’s dive into the steps to create this flavorful masterpiece:
Prepare the Crust
Start by preparing your pie crust. If you’re using a store-bought graham cracker crust, just make sure it’s ready to go. If you’re making it from scratch, mix your crushed graham crackers with melted butter, press it into a pie dish, and chill it in the fridge for a bit to firm up.
Make the Chocolate Pudding
In a medium saucepan, whisk together sugar, cocoa powder, cornstarch, and a pinch of salt. Gradually add milk and cook over medium heat, whisking constantly, until the mixture thickens and starts to bubble. Remove from heat and stir in butter and vanilla for that extra smoothness.
Assemble the Pie
Pour the chocolate pudding into your prepared pie crust, spreading it out evenly. Let it cool down a bit before transferring it to the fridge to set for at least 3 hours. Patience is key here, but trust me, it’s worth the wait.
Add the Whipped Cream
Once your pudding has set, top it with a generous layer of homemade whipped cream. Whip up some heavy cream with a little sugar until it’s fluffy and smooth, then pile it on top of the pudding like you mean it!
Chill and Serve
Place the pie back in the fridge for another 30 minutes to allow everything to set. Then slice and serve! This dessert is best enjoyed cold, straight from the fridge.
How to Serve No-Bake Chocolate Pudding Pie
This pie is so versatile and pairs wonderfully with a variety of sides and accompaniments. Here are a few serving suggestions to enhance your dessert experience:
Fresh Fruit
Pair your pie with a side of fresh fruit, like raspberries or strawberries, to add a burst of color and sweetness that balances the richness of the chocolate.
Coffee or Tea
Serve it alongside a strong cup of coffee or a fragrant herbal tea. The contrast between the sweet pie and the warmth of the drink is an irresistible combo.
Chocolate Garnishes
For the ultimate chocolate lover, drizzle some extra chocolate syrup over the pie or sprinkle with chocolate shavings for that extra indulgence.
Whipped Cream Perfection
If you’re like me and you can’t get enough of whipped cream, feel free to add an extra dollop on top. You can never have too much!
Additional Tips
Here are some extra tips to help you get the most out of this recipe:
Prep Ahead
This is a fantastic make-ahead dessert. Prepare it a day or two before your event, and it’ll save you time and stress.
Spice It Up
For a twist on the classic, add a pinch of cinnamon or even a dash of chili powder to the chocolate pudding to give it a little kick.
Dietary Adjustments
This pie is pretty adaptable! For a dairy-free version, try using coconut milk and a non-dairy whipped topping. Want to make it gluten-free? Use a gluten-free graham cracker crust, and you’re good to go.
Storage Tips
Store leftovers in an airtight container in the fridge for up to 3 days. Reheat slightly in the microwave for a few seconds, or enjoy it chilled the way it’s meant to be!
Double the Batch
This pie is so easy to make in large batches, so consider doubling the recipe for a bigger crowd. It’s sure to disappear in no time.
FAQ Section
Q1: Can I substitute [ingredient] with [alternative ingredient]?
A1: Absolutely! For instance, if you don’t have a graham cracker crust, you can use a chocolate cookie crust for an extra layer of flavor.
Q2: Can I make this dish ahead of time?
A2: Yes, absolutely! Make it a day ahead, and let the pie chill overnight. The flavors will have time to meld together, making it even better.
Q3: How do I store leftovers?
A3: Store leftovers in an airtight container in the fridge for up to 3 days. It’s delicious even after a couple of days!
Q4: Can I freeze this pie?
A4: Yes, it freezes well! Just make sure to cover it tightly, and it’ll keep in the freezer for up to a month. Thaw it in the fridge overnight before serving.
Q5: What’s the best way to reheat this pie?
A5: This pie is best served chilled, so no need to reheat. Just take it out of the fridge, slice, and enjoy!
Q6: Can I double the recipe?
A6: Definitely! Just make sure you have a larger pie dish, and adjust your chilling time accordingly.
Q7: Is this recipe suitable for [specific diet]?
A7: With a few tweaks, yes! You can easily make it gluten-free or dairy-free. Check the ingredient substitutions above.
Q8: What side dishes go well with this recipe?
A8: A simple fruit salad or a light, refreshing sorbet pairs beautifully with the richness of the pie.
Q9: How can I make this dish healthier?
A9: Consider swapping the heavy cream for a lighter version, or use a healthier sweetener in place of sugar.
Q10: What’s the best cookware to use for this recipe?
A10: No special cookware is needed—just a standard pie dish works perfectly.
Conclusion
This No-Bake Chocolate Pudding Pie is the ultimate dessert for chocolate lovers, and I just know it’s going to become your go-to treat for any occasion. Whether you’re making it for a special gathering or just to satisfy your own sweet tooth, this pie is simple, decadent, and absolutely delicious. So, go ahead, grab your ingredients, and make this no-bake wonder today. You won’t regret it!
Print
The Ultimate No-Bake Chocolate Pudding Pie
- Prep Time: 20 minutes (plus chilling time)
- Cook Time: No cooking required
- Total Time: 4 hours 20 minutes (including chilling)
- Yield: 8 servings
- Category: Dessert, No-Bake
- Method: No-Bake, Refrigerated
- Cuisine: American
- Diet: Vegetarian
Description
This No-Bake Chocolate Pudding Pie is rich, creamy, and easy to make with a chocolate cookie crust, silky chocolate pudding filling, and fluffy whipped topping. Perfect for a quick dessert
Ingredients
- For the Crust:
- 2 cups chocolate sandwich cookies (e.g., Oreos), crushed
- ½ cup unsalted butter, melted
- For the Filling:
- 2 boxes (3.9 oz each) instant chocolate pudding mix
- 3 cups cold milk
- ½ cup whipped topping (e.g., Cool Whip), for extra creaminess
- For the Topping:
- 1 ½ cups whipped topping (e.g., Cool Whip), thawed
- Chocolate shavings or curls for garnish (optional)
- Mini chocolate chips or sprinkles for extra flair (optional)
Instructions
-
Prepare the Crust:
- In a medium bowl, mix the crushed cookies with melted butter until evenly moistened.
- Press the mixture firmly into the bottom and up the sides of a 9-inch pie dish.
- Refrigerate for 10-15 minutes to set.
-
Make the Filling:
- In a large mixing bowl, whisk together the instant pudding mix and cold milk until thickened (about 2-3 minutes).
- Gently fold in ½ cup of whipped topping to create a silkier texture.
-
Assemble the Pie:
- Pour the pudding mixture into the prepared crust, spreading it evenly with a spatula.
-
Add the Whipped Topping:
- Spread the whipped topping evenly over the chocolate pudding layer. Smooth the surface with a spatula or create decorative swirls.
-
Chill and Garnish:
- Refrigerate the pie for at least 4 hours, or until fully set.
- Before serving, garnish with chocolate shavings, mini chocolate chips, or sprinkles for an elegant touch.
-
Serve:
- Slice into wedges and enjoy!
Notes
- Make sure the pie is well-chilled to achieve the perfect texture.
- You can use any chocolate sandwich cookies you prefer for the crust.
- Feel free to get creative with toppings; crushed nuts or fresh berries could also be great additions!
Nutrition
- Serving Size: 1 slice
- Calories: 350 kcal
- Sugar: 28g
- Sodium: 160mg
- Fat: 21g
- Saturated Fat: 10g
- Unsaturated Fat: 7g
- Trans Fat: 0g
- Carbohydrates: 37g
- Fiber: 1g
- Protein: 3g
- Cholesterol: 30mg


