

The Best Baked Huli Huli Chicken Recipe
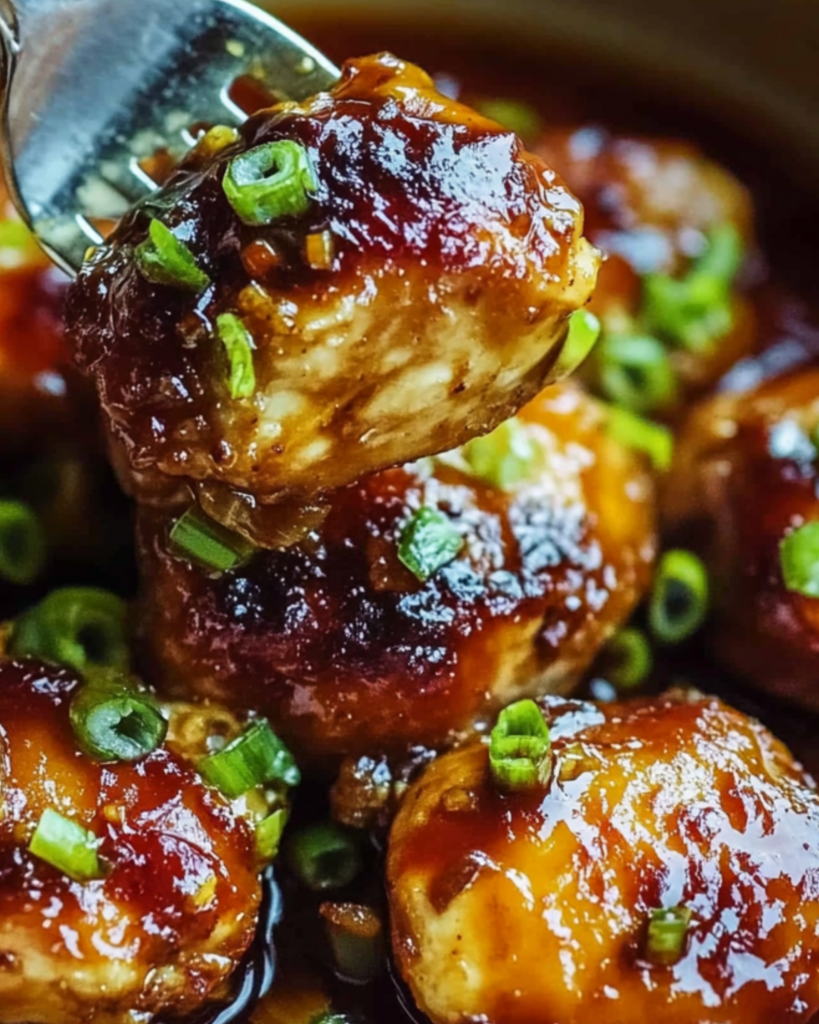
Hey there, friend! If you’re in the mood for something that’ll bring the taste of a tropical paradise straight to your kitchen, then you’re in for a treat with this Baked Huli Huli Chicken. I’m talking about tender, juicy chicken glazed with a sticky-sweet, savory sauce that’s got just the right hint of smokiness. The moment you take that first bite, you’ll be hooked—it’s a game-changer. Trust me, you’re going to love this recipe!
This one is perfect for when you want to impress without a lot of fuss, but still deliver a meal that’s packed with flavor. Whether you’re prepping dinner for the family, entertaining friends, or just treating yourself to something extraordinary, this dish is versatile, easy, and oh-so-delicious.
Why You’ll Love Baked Huli Huli Chicken
Let’s talk about why this dish is going to be your new favorite. Here’s why it’s a standout:
Versatile: Whether you’re looking for a quick weeknight dinner or a showstopper for your next gathering, this chicken fits the bill. Imagine how impressed your friends will be when they bite into this flavorful, juicy chicken and ask for the recipe.
Budget-Friendly: This dish is made with ingredients you probably already have in your kitchen. No need to go hunting for rare or expensive items—this recipe proves that simple ingredients can make something extraordinary.
Quick and Easy: If you’re the type of person who shies away from complicated recipes, don’t worry! This one’s straightforward and stress-free. You can easily prep it in just a few minutes, and then let your oven do the magic.
Customizable: Want to make it spicier? Go ahead and add a dash of chili flakes or cayenne pepper! Prefer a sweeter vibe? Add a little extra honey to the glaze. You can adjust it to your heart’s content.
Crowd-Pleasing: From picky eaters to foodies, this recipe has something for everyone. The sweet-savory glaze and tender chicken is sure to satisfy all tastes. It’s comfort food with a tropical twist!
Disclosure: This post contains affiliate links.If you click and make a purchase, I may earn a small commission at no extra cost to you.


Ingredients in Baked Huli Huli Chicken
Here’s the magic of this dish—it’s a simple list of ingredients that come together to create a juicy, flavorful masterpiece. Let’s break it down:
Chicken Thighs: These beauties are the perfect cut for this recipe. They stay moist and tender during baking, soaking up all that sweet, tangy glaze. (You can use chicken breasts if you prefer, but thighs are the way to go here.)
Soy Sauce: This is the base of the marinade, giving the chicken that deep, savory umami flavor that balances the sweetness of the other ingredients.
Honey: The sweet component that makes this glaze sticky and irresistible. It helps to caramelize the chicken to perfection in the oven.
Ketchup: Yes, you read that right! Ketchup adds a tangy sweetness and a bit of texture to the glaze, rounding out the flavor.
Rice Vinegar: This brings the perfect tangy note to cut through the sweetness and bring balance to the dish.
Garlic and Ginger: The heart of this recipe’s flavor! Fresh garlic and ginger bring warmth and complexity to the glaze. They’re what take this dish from good to great.
Sesame Oil: Adds a lovely nutty depth and a hint of smokiness. A little goes a long way in giving this dish that authentic Huli Huli vibe.
Green Onions: For garnish! These add a touch of freshness and color when sprinkled on top of the finished chicken.
(Note: The full ingredients list, including measurements, is provided in the recipe card directly below.)
Instructions
Let’s dive into the steps to create this flavorful masterpiece:
Preheat Your Oven: Start by preheating your oven to 400°F (200°C). This ensures that the chicken cooks evenly and gets that beautiful, crispy skin.
Make the Marinade: In a bowl, whisk together the soy sauce, honey, ketchup, rice vinegar, garlic, ginger, and sesame oil. The result should be a smooth, glossy glaze that’s both sweet and savory—just what you want for this dish.
Marinate the Chicken: Place your chicken thighs in a resealable plastic bag or shallow dish. Pour the marinade over the chicken, making sure it’s fully coated. Let it marinate for at least 30 minutes, but if you have time, marinate it for a few hours (or even overnight) for maximum flavor.
Prepare the Baking Dish: While the chicken marinates, line a baking dish with parchment paper or lightly grease it. This will make cleanup a breeze later on.
Bake the Chicken: Once the chicken is marinated and your oven is preheated, arrange the chicken thighs in the prepared baking dish. Bake them for 25-30 minutes, basting the chicken halfway through with the remaining marinade, until the chicken is golden, crispy on the edges, and cooked through.
Finishing Touches: Once the chicken is cooked to perfection, remove it from the oven and let it rest for a few minutes. This allows the juices to redistribute, making every bite juicy and tender.
Serve and Enjoy: Garnish with freshly chopped green onions for a pop of color and a burst of freshness. Serve the chicken with a side of rice, roasted veggies, or a crisp salad, and enjoy the tropical goodness!
How to Serve Baked Huli Huli Chicken
This dish is so flexible, you can serve it in a variety of ways! Here are a few suggestions:
- Rice: Serve the chicken on a bed of steamed rice. The sauce is perfect for drizzling over the rice for that extra burst of flavor.
- Grilled Vegetables: Pair it with grilled vegetables like zucchini, bell peppers, or asparagus to balance out the richness of the chicken.
- Tropical Salads: A light, refreshing salad with mango or pineapple would complement this dish perfectly. The sweetness and crunch would balance the savory chicken perfectly.
- Coconut Rice: Want to keep the tropical vibes going? Try serving it with coconut rice for that extra burst of flavor.
Presentation tip: When serving, don’t forget to drizzle a little extra marinade on top of the chicken and sprinkle some toasted sesame seeds for that extra touch of elegance!
Additional Tips
Here are a few tips to make this recipe even better:
Prep Ahead: If you’re short on time, marinate the chicken the night before. You can store the marinated chicken in the fridge and simply pop it in the oven when you’re ready to cook.
Make it Spicy: Want to add a little kick? Stir in a bit of chili flakes or sriracha into the marinade for a spicy twist.
Storage Tips: Leftovers can be stored in an airtight container in the fridge for up to 3 days. Reheat gently in the oven to maintain that delicious texture.
Double the Recipe: This dish freezes beautifully. So, if you’re cooking for a crowd or prepping meals for the week, go ahead and make a double batch. You’ll thank me later.
FAQ Section
Q1: Can I use chicken breasts instead of thighs?
A1: Absolutely! While chicken thighs are juicier and more tender, chicken breasts will work too. Just be sure not to overcook them, as they can dry out more easily.
Q2: Can I make this dish ahead of time?
A2: Yes! Marinate the chicken the night before and bake it when you’re ready to serve. It’s a great make-ahead meal!
Q3: How do I store leftovers?
A3: Store any leftovers in an airtight container in the fridge for up to 3 days. For best results, reheat in the oven at 350°F (175°C) until warmed through.
Q4: Can I freeze this dish?
A4: Yes, this dish freezes well. Just let it cool completely, then store it in a freezer-safe container for up to 3 months. Thaw it overnight in the fridge before reheating.
Q5: How do I reheat leftover chicken?
A5: To reheat, place the chicken back in the oven at 350°F (175°C) for about 10-15 minutes, or until it’s warmed through. You can also microwave it, but the oven will help keep it crispy!
Q6: Can I double the recipe?
A6: Yes! You can easily double the recipe. Just make sure you have a larger baking dish and that the chicken pieces are spaced out for even cooking.
Q7: Is this recipe suitable for any specific diets?
A7: This recipe is naturally gluten-free, as long as you use a gluten-free soy sauce! If you need it to be dairy-free, it already fits that bill as well.
Q8: What side dishes go well with this recipe?
A8: You can serve it with steamed rice, roasted vegetables, or even a tropical fruit salad. Coconut rice is also a great pairing for that extra flair.
Q9: How can I make this dish healthier?
A9: You can use skinless chicken breasts instead of thighs, reduce the amount of honey, or opt for a low-sodium soy sauce to make it a bit lighter.
Q10: What’s the best cookware to use for this recipe?
A10: A good, sturdy baking dish works best for even cooking. If you have a roasting pan, that’s great too!
Conclusion
And there you have it—your new favorite dish, Baked Huli Huli Chicken! It’s everything you want in a meal: packed with flavor, easy to make, and perfect for any occasion. Whether you’re cooking for the family, hosting friends, or treating yourself to something special, this recipe is sure to impress. The combination of sweet, savory, and smoky flavors will transport you straight to a tropical paradise with every bite.
The best part? It’s a total crowd-pleaser, customizable to fit your tastes, and incredibly simple to prepare. Plus, it’s perfect for meal prep and leftovers, so you can enjoy this tropical goodness all week long.
Go ahead, give it a try—I promise you won’t be disappointed. This Baked Huli Huli Chicken is a dish that’s bound to become a regular in your kitchen. Enjoy, and happy cooking!
Print
The Best Baked Huli Huli Chicken Recipe
- Prep Time: 15 minutes
- Cook Time: 60 minutes
- Total Time: 75 minutes
- Yield: 4 servings
- Category: Main Dish
- Method: Baking
- Cuisine: Hawaiian, Asian Fusion
- Diet: Vegetarian
Description
Enjoy the sweet, savory, and tangy flavors of this Baked Huli Huli Chicken, a Hawaiian-inspired dish that’s easy to make and bursting with flavor! Marinated in a delicious pineapple-soy sauce glaze, this dish will transport you straight to the islands
Ingredients
- 3 pounds chicken thighs, bone-in, skin-on
- 1 cup pineapple juice
- 1/2 cup soy sauce
- 1/2 cup brown sugar, packed
- 1/3 cup ketchup
- 1/4 cup chicken broth
- 2 tablespoons fresh ginger, grated
- 2 garlic cloves, minced
- 2 teaspoons sesame oil
- 1 tablespoon cornstarch
- 1 tablespoon water
- Fresh pineapple slices, for garnish (optional)
- Green onions, sliced for garnish (optional)
- Sesame seeds, for garnish (optional)
Instructions
- Preheat oven to 375°F (190°C). Arrange chicken thighs in a single layer in a large baking dish.
- In a saucepan, mix pineapple juice, soy sauce, brown sugar, ketchup, chicken broth, ginger, garlic, and sesame oil. Heat over medium to a low boil.
- Simmer for 10 minutes, stirring occasionally, until the sauce thickens slightly.
- Whisk cornstarch and water in a small bowl to make a slurry. Stir into the sauce, whisking until thickened.
- Pour sauce over chicken, coating thoroughly.
- Bake for 45-60 minutes, until chicken reaches an internal temperature of 165°F (74°C) and sauce caramelizes. Baste with sauce halfway through.
- Let rest a few minutes before serving.
- Garnish with pineapple slices, green onions, and sesame seeds.
Notes
- The internal temperature of the chicken should reach 165°F (74°C) to ensure it’s cooked through.
- You can also grill the chicken for a smokier flavor, basting it with the sauce as it cooks.
Nutrition
- Serving Size: 1/4 of the recipe
- Calories: 500
- Sugar: 30g
- Sodium: 650mg
- Fat: 22g
- Saturated Fat: 4g
- Unsaturated Fat: 12g
- Trans Fat: 0g
- Carbohydrates: 45g
- Fiber: 2g
- Protein: 30g
- Cholesterol: 100mg


