Original Fantasy Fudge Recipe for Timeless Sweet Bliss
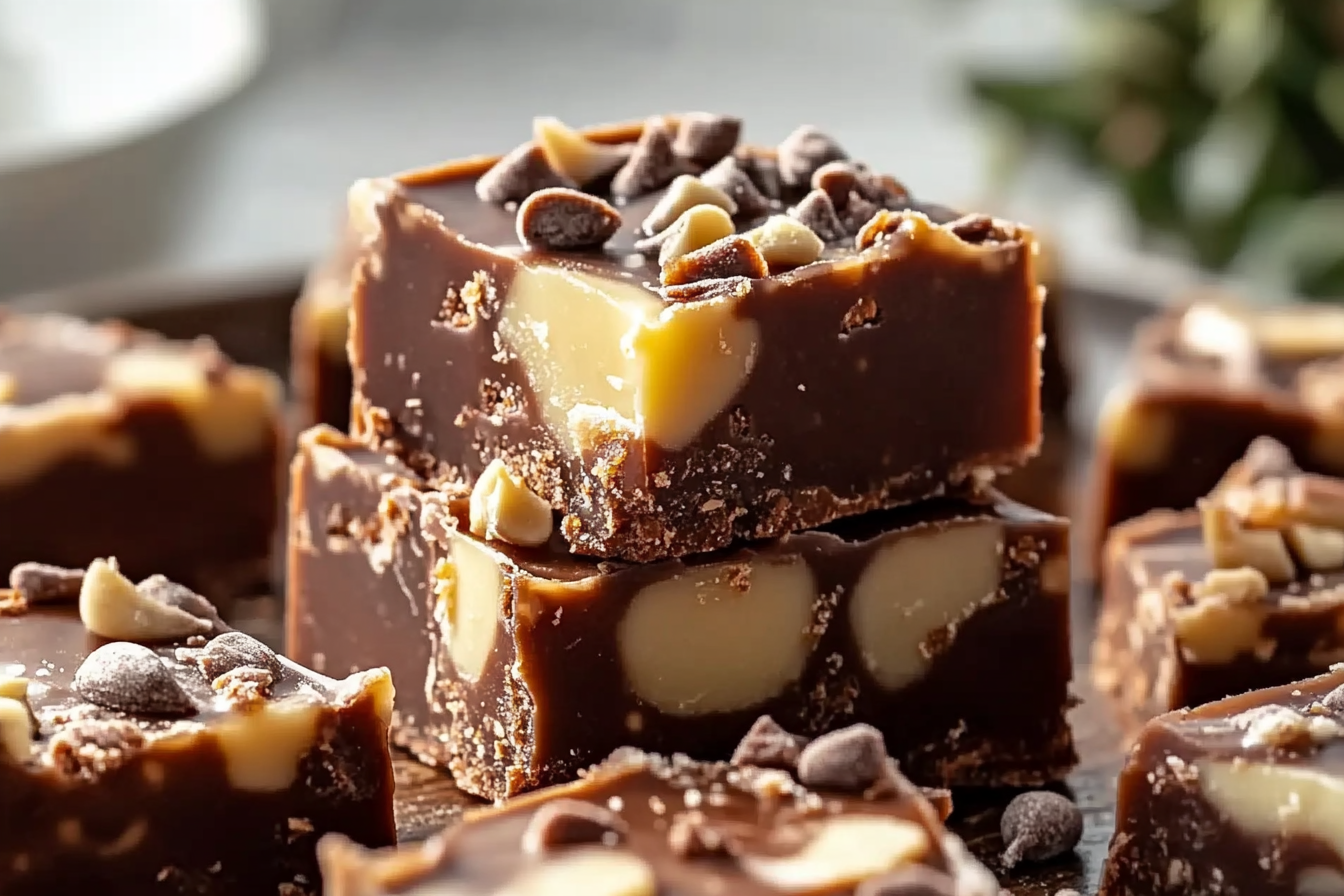
If you’ve ever wanted to experience a chocolate treat that wraps you in a warm hug from the first bite, the Original Fantasy Fudge Recipe is your ticket to timeless sweet bliss. This fudge boasts a perfect balance of creamy texture and rich, dreamy chocolaty flavor, making it a favorite for fudge enthusiasts everywhere. Whether you’re new to fudge-making or a seasoned dessert lover, this recipe invites you into a delightful world where nostalgia and exquisite taste unite, creating moments worth savoring again and again.
Why You’ll Love This Recipe
- Classic Charm: This fudge recipe has a traditional richness that evokes warm memories and joyful moments.
- Simplicity at Its Best: With just a handful of straightforward ingredients, you get an indulgent result that feels luxurious but isn’t complicated to make.
- Perfect Texture: Smooth and creamy with just the right bite, it’s the kind of fudge that melts gently in your mouth.
- Kid-Friendly Fun: Easy to prepare with help from little hands, this recipe is great for family bonding and sweet celebrations.
- Customizable Delight: Its base allows for creative tweaks, making it ideal for your personal flavor preferences or dietary adjustments.
Ingredients You’ll Need
Each ingredient in the Original Fantasy Fudge Recipe plays an important role in creating that signature texture and flavor. From creamy butter to rich chocolate, every component is essential, yet simple enough to find in your pantry or local store.
- Semi-sweet chocolate chips: They provide the deep, chocolaty backbone that defines this fudge.
- Sweetened condensed milk: Adds luxurious creaminess and balances sweetness perfectly.
- Unsalted butter: Brings richness and smooth mouthfeel without overwhelming saltiness.
- Vanilla extract: Enhances the overall flavor with a subtle floral note that lifts the chocolate.
- Salt pinch: Just a tiny amount that brightens the chocolate and rounds out the sweetness.
Variations for Original Fantasy Fudge Recipe
This fudge is a fantastic base that welcomes playful personalization. Whether you want to add texture, adjust for dietary needs, or create a new flavor experience, it’s easy to customize.
- Nutty upgrade: Mix in chopped walnuts or pecans for a pleasant crunch and earthiness.
- Peanut butter swirl: Add dollops of peanut butter before setting to create a thrilling flavor contrast.
- Dairy-free option: Swap butter for coconut oil and condensed milk for a coconut milk-based substitute.
- Spiced delight: Stir in a pinch of cinnamon or cayenne for a subtle warming spice twist.
- Mint chocolate: Incorporate mint extract to give your fudge a refreshing, cooling finish.

Disclosure: This post contains affiliate links.If you click and make a purchase, I may earn a small commission at no extra cost to you.
How to Make Original Fantasy Fudge Recipe
Step 1: Prepare Your Pan
Line an 8-inch square baking pan with parchment paper or lightly grease it to ensure your fudge releases easily after chilling.
Step 2: Melt Butter and Chocolate
In a medium saucepan over low heat, melt the butter thoroughly. Add the semi-sweet chocolate chips, stirring constantly until completely smooth and combined.
Step 3: Add Condensed Milk and Mix
Slowly pour in the sweetened condensed milk while stirring. Keep the heat low and continue to stir until the mixture becomes creamy and shiny, ensuring no chocolate lumps remain.
Step 4: Incorporate Vanilla and Salt
Remove the pan from heat and stir in the vanilla extract and a pinch of salt to boost the flavor complexity and balance the sweetness.
Step 5: Pour and Chill
Pour the fudge mixture into your prepared pan, spreading it evenly. Refrigerate for at least 3-4 hours, or until firm to the touch.
Step 6: Slice and Enjoy
Once chilled, lift the fudge using the parchment paper and cut it into small squares. Serve, savor, and watch smiles spread!
Pro Tips for Making Original Fantasy Fudge Recipe
- Use quality chocolate: Premium chocolate chips or bars dramatically improve taste and texture.
- Stir constantly: Prevents scorching and ensures a silky-smooth mixture.
- Monitor heat closely: Low and slow heat is key to avoid grainy fudge.
- Chill thoroughly: For clean cuts, fully refrigerate fudge before slicing.
- Room temperature ingredients: Ensures even melting and mixing for a consistent result.
How to Serve Original Fantasy Fudge Recipe
Garnishes
Sprinkle chopped nuts, sea salt flakes, or colorful edible glitter on top before chilling to add a delightful contrast or festive touch.
Side Dishes
Pair fudge squares with fresh berries, whipped cream, or a scoop of vanilla ice cream for a dessert experience that feels special and indulgent.
Creative Ways to Present
Arrange fudge on a decorative platter with parchment separators for parties, or wrap individual squares in wax paper tied with twine as charming homemade gifts.
Make Ahead and Storage
Storing Leftovers
Keep leftover fudge in an airtight container at room temperature for up to one week to retain moisture and flavor perfectly.
Freezing
For longer storage, freeze fudge in a sealed container or wrapped tightly in plastic wrap for up to three months. Thaw in the refrigerator before serving.
Reheating
While fudge is best served chilled, you can soften it slightly by letting it sit at room temperature for 10-15 minutes prior to eating for a melt-in-your-mouth effect.
FAQs
Can I use dark chocolate instead of semi-sweet chocolate in this recipe?
Yes, substituting dark chocolate will give your fudge a richer, more intense flavor but may slightly alter the sweetness, so adjust the amount of condensed milk if needed.
Is it possible to make this fudge gluten-free?
Absolutely! All the main ingredients in the Original Fantasy Fudge Recipe are naturally gluten-free, just double-check that your chocolate does not contain any gluten additives.
How long will the fudge keep?
Stored properly, your fudge should stay fresh and delicious for up to one week at room temperature or up to three months in the freezer.
Can I add mix-ins like nuts or dried fruit?
Definitely. Mix-ins such as chopped nuts, dried cranberries, or even crushed candy canes can easily be folded in right before pouring the fudge into the pan.
What’s the best way to cut fudge without it sticking?
Use a sharp knife warmed under hot water, wiped dry between cuts, or chill the fudge thoroughly so it slices cleanly without sticking to the blade.
Final Thoughts
The Original Fantasy Fudge Recipe is more than just a sweet treat — it’s an experience filled with creamy texture, nostalgic chocolate goodness, and a smile in every bite. Perfect for gift-giving, celebrations, or simply indulging yourself, this recipe invites you to create moments of sweet bliss that will keep people coming back for more. So grab your ingredients, get ready to whisk up some magic, and enjoy the timeless joy of homemade fudge!
Related Posts
- No-Bake Chocolate Raspberry Tart Perfect for Easy Indulgence
- Easy Chocolate Cherry Brownie Parfait Layers of Decadence
- Cherry Bundt Cake Recipes to Sweeten Any Occasion
Original Fantasy Fudge Recipe
- Prep Time: 10 minutes
- Cook Time: 10 minutes
- Total Time: 4 hours 20 minutes
- Yield: 16 small squares 1x
- Category: Dessert
- Method: Stovetop melting and refrigeration
- Cuisine: American
- Diet: Vegetarian
Description
The Original Fantasy Fudge Recipe is a timeless chocolate treat that offers a perfect balance of creamy texture and rich chocolaty flavor. Easy to make with simple ingredients, this classic fudge melts gently in your mouth and invites nostalgia and joy with every bite. Ideal for both beginners and experienced fudge lovers, this recipe is perfect for family fun, celebrations, and customizable to suit various preferences and dietary needs.
Ingredients
Main Ingredients
- 2 cups semi-sweet chocolate chips
- 1 (14 oz) can sweetened condensed milk
- 1/4 cup unsalted butter
- 1 teaspoon vanilla extract
- Pinch of salt
Instructions
- Prepare Your Pan: Line an 8-inch square baking pan with parchment paper or lightly grease it to ensure your fudge releases easily after chilling.
- Melt Butter and Chocolate: In a medium saucepan over low heat, melt the butter thoroughly. Add the semi-sweet chocolate chips, stirring constantly until completely smooth and combined.
- Add Condensed Milk and Mix: Slowly pour in the sweetened condensed milk while stirring. Keep the heat low and continue to stir until the mixture becomes creamy and shiny, ensuring no chocolate lumps remain.
- Incorporate Vanilla and Salt: Remove the pan from heat and stir in the vanilla extract and a pinch of salt to boost the flavor complexity and balance the sweetness.
- Pour and Chill: Pour the fudge mixture into your prepared pan, spreading it evenly. Refrigerate for at least 3-4 hours, or until firm to the touch.
- Slice and Enjoy: Once chilled, lift the fudge using the parchment paper and cut it into small squares. Serve, savor, and watch smiles spread!
Notes
- Use quality chocolate: Premium chocolate chips or bars dramatically improve taste and texture.
- Stir constantly: Prevents scorching and ensures a silky-smooth mixture.
- Monitor heat closely: Low and slow heat is key to avoid grainy fudge.
- Chill thoroughly: For clean cuts, fully refrigerate fudge before slicing.
- Room temperature ingredients: Ensures even melting and mixing for a consistent result.
Nutrition
- Serving Size: 1 small square (approx. 28g)
- Calories: 150
- Sugar: 20g
- Sodium: 35mg
- Fat: 7g
- Saturated Fat: 4.5g
- Unsaturated Fat: 2.5g
- Trans Fat: 0g
- Carbohydrates: 22g
- Fiber: 1g
- Protein: 2g
- Cholesterol: 15mg

