No-Oven Stovetop Bread
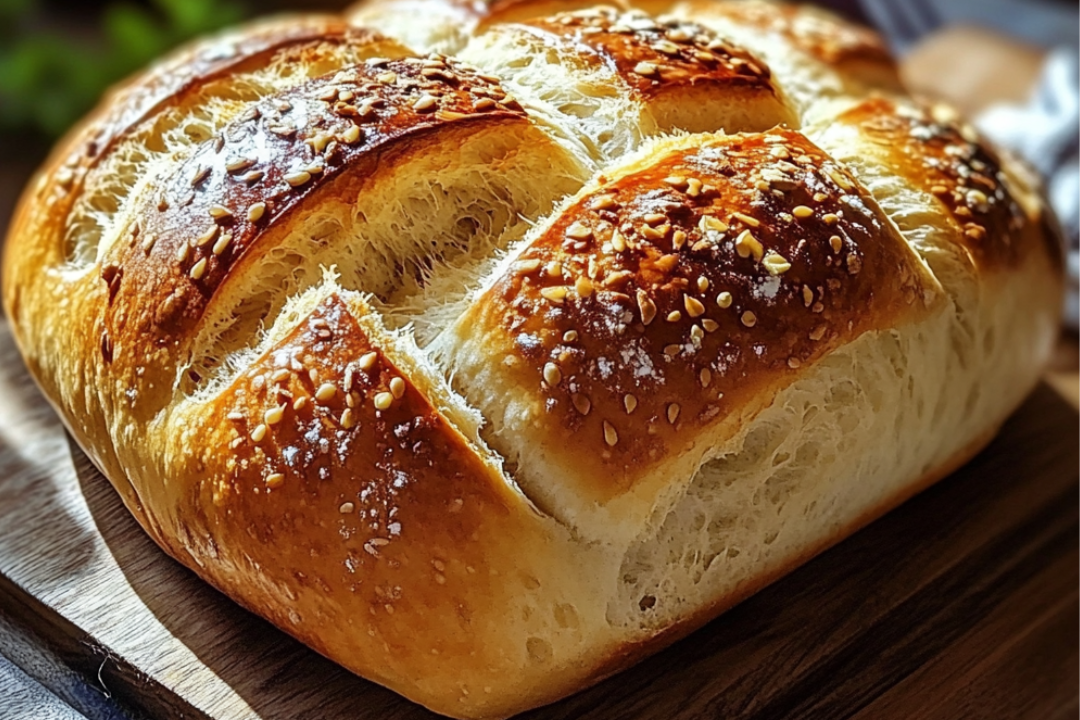
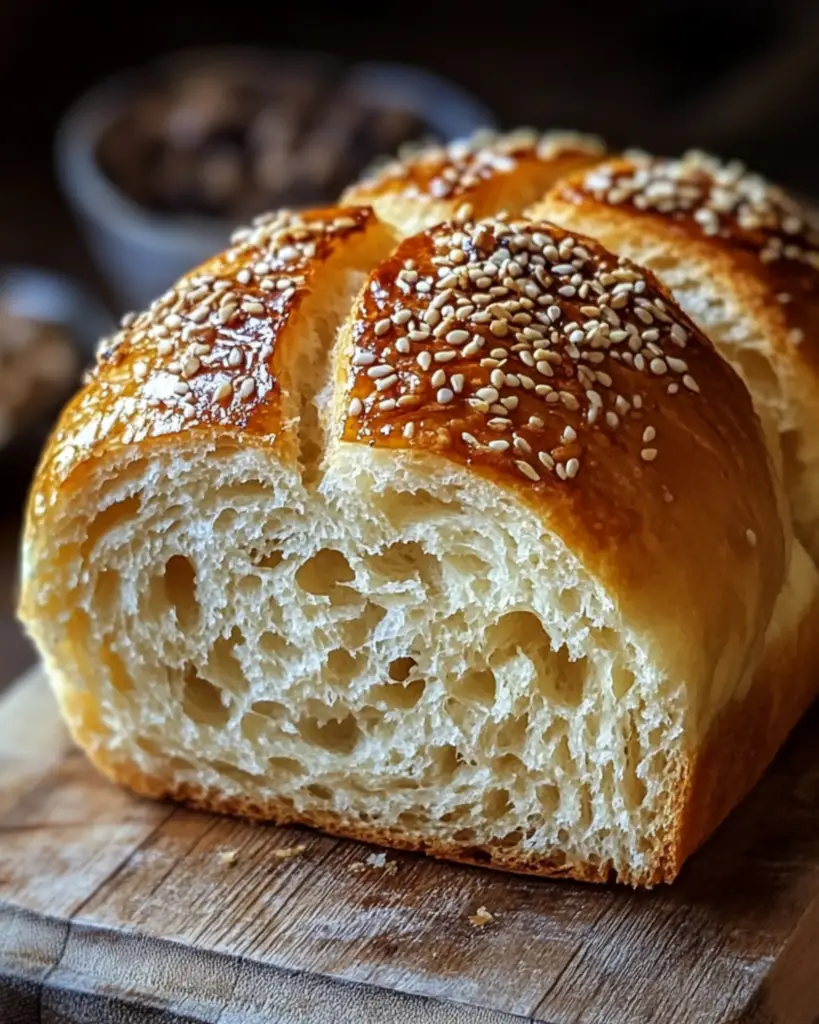
There’s something magical about homemade bread, but not everyone has the time—or the oven space—to bake a loaf from scratch. Enter this No-Oven Stovetop Bread: your new best friend in the kitchen! Soft, fluffy, and golden-brown, this bread is made on the stovetop, no oven required. Picture biting into a warm, pillowy slice of bread with a hint of crunch on the outside. The smell? Absolutely irresistible. Trust me, once you’ve made this, you’ll be hooked, and it’ll quickly become your go-to recipe for fresh, homemade bread!
Why You’ll Love No-Oven Stovetop Bread
This bread isn’t just easy; it’s a total game-changer. Here’s why:
Versatile: Whether you’re making a quick snack, serving it alongside soup, or pairing it with your favorite dip, this bread is perfect for any occasion. You can even use it for sandwiches—imagine a freshly made grilled cheese. Yes, please!
Budget-Friendly: Made with simple pantry staples, this recipe is an affordable way to enjoy the satisfaction of homemade bread without breaking the bank.
Quick and Easy: Forget about waiting for dough to rise for hours or having to heat up the oven. This stovetop bread takes minimal effort and can be ready in less than an hour.
Customizable: You can play around with this recipe! Add herbs like rosemary or garlic, throw in some cheese, or even a sprinkle of cinnamon and sugar for a sweet twist. It’s like the bread is your canvas!
Crowd-Pleasing: No one can resist fresh bread, and this stovetop version is guaranteed to make everyone at the table ask for seconds (and thirds). It’s soft and hearty, with just the right amount of crust.
Disclosure: This post contains affiliate links.If you click and make a purchase, I may earn a small commission at no extra cost to you.
Ingredients
Let’s break it down—these are the humble ingredients that come together to create something amazing.
Flour: The base of any good bread. It gives the bread structure and texture, providing the perfect foundation for everything that comes next.
Baking Powder: This is the secret to getting that lovely, fluffy texture without needing yeast or an oven. It helps the bread rise perfectly.
Salt: A pinch of salt to enhance the flavors and balance the richness of the bread. You can even use flavored salt if you’re feeling fancy.
Sugar: Just a little bit of sugar to add a touch of sweetness, helping the bread brown nicely and complement the savory flavors.
Butter: For that melt-in-your-mouth texture and a hint of richness that makes this bread irresistible. You’ll want to slather some on once it’s done.
Milk: The liquid that binds everything together, giving the bread that soft, pillowy texture. You can substitute with any milk alternative if needed.
(Note: The full ingredients list, including measurements, is provided in the recipe card directly below.)
Instructions
Let’s get baking—well, not baking, actually, but you get the idea! Follow these simple steps, and you’ll be enjoying fresh stovetop bread in no time.
1. Prep the Ingredients
In a large bowl, combine your dry ingredients: flour, baking powder, salt, and sugar. Mix them together until evenly incorporated.
2. Add the Wet Ingredients
Next, add the milk and melted butter to the dry ingredients. Stir until you get a thick dough that’s slightly sticky. Don’t worry if it’s a little sticky—that’s what makes the bread soft and fluffy.
3. Form the Dough
Transfer the dough to a lightly floured surface and gently knead it for a minute or two. You don’t need to work it too much, just enough to bring everything together into a smooth ball.
4. Cook on the Stovetop
Heat a large, non-stick skillet over medium heat and add a little butter to coat the bottom. Place the dough in the skillet, pressing it down slightly to form a round loaf. Cover with a lid and cook for 10-15 minutes on each side, checking occasionally to make sure it doesn’t burn. The bread should be golden brown and cooked through when it’s done.
5. Let It Cool
Once your bread is cooked to perfection, remove it from the skillet and let it cool for a few minutes. This gives the flavors time to settle and lets you cut into it without burning your fingers.
6. Slice and Serve
Now comes the best part—slice it up, butter it (optional but highly recommended), and enjoy! The bread is warm, soft, and utterly delicious. You can even sprinkle a little sea salt on top for an extra kick.
How to Serve No-Oven Stovetop Bread
This bread is so versatile and can be served with just about anything. Here are some ideas to inspire your next meal:
With Soups or Stews: Pair it with a comforting bowl of soup or stew to soak up all the delicious flavors. It’s perfect for dipping!
For Sandwiches: Slice it up and make a tasty sandwich. Think classic turkey and cheese or a veggie-packed delight with avocado and hummus.
With Butter and Jam: Keep it simple with a slice of this bread, a little butter, and your favorite jam or preserves. It’s like a cozy breakfast or afternoon snack.
As a Side for Salads: Add a slice of this warm bread alongside a fresh salad. It’s a great balance of textures and flavors.
Additional Tips
Here are a few tricks to make sure your stovetop bread is always a success:
Don’t Rush the Cooking: The secret to perfect stovetop bread is cooking it low and slow. Resist the urge to crank up the heat—you want that golden crust without burning the outside while the inside stays raw.
Try Adding Flavors: Add garlic powder, fresh herbs, or even shredded cheese to the dough for a fun twist.
Make It Sweet: Swap out a bit of the salt for extra sugar, then top the bread with cinnamon and sugar for a sweet version that’s perfect for breakfast.
Store Properly: Keep leftovers in an airtight container for a couple of days. You can also wrap it up and freeze slices for later—just pop it in the toaster to bring it back to life!
FAQ Section
Q1: Can I use whole wheat flour instead of white flour?
A1: Absolutely! Whole wheat flour will give the bread a denser texture and a slightly nutty flavor. It’s a great swap if you want a heartier loaf.
Q2: Can I freeze this bread?
A2: Yes! Let it cool completely, then wrap it tightly in plastic wrap or foil and store it in the freezer for up to 3 months.
Q3: Can I make this without butter?
A3: You can! Just substitute the butter with olive oil or another oil of your choice. It will still be soft and delicious.
Q4: Can I make this bread gluten-free?
A4: You sure can! Use a gluten-free all-purpose flour blend, and the bread will turn out just as tasty.
Q5: How do I store leftover bread?
A5: Store any leftover bread in an airtight container at room temperature for up to 2 days. After that, it’s best to freeze it.
Q6: Can I add extras like cheese or herbs?
A6: Yes, feel free to mix in your favorite add-ins like shredded cheese, garlic, or herbs! Just fold them into the dough before cooking.
Q7: What kind of skillet should I use?
A7: A large, non-stick skillet works best. Cast iron is also a great option if you have one—it gives the bread a nice crust.
Q8: How can I make the bread crispier?
A8: For a crispier crust, cook the bread a little longer on each side, but be careful not to burn it. You can also brush the top with a little olive oil before cooking.
Q9: Can I double the recipe?
A9: Yes! Just make sure your skillet is large enough to accommodate the extra dough. You may need to cook it for a bit longer.
Q10: How can I reheat leftover bread?
A10: Reheat slices in a toaster or on the stovetop with a little butter for a warm, crispy treat.
Conclusion
And there you have it—your new go-to stovetop bread recipe! It’s so easy, so satisfying, and will make your kitchen smell absolutely heavenly. Whether you’re serving it for dinner, using it for sandwiches, or just enjoying a slice with butter, this bread will never disappoint. Happy cooking, and enjoy every delicious bite!
Print
No-Oven Stovetop Bread
- Prep Time: 10 minutes (plus rising time)
- Cook Time: 20-25 minutes
- Total Time: 1 hour 30 minutes
- Yield: 12-16 pieces (depending on size)
- Category: Bread
- Method: Stovetop, Boiling
- Cuisine: American
- Diet: Vegetarian
Description
This easy and delicious No-Oven Stovetop Bread is a perfect alternative to traditional baking! Made with simple ingredients, it’s soft, fluffy, and crispy on the outside
Ingredients
- 5 cups flour
- 2 cups warm milk
- 1 cup oil (vegetable or canola)
- 1 tablespoon dry yeast
- 1 tablespoon granulated sugar
- 1 teaspoon salt
- For boiling the dough:
- 2.5 – 3 liters of water
- 1 teaspoon salt
Instructions
- Prepare the Dough:
In a large mixing bowl, combine warm milk, sugar, and dry yeast. Stir, and let it sit for 5-10 minutes until frothy.
Add flour, oil, and salt to the yeast mixture. Mix until it forms dough. Adjust flour or milk to get the right consistency.
Knead on a floured surface for 8-10 minutes until smooth and stretchy. - Let the Dough Rise:
Grease a bowl and place the dough inside. Cover with a damp cloth and let it rise in a warm spot for about 1 hour or until doubled in size. - Prepare for Boiling:
In a large pot, bring 2.5 to 3 liters of water to a boil. Add 1 teaspoon salt. - Shape and Boil the Bread:
Punch down the risen dough and shape it into balls or preferred shapes. Drop the dough pieces into the boiling water a few at a time. Boil for 1-2 minutes, until they puff up and float. - Cook on Stovetop:
Heat a skillet or griddle over medium heat. Once hot, add the boiled dough pieces. Cook each side for 2-3 minutes until golden and crispy. Press lightly with a spatula for even cooking. - Serve:
Serve the warm stovetop bread with butter, jam, or your favorite toppings. Enjoy!
Notes
- If the dough is too sticky or dry, adjust the flour or milk until it reaches the desired texture.
- This bread is perfect for serving with soups, stews, or as a snack!
Nutrition
- Serving Size: 1 piece
- Calories: 150
- Sugar: 1g
- Sodium: 250mg
- Fat: 6g
- Saturated Fat: 0.5g
- Unsaturated Fat: 5g
- Trans Fat: 0g
- Carbohydrates: 22g
- Fiber: 1g
- Protein: 3g
- Cholesterol: 0mg

