Mini Cherry Cheesecakes
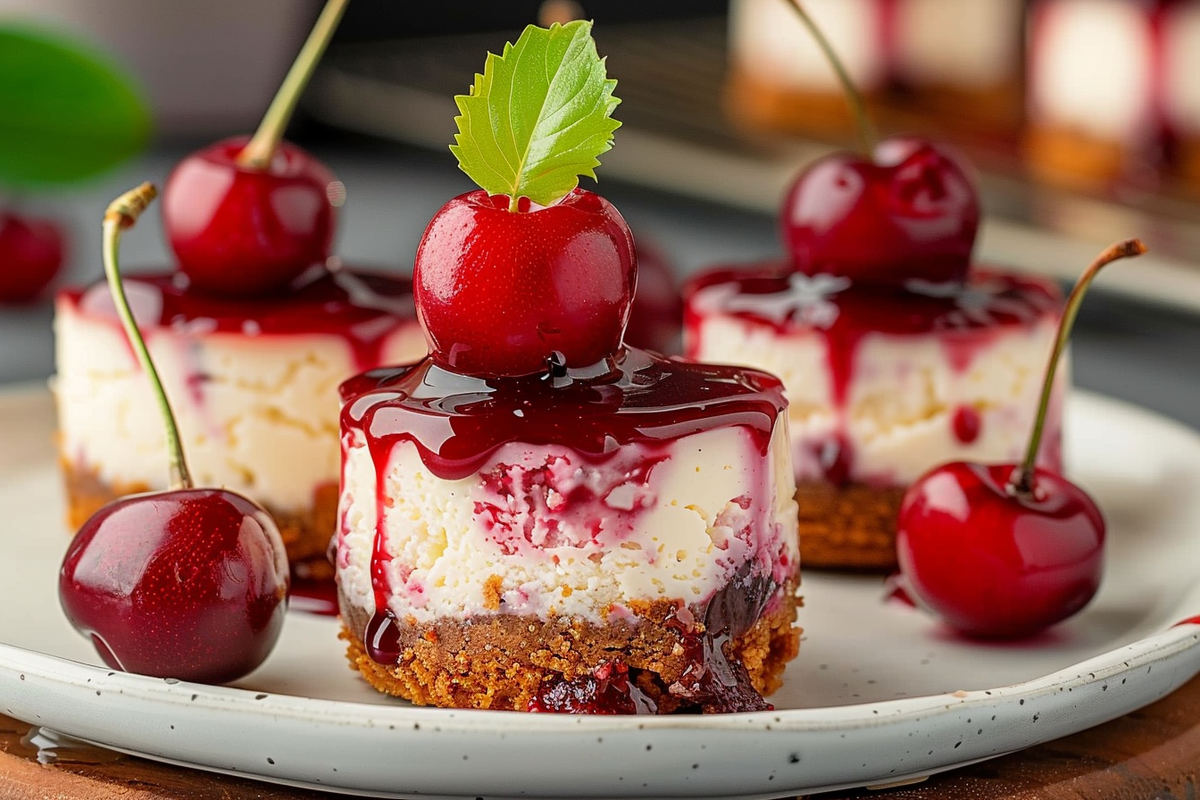
Mini Cherry Cheesecakes are the ultimate bite-sized dessert delight that combines the creamy richness of cheesecake with the sweet and tart flavor of cherries, all served up in an adorable, individual-sized portion. These cheesecake treats are perfect for parties, holiday gatherings, or simply as a sweet treat during the week. They’re easy to make, and even easier to love!
Why You Will Love This Recipe
This Mini Cherry Cheesecake recipe is loved for several reasons. Firstly, the combination of smooth cream cheese, sweet powdered sugar, and cherry pie filling creates a delightful contrast between creamy and fruity flavors. Secondly, these mini cheesecakes are not only delicious—they are also wonderfully portable, making them an excellent choice for potlucks or picnics. Lastly, they are a hit amongst both kids and adults, ensuring that everyone at your gathering will enjoy a taste.
Pro Tips for Making Mini Cherry Cheesecakes
Here are a few tips to help you create the best mini cheesecakes:
- Use Room Temperature Ingredients: Room temperature cream cheese mixes more smoothly, ensuring a creamy texture.
- Don’t Overmix: Mix just until combined to prevent the cheesecake from cracking while baking.
- Experiment with Flavors: While cherry is a classic choice, consider using other toppings like blueberry or chocolate for variety.
- Let Them Chill: Allow the cheesecakes to cool to room temperature before refrigerating to help them set properly.
Ingredients
This delightful treat requires simple yet essential ingredients:
- 1 cup cream cheese
- 1/2 cup powdered sugar
- 1 cup cherry pie filling
Directions
Step 1: Preheat your oven to 325°F (160°C). Line a muffin tin with paper liners to prepare for the cheesecakes.
Step 2: In a mixing bowl, combine the cream cheese and powdered sugar. Beat them together until the mixture is smooth and creamy, ensuring that there are no lumps left.
Step 3: Spoon the cream cheese mixture into the lined muffin tin, filling each cup about halfway. This will serve as the base of your mini cheesecakes.
Step 4: Bake in the preheated oven for 15-18 minutes. The edges should be set, while the centers may still have a slight jiggle, which is perfectly normal.
Step 5: Remove the cheesecakes from the oven and let them cool to room temperature. Once cooled, transfer them to the refrigerator to chill for at least 2 hours, allowing them to firm up fully.
Step 6: After the cheesecakes have chilled, top each mini cheesecake with a spoonful of cherry pie filling. This will add that beautiful burst of flavor on top.
Step 7: Serve cold and enjoy the delightful balance of creaminess and tart cherry flavor in every bite!
FAQs
Can I use a different fruit topping?
Absolutely! While cherry pie filling is a classic choice, you can experiment with other fruit toppings like blueberry, strawberry, or even a chocolate ganache.
How long can I store these mini cheesecakes?
Mini Cherry Cheesecakes can be stored in the refrigerator for up to 5 days in an airtight container.
Can I freeze mini cheesecakes?
Yes, you can freeze them! Just cover the cheesecakes with plastic wrap or foil and store them in a freezer-safe container. Thaw in the refrigerator before serving.
What can I serve with mini cheesecakes?
These cheesecakes can be enjoyed as is, or served alongside whipped cream or additional fruit for added flavor and garnish.
Can I make this recipe gluten-free?
Yes, simply ensure that the powdered sugar and any additional toppings used are gluten-free.
Conclusion
Mini Cherry Cheesecakes are not just a treat; they’re an experience! With their rich, creamy filling and delicious cherry topping, these bite-sized desserts promise to impress your guests or make any occasion special. Easy to pull together and delightful to eat, they are the perfect sweet addition to your dessert repertoire. Give this recipe a try—you won’t regret it!


