

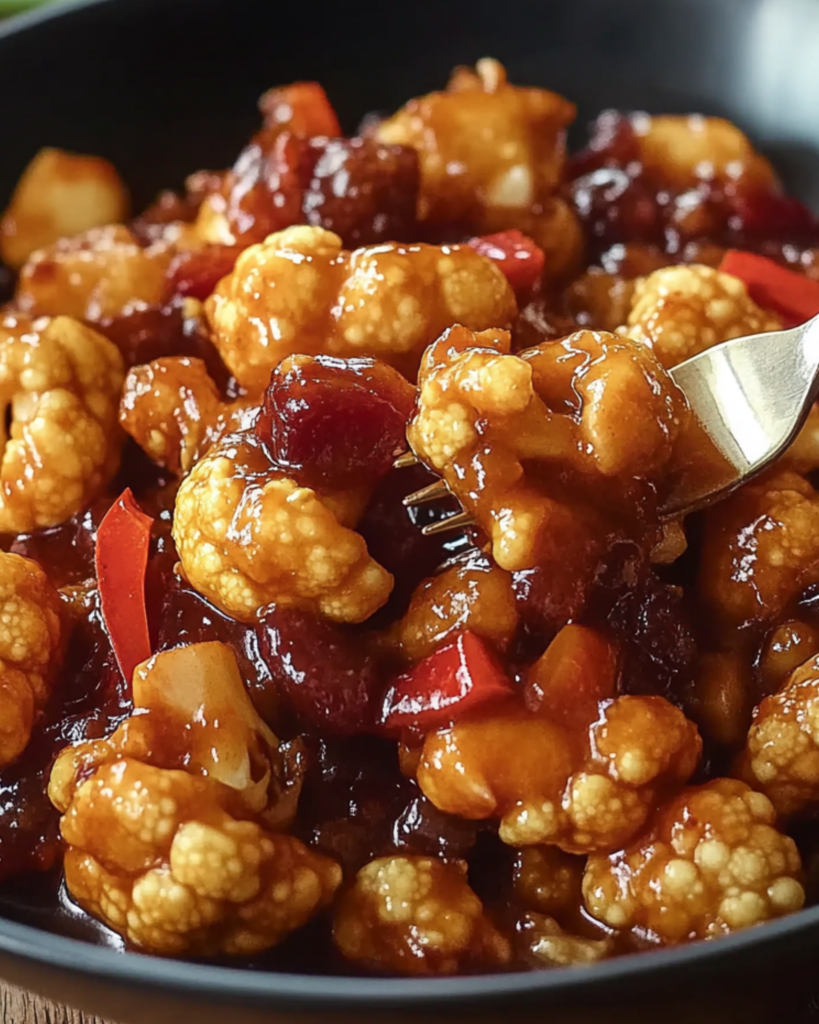
Kung Pao Cauliflower
Okay, let me tell you about this dish—Kung Pao Cauliflower. It’s the perfect marriage of crispy cauliflower, savory sauce, and just the right amount of spice. If you’ve ever craved Chinese takeout but wanted something that packs a little more flavor without the guilt, this is your dish. Imagine biting into perfectly crisped cauliflower that’s been bathed in a sweet, spicy, tangy sauce, then topped with crunchy peanuts and green onions. Trust me, you’re going to love this one. It’s the kind of recipe that’s so good, you’ll want to make it again and again. Plus, it’s surprisingly easy to make—seriously, this is comfort food with a kick!
Why You’ll Love Kung Pao Cauliflower
This recipe isn’t just about the ingredients—it’s about the experience. Whether you’re in need of a quick dinner for yourself, or you want to impress your friends at your next gathering, this dish does it all. Here’s why this Kung Pao Cauliflower is going to be your new favorite:
Versatile
It’s a perfect weeknight dinner or a stand-out side dish for a get-together. Whether you’re serving it over steamed rice or as a main dish, it’s versatile enough for any occasion. Picture this: you’re sitting down to a meal, and the crunchy, flavorful bites of cauliflower make everything better. That’s exactly what this dish brings to the table.
Budget-Friendly
No need for expensive ingredients here! This dish uses simple ingredients that you likely already have in your kitchen. A few pantry staples and fresh cauliflower are all it takes to create something that tastes like it came from a restaurant.
Quick and Easy
This recipe is straightforward and simple—just the kind of dish you can whip up without breaking a sweat. You’ll have it ready in no time, which is perfect when you’re craving something delicious but don’t have hours to spend in the kitchen.
Customizable
Spice lover? Add more chili paste. Prefer it milder? Skip the heat and still enjoy all the flavor. It’s totally customizable to your taste, which makes it a win for everyone at the table.
Crowd-Pleasing
This dish is a guaranteed hit with everyone—from kids to adults. It’s got that perfect balance of heat, sweetness, and crunch, making it irresistible for all ages. You’ll see everyone reaching for seconds.
Disclosure: This post contains affiliate links.If you click and make a purchase, I may earn a small commission at no extra cost to you.


Ingredients in Kung Pao Cauliflower
Here’s the magic of this Kung Pao Cauliflower—it’s packed with a few simple ingredients, yet each bite bursts with flavor. Let’s take a closer look at what makes this dish so irresistible:
Cauliflower
The star of the show! When you roast cauliflower, it gets this crispy, golden exterior while staying tender on the inside. It’s the perfect canvas for all the saucy goodness that follows.
Soy Sauce
This brings that umami richness and saltiness to the dish, creating a deep savory base that pairs so well with the other flavors.
Rice Vinegar
A splash of rice vinegar gives the dish a nice tang, balancing out the sweetness and heat in the sauce.
Chili Paste
For those of us who love a little heat! Chili paste gives the dish its signature spiciness. Feel free to adjust the amount to suit your spice tolerance.
Peanuts
These crunchy little gems add texture and a nice nutty flavor that complements the cauliflower and sauce perfectly.
Green Onions
A sprinkle of green onions on top adds color and a bit of freshness to the dish. They’re the finishing touch that makes everything come together beautifully.
(Note: the full ingredients list, including measurements, is provided in the recipe card directly below.)
Instructions
Let’s dive into the steps to create this flavorful masterpiece:
Preheat Your Oven
Start by preheating your oven to 400°F. A hot oven ensures your cauliflower gets crispy without drying out. Trust me, crispy cauliflower is the key to this dish!
Roast the Cauliflower
Toss your cauliflower florets with a little olive oil, salt, and pepper, and spread them out on a baking sheet. Roast for about 25-30 minutes, flipping halfway through to make sure they’re golden and crisp on all sides. You’ll know they’re ready when they’re lightly browned and crispy.
Prepare the Sauce
While the cauliflower is roasting, it’s time to make the sauce. In a small bowl, whisk together soy sauce, rice vinegar, chili paste, and a bit of brown sugar. The sugar balances out the heat, creating that perfect sweet-and-spicy combo. Stir until the sugar dissolves and the sauce is smooth.
Sauté the Peanuts and Green Onions
In a small pan, heat a tablespoon of oil over medium heat. Add your peanuts and cook for 1-2 minutes until they’re toasted and fragrant. Add the green onions and cook for another 30 seconds. This gives the dish that added crunch and freshness.
Combine Everything
Once the cauliflower is roasted, toss it in the sauce until it’s well coated. Add the peanuts and green onions, and give everything one final toss. The cauliflower should be crispy, the sauce should cling to every floret, and the peanuts should provide the perfect crunch.
Serve and Enjoy
Serve your Kung Pao Cauliflower immediately while it’s hot and crispy. Pair it with some steamed rice or enjoy it on its own. Either way, it’s sure to be a hit!
Nutrition Facts
Servings: [Number of servings]
Calories per serving: [Calorie count per serving]
Preparation Time
Prep Time: [Time to prepare ingredients]
Cook Time: [Time to cook or bake]
Total Time: [Total time needed]
How to Serve Kung Pao Cauliflower
This dish is versatile and can be served in many ways. Here are a few ideas:
Over Steamed Rice
Serve this Kung Pao Cauliflower over a bed of fluffy rice. The rice will soak up all that delicious sauce, creating a comforting base for the crispy cauliflower.
As a Side Dish
Pair it with your favorite Chinese-inspired dishes like sesame noodles or stir-fried vegetables. It’s a great way to add a bit of variety to your meal.
With Noodles
You can also serve it alongside noodles, like soba or rice noodles, to create a more filling meal.
Garnished with Fresh Herbs
Top it with cilantro or basil for a fresh pop of flavor. The herbs will add a burst of color and a touch of freshness that complements the dish perfectly.
Additional Tips
Here are some extra tips to help you get the most out of this recipe:
Prep Ahead
You can chop the cauliflower and make the sauce in advance to save time. Just store them separately in the fridge until you’re ready to cook.
Adjust the Spice Level
If you’re not into too much heat, start with a small amount of chili paste and add more to taste. It’s all about finding the right balance for you.
Make it Vegan
This dish is already plant-based, but you can make it gluten-free by using tamari instead of soy sauce.
Storage Tips
Store leftovers in an airtight container in the fridge for up to 3 days. Reheat in the oven to keep the cauliflower crispy.
Double the Batch
This recipe is perfect for making extra! You can easily double the recipe to feed a crowd or have leftovers for the next day.
FAQ Section
Q1: Can I substitute cauliflower with another vegetable?
A1: Absolutely! You can try broccoli, Brussels sprouts, or even tofu for a different texture and flavor.
Q2: Can I make this ahead of time?
A2: You can prep the cauliflower and sauce ahead of time, but I recommend roasting the cauliflower just before serving to keep it crispy.
Q3: How do I store leftovers?
A3: Store leftovers in an airtight container for up to 3 days. Reheat in the oven at 375°F for 10-15 minutes to maintain the crispiness.
Q4: Can I freeze this dish?
A4: While the cauliflower may lose some of its crispiness, you can freeze it for up to 1 month. Just reheat in the oven when ready to eat.
Q5: What’s the best way to reheat this dish?
A5: To keep the cauliflower crispy, reheat it in the oven at 375°F for about 10 minutes. You can also microwave it, but it won’t be as crispy.
Q6: Can I double the recipe?
A6: Yes, you can easily double the recipe! Just make sure to use a larger pan for roasting the cauliflower and adjust the cooking time as needed.
Q7: Is this recipe suitable for a gluten-free diet?
A7: Yes, just use tamari instead of soy sauce for a gluten-free version!
Q8: What side dishes go well with this recipe?
A8: This dish pairs well with steamed rice, stir-fried vegetables, or even a fresh green salad.
Q9: How can I make this dish healthier?
A9: You can reduce the sugar in the sauce or skip the peanuts if you want to cut back on calories.
Q10: What’s the best cookware to use for this recipe?
A10: A sturdy baking sheet for roasting the cauliflower and a small pan for sautéing the peanuts and green onions will work perfectly.
Conclusion
This Kung Pao Cauliflower is a game-changer—it’s crispy, spicy, and packed with flavor. Whether you’re cooking for yourself or serving a crowd, this dish is sure to impress. And with how easy it is to make, you’ll find yourself reaching for this recipe time and time again. Happy cooking!
Print
Kung Pao Cauliflower
- Prep Time: 15 minutes
- Cook Time: 30 minutes
- Total Time: 45 minutes
- Yield: 4 servings
- Category: Main Course, Vegan, Gluten-Free (optional)
- Method: Stir-frying, Baking, Frying, Air-frying
- Cuisine: Chinese, Asian-Inspired
- Diet: Vegetarian
Description
This Kung Pao Cauliflower is crispy, saucy, and packed with bold, spicy-sweet flavors. A plant-based twist on the classic Chinese dish, it’s perfect served over rice or noodles for a quick and delicious meal!
Ingredients
-
For the Cauliflower:
- 1 medium head cauliflower, cut into florets
- 1/2 cup cornstarch
- 1/2 cup water
- 1/2 cup all-purpose flour (or rice flour for gluten-free)
- 1/2 tsp salt
- 1/2 tsp garlic powder
- 1/4 tsp black pepper
- Oil for frying (or baking/air-frying alternative below)
For the Kung Pao Sauce:
- 1/4 cup soy sauce (or tamari for gluten-free)
- 2 tbsp hoisin sauce
- 1 tbsp rice vinegar
- 1 tbsp brown sugar or maple syrup
- 1 tsp sesame oil
- 2 cloves garlic, minced
- 1 tsp grated ginger
- 1 tsp cornstarch mixed with 2 tbsp water (to thicken)
- 1/2 tsp red pepper flakes (or more for extra heat)
For Stir-Frying:
- 1 tbsp oil
- 1/2 cup red bell pepper, diced
- 1/2 cup green bell pepper, diced
- 1/4 cup roasted peanuts or cashews
- 2–3 dried red chilies (optional, for authentic heat)
- 2 green onions, sliced (for garnish)
Instructions
1️⃣ Prepare the Crispy Cauliflower:
- In a bowl, whisk together cornstarch, flour, water, salt, garlic powder, and black pepper until smooth.
- Dip cauliflower florets into the batter, shaking off excess.
- Frying Option: Heat oil in a deep pan over medium heat and fry cauliflower for 3-4 minutes until golden brown. Drain on paper towels.
- Baking Option: Bake at 425°F (220°C) for 20-25 minutes, flipping halfway.
- Air-Frying Option: Air fry at 400°F (200°C) for 12-15 minutes, shaking halfway.
2️⃣ Make the Kung Pao Sauce:
- In a bowl, whisk together soy sauce, hoisin sauce, rice vinegar, brown sugar, sesame oil, garlic, ginger, cornstarch slurry, and red pepper flakes.
3️⃣ Stir-Fry the Veggies:
- Heat 1 tbsp oil in a large pan over medium-high heat.
- Add bell peppers, dried chilies, and peanuts, stir-frying for 2 minutes.
4️⃣ Coat the Cauliflower:
- Pour in the Kung Pao sauce and stir until thickened.
- Add the crispy cauliflower and toss to coat.
5️⃣ Garnish & Serve:
- Sprinkle with green onions and serve over steamed rice or noodles.
Notes
- For a gluten-free version, use tamari instead of soy sauce and rice flour instead of all-purpose flour.
- Adjust the amount of red pepper flakes based on your preferred spice level.
- This dish can be served with steamed jasmine rice or noodles for a complete meal.
Nutrition
- Serving Size: 1/4 of the recipe
- Calories: 270
- Sugar: 7g
- Sodium: 900mg
- Fat: 16g
- Saturated Fat: 2g
- Unsaturated Fat: 14g
- Trans Fat: 0g
- Carbohydrates: 28g
- Fiber: 5g
- Protein: 5g
- Cholesterol: 0mg


