

Island Dream Coconut Cream Bars
Okay, friend—let’s talk coconut. But not just any coconut dessert. We’re diving fork-first into Island Dream Coconut Cream Bars, and let me tell you… these little squares are like a tropical vacation for your taste buds. One bite and you’re transported to a breezy, sun-kissed beach where the only thing on your agenda is dessert and good vibes.
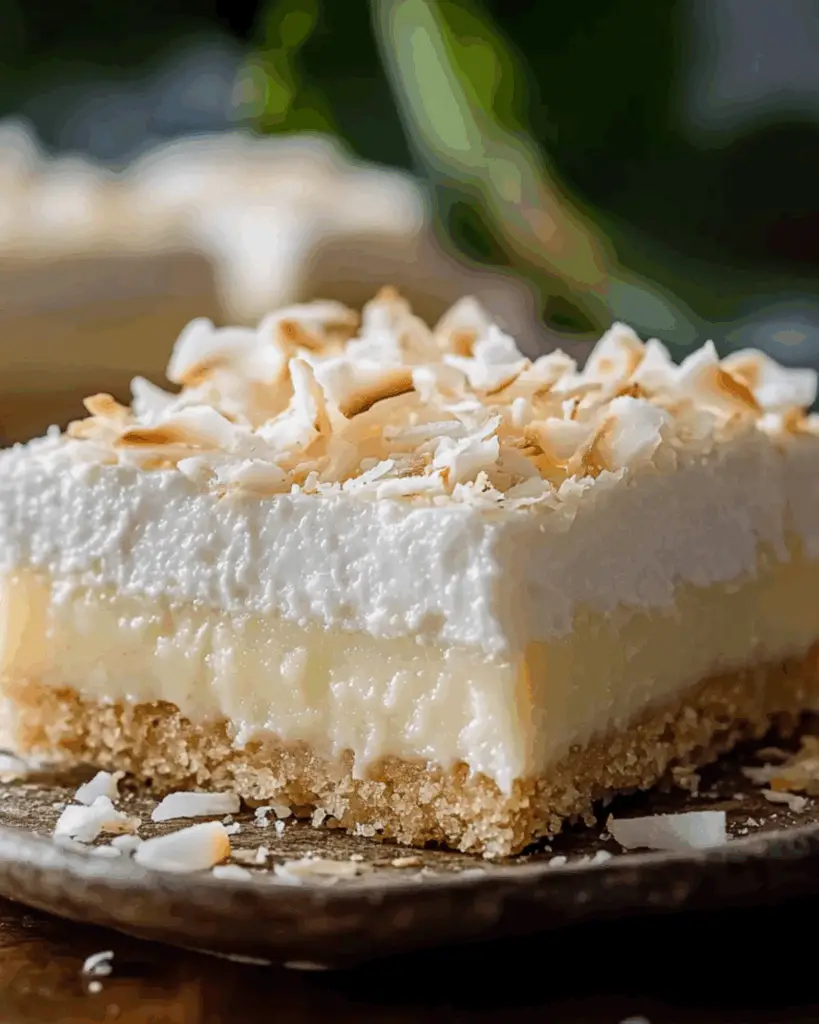
We’re talking about a buttery golden crust, a smooth, creamy coconut filling that’s luxuriously rich without being too heavy, and a delicate whipped topping that melts on your tongue like a sea breeze. Oh, and let’s not forget that sprinkle of toasted coconut on top for the ultimate crunch and tropical flair. Honestly? These bars are pure magic.
They’re the kind of dessert that makes people close their eyes when they take a bite. Perfect for potlucks, picnics, or just treating yourself after a long day. So grab your mixing bowls, channel your inner island goddess (or dude), and let’s bake something beautiful. Trust me—you’re going to love this one.
Why You’ll Love Island Dream Coconut Cream Bars
This recipe isn’t just about ingredients—it’s about escape, comfort, and a little slice of indulgence. Whether you’re sharing it or savoring it solo, it fits every mood and moment. Here’s what makes it a go-to favorite:
Versatile
Perfect for a warm-weather get-together, holiday dessert table, or a quiet night in. These bars feel festive but aren’t fussy, so you can dress them up or keep things chill.
Budget-Friendly
Uses everyday ingredients you probably already have tucked away in your pantry. Nothing fancy here—just simple things coming together in a sweet, creamy harmony.
Quick and Easy
Minimal fuss, maximum payoff. You don’t need to be a pastry chef to make these, and the steps are beginner-friendly and stress-free.
Customizable
Craving something extra? Add a splash of rum to the filling for an adult twist or fold in crushed pineapple for a piña colada vibe. These bars are your canvas!
Crowd-Pleasing
Sweet, creamy, and loaded with coconut goodness—what’s not to love? These bars are guaranteed to disappear fast at any gathering (and you’ll probably be asked for the recipe more than once).
Disclosure: This post contains affiliate links.If you click and make a purchase, I may earn a small commission at no extra cost to you.


Ingredients in Island Dream Coconut Cream Bars
Here’s the beauty of these bars—they’re made with humble ingredients that turn into something truly crave-worthy. Let’s break it down:
All-Purpose Flour
Forms the base of that dreamy shortbread-style crust. Tender and buttery with just the right amount of structure.
Unsalted Butter
Rich and creamy, it makes the crust irresistibly golden and flaky. Bonus: it adds that comforting, melt-in-your-mouth texture.
Granulated Sugar
Adds the perfect touch of sweetness to the crust and balances the coconut cream.
Eggs
Help bind everything together and give the filling its creamy, custard-like consistency.
Sweetened Shredded Coconut
The star of the show! It brings in the signature texture and tropical flavor that makes this dessert shine.
Coconut Milk
Adds richness and depth to the filling. It gives the bars that silky coconut flavor without being overpowering.
Vanilla Extract
A splash of vanilla ties the whole flavor profile together with its warm, comforting aroma.
Cornstarch
Helps thicken the filling to that dreamy, creamy consistency we all love.
Whipped Topping
Light and fluffy, this adds the perfect cloud-like finish to the bars. Homemade whipped cream or store-bought both work beautifully.
Toasted Coconut (for garnish)
A finishing touch that adds a delightful crunch and a little extra island flair. Plus, it looks gorgeous.
(Note: The full ingredients list, including measurements, is provided in the recipe card directly below.)
Instructions for Island Dream Coconut Cream Bars
Let’s dive into the steps to create this flavorful masterpiece:
Preheat Your Equipment
Preheat your oven to [temperature]. Grease or line a baking pan with parchment paper to make serving and cleanup a breeze.
Combine Ingredients
In a large bowl, mix flour, sugar, and butter until crumbly. Press into the prepared pan to form a crust. Bake until golden and let it cool slightly.
Prepare Your Cooking Vessel
While the crust bakes, prepare a saucepan for the coconut cream filling. Stir gently over medium heat—this is where the creamy magic happens.
Assemble the Dish
Pour the coconut cream mixture over the baked crust and smooth it out with a spatula. Make sure it’s even so every bite has that silky filling.
Cook to Perfection
Return the pan to the oven and bake until the filling is set—look for a gentle jiggle in the center. Let the bars cool completely at room temperature before refrigerating to firm up.
Finishing Touches
Once chilled, top with whipped topping and sprinkle generously with toasted coconut. Slice into squares and prepare for your taste buds to do a happy dance.
Serve and Enjoy
Serve cold, straight from the fridge. These are refreshing, indulgent, and totally irresistible—especially on a warm day with a cold drink nearby.
How to Serve Island Dream Coconut Cream Bars
- Tropical Dessert Table: Pair with pineapple chunks, mango slices, or a fruity punch for full-on island vibes.
- On the Go: Pack them into lunch boxes or picnic baskets for a sweet surprise.
- Late-Night Treat: Keep them chilled in the fridge for that perfect after-dinner nibble.
- Mini Style: Cut them into bite-sized squares and serve them as part of a dessert sampler—so cute!
Presentation tip: Garnish each square with a little mint sprig or a drizzle of chocolate sauce for an elevated look that feels straight out of a bakery.
Additional Tips
- Prep Ahead: Make these the night before—they taste even better after chilling overnight.
- Toasting Coconut: Toast your coconut in a dry skillet for 2–3 minutes until golden and fragrant—watch it closely, it browns quickly!
- Storage Tips: Store in an airtight container in the fridge for up to [time duration]. They hold their shape and stay creamy.
- Freezing Friendly: Freeze the bars (without whipped topping) and thaw overnight in the fridge before serving.
- Flavor Twist: Try adding lime zest or a splash of coconut extract to boost the tropical flavor.
FAQ Section
Q1: Can I use unsweetened coconut instead of sweetened?
A1: Yes, but you may want to add a touch more sugar to balance the flavor.
Q2: Can I make this dessert ahead of time?
A2: Absolutely! These bars are actually better when made in advance and chilled thoroughly.
Q3: How do I store leftovers?
A3: Store in the fridge in an airtight container for up to 5 days.
Q4: Can I freeze these bars?
A4: Yes! Freeze the un-topped bars for up to 2 months. Thaw, then add whipped topping and garnish before serving.
Q5: What’s the best way to reheat them?
A5: These are best served cold, but if you want a warm crust, let the base come to room temp before serving.
Q6: Can I double the recipe?
A6: For sure! Just use a larger pan and extend the baking time slightly.
Q7: Is this recipe gluten-free?
A7: Use a 1:1 gluten-free flour substitute for the crust and double-check that all other ingredients are gluten-free.
Q8: What drinks pair well with this dessert?
A8: Coconut-flavored drinks, fruity mocktails, or a chilled glass of white wine are fabulous choices.
Q9: How can I make this healthier?
A9: Swap in light coconut milk and use less sugar in the filling. Greek yogurt whipped topping is also a lighter option.
Q10: What’s the best dish to bake these in?
A10: A glass or ceramic 9×13-inch baking dish is ideal—it ensures even baking and easy slicing.
Conclusion
There you have it—Island Dream Coconut Cream Bars, your new favorite way to indulge in creamy, coconutty bliss. They’re easy, dreamy, and downright addictive. Whether you’re making a batch for a summer party or just treating yourself to a little moment of joy, this recipe delivers every time. So go ahead—take a bite, close your eyes, and drift away to dessert paradise.
Print
Island Dream Coconut Cream Bars
- Prep Time: 15 minutes
- Cook Time: 12 minutes
- Total Time: 45 minutes
- Yield: 9 bars
- Category: Dessert
- Method: Baking, Chilling
- Cuisine: American
- Diet: Vegetarian
Description
These creamy Coconut Cream Bars are the perfect no-fuss dessert with layers of flaky pie crust, coconut pudding, whipped topping, and toasted coconut. Light, tropical, and super easy to make ahead!
Ingredients
1 roll refrigerated pie crust (at room temperature)
3.4 ounces coconut cream instant pudding mix
2 cups whole milk
1 teaspoon coconut extract (optional)
2 cups sweetened flaked coconut (divided in half)
8 ounces frozen whipped topping (thawed)
Instructions
Preheat the oven to 450°F.
Unroll the pie crust and place it in an 8×8-inch square glass baking dish. Press the crust into the dish and up the sides as far as possible—it will shrink slightly while baking. Prick the bottom and sides with a fork.
Bake the crust according to package instructions, usually 10 to 12 minutes. Remove and cool completely for about 15 minutes.
In a bowl, whisk together the pudding mix, milk, and coconut extract (if using) for 3 to 5 minutes, until it thickens.
Stir in 1 cup of flaked coconut (optional).
Spread the pudding mixture evenly into the cooled crust.
Top with the thawed whipped topping, spreading evenly.
Freeze for at least 30 minutes to chill and set.
Spread the remaining 1 cup of coconut flakes on a baking sheet or pie plate. Toast in the oven at 450°F for 5 to 8 minutes, stirring every few minutes until golden. Remove and cool.
Sprinkle toasted coconut over the bars before serving. Cut and enjoy!
Notes
-
For a stronger coconut flavor, use coconut milk instead of whole milk in the pudding mixture.
-
Store leftovers covered in the refrigerator for up to 3 days.
-
This recipe can be made a day ahead—just add the toasted coconut right before serving for best texture.
Nutrition
- Serving Size: 1 bar
- Calories: 280
- Sugar: 20g
- Sodium: 210mg
- Fat: 15g
- Saturated Fat: 11g
- Unsaturated Fat: 3g
- Trans Fat: 0g
- Carbohydrates: 32g
- Fiber: 2g
- Protein: 3g
- Cholesterol: 15mg


