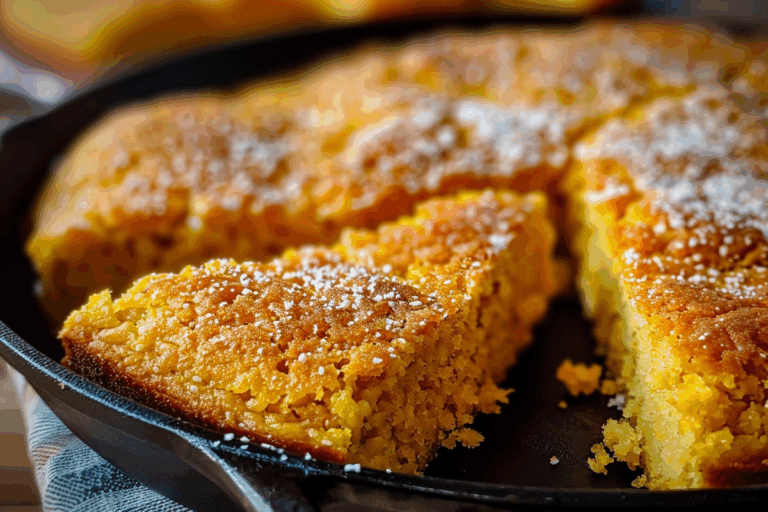
Hot Milk Cake
Hot Milk Cake is a classic dessert that is as simple as it is delicious. With its moist crumb, light texture, and subtle sweetness, this cake is perfect for a variety of occasions, from tea time to birthday celebrations. Made with readily available ingredients and requiring minimal effort, it’s a go-to recipe for beginners and seasoned bakers alike. In this post, you’ll learn not only how to make Hot Milk Cake but also tips for perfecting your bake every time.
Why You Will Love This Recipe
If you’re looking for a versatile cake that can stand on its own or be decorated for special occasions, Hot Milk Cake is your answer. Its buttery flavor and airy texture make it ideal for pairing with fruits and whipped cream or serving plain with a dusting of powdered sugar. Moreover, this cake is forgiving for novice bakers, ensuring a successful outcome with each attempt.
Ingredients
This delightful cake requires only a handful of simple ingredients that combine to create its unique flavor and texture:
- All-purpose flour: 2 cups (250g)
- Baking powder: 1 teaspoons
- Salt: 1 teaspoon
- Granulated sugar: 1 cup (200g)
- Eggs: 2 large, room temperature
- Whole milk: ½ cup (120ml)
- Unsalted butter: ¼ cup (60g)
- Vanilla extract: 1 teaspoon
Instructions
Step 1: Preheat your oven to 175°C (350°F). This ensures your oven is ready to bake the cake once your batter is mixed.
Step 2: Lightly grease a loaf pan with butter or non-stick spray. To further prevent sticking, line the bottom of the pan with parchment paper. This will help ensure an easy release of the cake later on.
Step 3: In a medium mixing bowl, combine the flour, baking powder, and salt. Whisk these dry ingredients together to evenly distribute the baking powder and salt. Set this bowl aside for later use.
Step 4: In a larger mixing bowl, crack the two eggs and add the granulated sugar. Using a hand mixer or a whisk, beat the mixture until it becomes pale, thick, and slightly fluffy. This process incorporates air into the batter, which will contribute to the light texture of the final cake.
Step 5: In a small saucepan, pour in the milk and add the unsalted butter. Set the saucepan over medium heat and warm the mixture until the butter has fully melted and the milk is hot, but not boiling. You’ll notice small bubbles forming around the edges; this is the indication that it’s ready. Once melted, remove the saucepan from heat immediately.
Step 6: With your egg and sugar mixture still being whisked, slowly pour the hot milk-butter mixture into the bowl in a thin, steady stream. Mix constantly as you pour this hot mixture in to ensure that the heat doesn’t scramble the eggs. Once combined, stir in the vanilla extract for added flavor.
Step 7: Gradually add the dry ingredients to the wet mixture in two batches. Fold gently with a spatula after each addition, mixing only until the flour disappears. Overmixing can lead to a dense cake, so be gentle with your movements. The batter will be slightly thin, which is normal, so don’t be alarmed.
Step 8: Pour the batter into the prepared loaf pan, smoothing the top with a spatula to ensure an even bake. Place the pan in the preheated oven and bake for 40–45 minutes. The cake is done when the top is golden brown, and a toothpick inserted in the center comes out clean.
Step 9: Once baked, remove the cake from the oven and allow it to cool in the pan for 10 minutes. This will help the cake firm up, making it easier to handle. Carefully lift the cake out using the parchment paper, and transfer it to a wire rack to cool completely before slicing.
Pro Tips for Perfect Hot Milk Cake
1. **Room Temperature Ingredients:** Always ensure that your eggs are at room temperature. This helps to create a more even batter and improves the final texture of the cake.
2. **Don’t Overmix:** Once you add the dry ingredients, mix just until combined for a beautiful, light cake. Overmixing develops the gluten in flour, leading to density.
3. **Check Doneness:** Use a toothpick to check for doneness, inserting it in the center. If it comes out clean or with a few moist crumbs, your cake is ready.
4. **Cooling:** Allow the cake to cool completely on a wire rack to let it set properly and avoid sogginess.
5. **Serving Variations:** This cake can be enjoyed plain, dusted with powdered sugar, or served alongside fresh fruit and whipped cream for an elegant dessert.
Frequently Asked Questions
Can I use a different type of flour?
While all-purpose flour is recommended for the best texture, you can try cake flour, which will give you an even lighter crumb.
What flavor variations can I add to Hot Milk Cake?
You can incorporate lemon zest, almond extract, or spices like cinnamon or nutmeg into the batter for festive variations. Also, consider adding chocolate chips for a chocolatey delight!
Can Hot Milk Cake be frozen?
Yes! You can freeze the cooled cake by wrapping it tightly in plastic wrap and then in aluminum foil. To serve, thaw in the fridge overnight and enjoy the next day.
How do I store leftovers?
Store any leftover cake in an airtight container at room temperature for up to 3 days. For longer storage, refrigerate for up to a week.
Can I make this cake using a different pan?
Absolutely! This recipe can also be made in an 8-inch round cake pan or a muffin tin; just adjust the baking time accordingly.
Conclusion
Hot Milk Cake is a timeless recipe that manages to impress with its simplicity and delicious flavor. Whether you make it for a gathering or just to enjoy at home, this cake’s versatility and ease will make it a favorite among friends and family. Try it out and discover how easy it is to create a delightful treat that will leave everyone asking for seconds!


