Homemade Strawberry Vanilla Bean Ice Cream
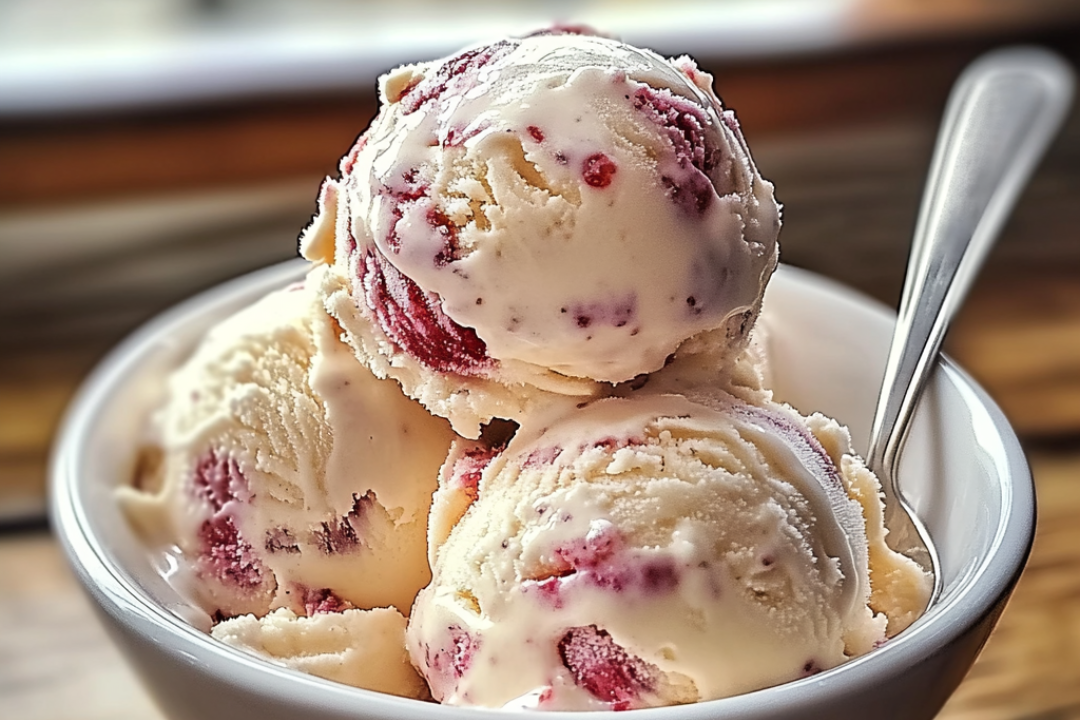
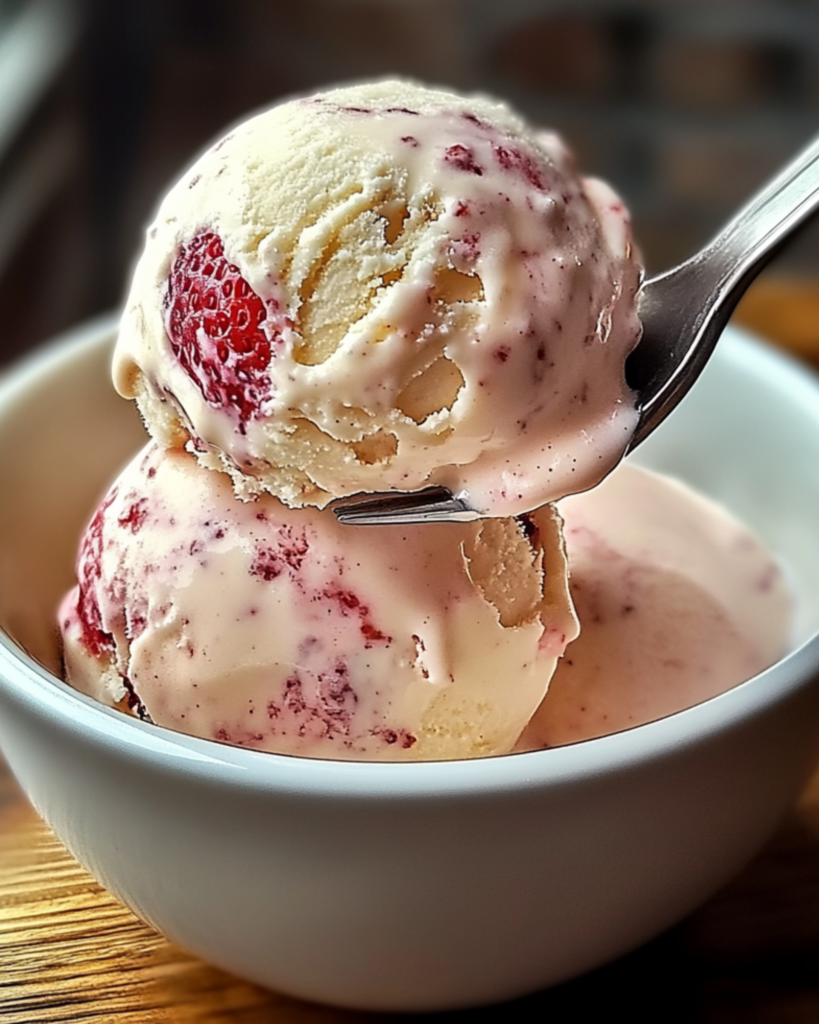
Let’s talk about ice cream—specifically, homemade strawberry vanilla bean ice cream that will make your taste buds do a happy dance. Imagine the sweet, juicy flavor of ripe strawberries paired with the rich, creamy goodness of vanilla bean ice cream. Now, picture that fresh, vibrant flavor melting perfectly on your tongue with every scoop. Trust me, once you taste this, you’ll wonder why you ever bought store-bought again! Whether you’re treating yourself after a long week, impressing your friends at a party, or indulging in a nostalgic dessert moment, this ice cream is a total game-changer. You’re going to love it.
Why You’ll Love Homemade Strawberry Vanilla Bean Ice Cream
This recipe isn’t just about the flavors—it’s about making memories in the kitchen and sharing them with the ones you love. Whether you’re cozying up with a bowl on a lazy afternoon or serving it as the star of your next dinner party, here’s why this ice cream is a favorite:
Versatile:
Perfect for any occasion. Whether you’re cooling off in the summer heat or indulging in a sweet treat year-round, this ice cream is ready for any moment. Want to take it to a party? It’s an absolute crowd-pleaser.
Budget-Friendly:
No need for fancy ingredients or a complicated shopping list. With just a few pantry staples, you can make ice cream that tastes like it came from a high-end gelato shop. It’s the perfect way to treat yourself without breaking the bank.
Quick and Easy:
The steps are simple and straightforward—no complicated methods or equipment needed. Just a few basic steps and some patience while it freezes, and you’ll have your new favorite homemade ice cream.
Customizable:
Feeling a little adventurous? Try adding a swirl of chocolate fudge, a handful of crushed cookies, or a sprinkle of cinnamon. You can make this recipe your own with just a little tweak to the ingredients or flavor.
Crowd-Pleasing:
Guaranteed to please everyone, from kids to adults. The fresh strawberry flavor combined with that sweet vanilla base is the ultimate combo. It’s a perfect dessert that suits any sweet tooth.
Disclosure: This post contains affiliate links.If you click and make a purchase, I may earn a small commission at no extra cost to you.
Ingredients
This simple and sweet treat uses just a handful of ingredients to bring you that creamy, dreamy texture. Let’s break it down:
Fresh Strawberries:
The star of the show. Sweet, juicy strawberries will give this ice cream its vibrant color and fresh flavor. You can’t go wrong with ripe, in-season berries.
Heavy Cream:
For that rich, creamy texture that makes homemade ice cream so special. It adds the luxurious mouthfeel and helps freeze the ice cream without making it too hard.
Whole Milk:
Pairs perfectly with the heavy cream to balance the texture, giving it that smooth, velvety consistency.
Sugar:
The sweet touch that ties everything together. It enhances the natural sweetness of the strawberries and adds the right amount of sweetness to the base.
Vanilla Bean:
Nothing beats the fragrance and flavor of real vanilla bean. It adds depth to the ice cream, making every bite feel indulgent. Trust me, it’s worth the extra step over vanilla extract!
Salt:
Just a pinch to balance the sweetness and bring all the flavors to life. It’s the secret ingredient that makes everything pop.
(Note: The full ingredient list, including measurements, is provided in the recipe card directly below.)
Instructions
Ready to make your ice cream? Let’s dive into the easy steps:
Prepare the Strawberries:
Start by washing and hulling your strawberries. Once they’re nice and clean, chop them up and toss them into a bowl. Mash the berries with a fork or potato masher to break them down, leaving a few chunks for texture.
Make the Ice Cream Base:
In a separate bowl, combine the heavy cream, whole milk, sugar, and a pinch of salt. Scrape the seeds from the vanilla bean and add them to the mixture, along with the vanilla pod for extra flavor. Stir everything together until the sugar dissolves.
Mix the Strawberries:
Once your cream mixture is smooth, fold in the mashed strawberries. This is where the magic happens—those juicy berries will infuse the base with flavor.
Freeze:
Pour the mixture into your ice cream maker and churn according to the manufacturer’s instructions. You’ll know it’s ready when it thickens and has a soft-serve-like consistency.
Freeze Again:
Transfer the ice cream to a container and spread it out evenly. Pop it in the freezer for at least 4 hours (or overnight) to let it harden and reach that perfect scoopable texture.
Serve and Enjoy:
Scoop it into bowls or cones, and enjoy! You can top it with fresh berries, a drizzle of chocolate syrup, or even some crumbled cookies. But honestly, it’s perfect all on its own.
Nutrition Facts
Servings: 1/2 cup
Calories per serving: 220
Preparation Time
Prep Time: 30 minutes
Cook Time: 15-20 minutes (excluding chilling and freezing time)
Total Time: 4+ hours (including chilling and freezing)
How to Serve Homemade Strawberry Vanilla Bean Ice Cream
This ice cream is great on its own, but here are a few ideas to make it extra special:
Waffle Cones:
Serve it in a crispy, buttery waffle cone for that perfect ice cream parlor experience. You can even sprinkle some crushed nuts or chocolate chips on top for added texture.
Sundae Style:
Create a sundae bar with your favorite toppings. Think whipped cream, sprinkles, chocolate sauce, or fresh strawberries. Let everyone build their perfect sundae!
Pair with a Slice of Cake:
For an extra indulgent treat, serve a scoop of this ice cream alongside a slice of your favorite cake. Strawberry shortcake, anyone?
With Fresh Fruit:
For a refreshing twist, top your ice cream with fresh fruit like blueberries, raspberries, or a sprinkle of mint.
Additional Tips
Here are some pro tips to help you make the most of this ice cream recipe:
Prep Ahead:
Make the base the night before and chill it overnight. This helps it churn more easily and speeds up the process.
Experiment with Flavors:
Add a swirl of raspberry puree or a dash of cinnamon for a fun variation. The possibilities are endless!
Keep It Soft:
If your ice cream gets too hard, let it sit at room temperature for a few minutes before scooping. This will make it easier to serve.
Storage Tips:
Store any leftover ice cream in an airtight container in the freezer for up to a week. Make sure to press a piece of plastic wrap onto the surface to prevent freezer burn.
Double the Batch:
This recipe is easy to double or triple. If you’re hosting a party or just want extra for yourself (hey, no judgment), make more and store it!
FAQ Section
Q1: Can I use frozen strawberries instead of fresh ones?
A1: Absolutely! Frozen strawberries will work just fine—just let them thaw before mashing.
Q2: Do I need an ice cream maker to make this recipe?
A2: An ice cream maker is highly recommended for the best texture, but if you don’t have one, you can freeze the mixture and stir it every 30 minutes for a few hours to break up the ice crystals.
Q3: Can I make this dairy-free?
A3: Yes! Swap the heavy cream and milk for coconut milk or any plant-based milk of your choice.
Q4: How do I store leftovers?
A4: Keep the ice cream in an airtight container in the freezer for up to a week for the best texture.
Q5: Can I add mix-ins like chocolate chips or crushed cookies?
A5: Yes! Add them after the ice cream has finished churning but before you freeze it for the best texture.
Q6: How do I get that creamy texture?
A6: The key is using a combination of cream and whole milk. The fat content helps create that rich, smooth texture we all love.
Q7: Can I make this with other fruits?
A7: Definitely! You can use peaches, mangoes, or even mixed berries for different flavors.
Q8: How long does it take for the ice cream to harden?
A8: You’ll need at least 4 hours in the freezer, but overnight is best for that perfect scoopable texture.
Q9: Can I make this without the vanilla bean?
A9: Yes, you can substitute vanilla extract. Just be sure to use a high-quality extract for the best flavor.
Q10: Can I use a different sweetener?
A10: Yes, feel free to swap out the sugar for honey or maple syrup, but keep in mind it may change the flavor slightly.
Conclusion
Homemade strawberry vanilla bean ice cream is one of those simple pleasures that makes life sweeter. Whether you’re sharing it with friends, serving it at a special occasion, or simply enjoying a scoop (or two!) on a quiet evening, it’s sure to bring smiles all around. Don’t forget to indulge—you’ve earned it!
Print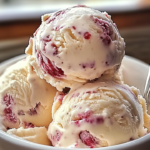
Homemade Strawberry Vanilla Bean Ice Cream
- Prep Time: 30 minutes
- Cook Time: 15-20 minutes (excluding chilling and freezing time)
- Total Time: 4+ hours (including chilling and freezing)
- Yield: 6-8 servings
- Category: Dessert
- Method: Ice Cream Maker
- Cuisine: American
- Diet: Gluten Free
Description
Indulge in a creamy, luxurious homemade strawberry vanilla bean ice cream made with fresh ingredients and a vanilla bean base. The perfect summer treat!
Ingredients
- For the Ice Cream Base:
- 1 vanilla bean, split and seeds scraped
- 2 cups heavy cream
- 1 cup whole milk
- 3/4 cup granulated sugar
- Pinch of salt
- 6 large egg yolks
- 1 teaspoon pure vanilla extract
For the Strawberries:
- 1 cup fresh strawberries, hulled and diced
- 2 tablespoons sugar (for strawberries)
Instructions
- Prepare the Strawberries: Toss the diced strawberries with 2 tablespoons of sugar. Let them macerate for about 30 minutes to bring out their natural juices and sweetness.
- Heat Milk and Cream Mixture: In a saucepan over medium heat, combine the heavy cream, milk, half of the granulated sugar, salt, and the seeds from the vanilla bean (including the pod). Bring to a boil, then remove from heat.
- Temper the Egg Yolks: In a separate bowl, whisk together the egg yolks and the remaining granulated sugar until smooth. Gradually pour the hot milk mixture into the egg yolks, whisking constantly to prevent the eggs from scrambling.
- Cook the Custard: Return the mixture to the saucepan and cook over low heat, stirring constantly with a wooden spoon, until the custard thickens enough to coat the back of the spoon (about 170-175°F).
- Chill the Custard: Remove from heat, strain through a fine-mesh sieve into a bowl, and stir in the vanilla extract. Cover and chill the custard thoroughly in the refrigerator for at least 4 hours or overnight.
- Process in Ice Cream Maker: Once chilled, remove the vanilla bean pod. Churn the custard in an ice cream maker according to the manufacturer’s instructions. During the last few minutes of churning, add the macerated strawberries.
- Freeze: Transfer the ice cream to an airtight container and freeze until firm, at least 2-4 hours before serving.
- Serve and Enjoy: Scoop and enjoy your homemade strawberry vanilla bean ice cream!
Notes
- Make sure to chill the custard for at least 4 hours, or overnight, for the best texture and flavor.
- If you don’t have an ice cream maker, you can freeze the mixture in a container, stirring every 30 minutes until it reaches a smooth consistency.
Nutrition
- Serving Size: 1/2 cup
- Calories: 220
- Sugar: 22g
- Sodium: 45mg
- Fat: 16g
- Saturated Fat: 10g
- Unsaturated Fat: 5g
- Trans Fat: 0g
- Carbohydrates: 23g
- Fiber: 1g
- Protein: 3g
- Cholesterol: 120mg

