

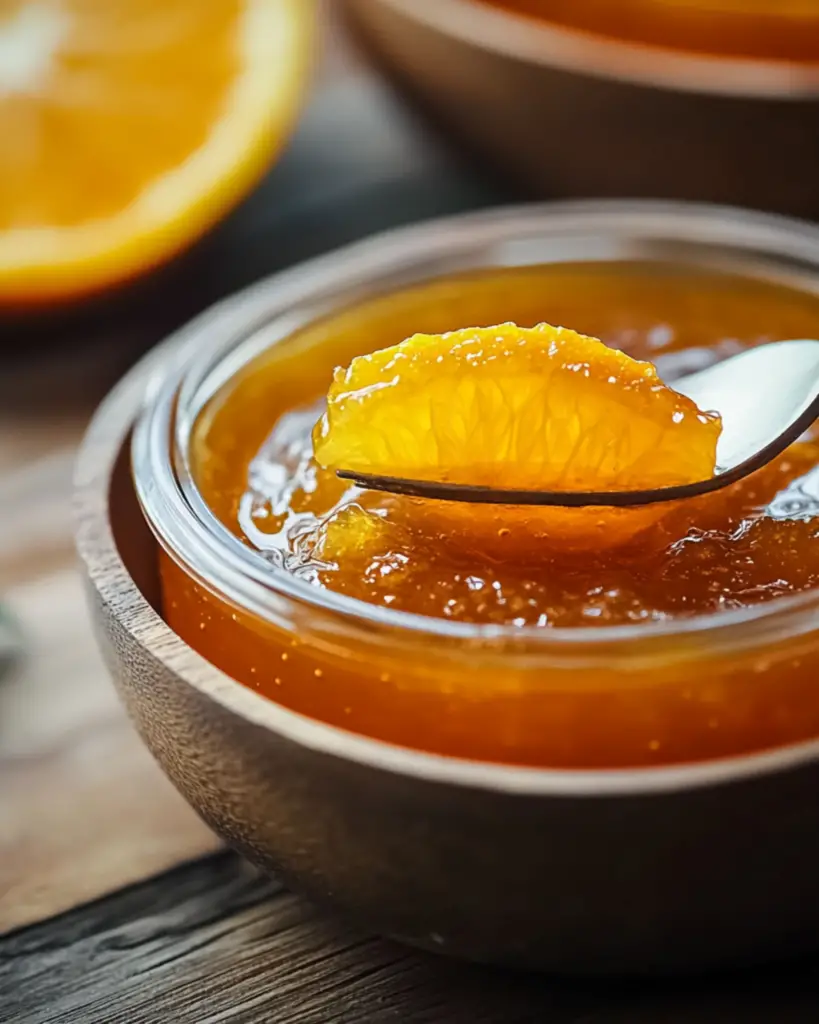
Homemade Orange Jam
Hey there, friend! If you’ve ever tasted that sweet, zesty goodness of homemade jam, you know that it’s a game-changer. And this Homemade Orange Jam? It’s like a little jar of sunshine! Trust me, you’re going to love this. There’s something magical about the way the bright citrus flavor melds perfectly with the sweetness, creating a spreadable treat that makes every bite feel like a cozy hug. Whether you’re slathering it on toast, dolloping it on your pancakes, or just sneaking spoonfuls straight from the jar (we won’t judge), this jam is going to steal your heart.
Why You’ll Love Homemade Orange Jam
This jam isn’t just about the ingredients—it’s about capturing the essence of summer and preserving it for those days when you need a little burst of sunshine in your day. Here’s why it’s a favorite:
Versatile:
Perfect for breakfast, snack time, or even a cheeky dessert. This jam goes with almost anything—spread it on your morning toast, pair it with a creamy brie on a cheese board, or swirl it into your yogurt for a fresh twist.
Budget-Friendly:
You don’t need a pantry full of exotic items. A few simple ingredients, and you’ve got yourself a sweet treat that’s way better than anything from the store. Plus, the whole process is pretty much foolproof, so you can make a batch without any stress.
Quick and Easy:
Even if you’re new to jam-making, you can totally nail this one. The steps are simple, and the results? Oh, they’re SO worth it. No fancy equipment needed, just some fruit, sugar, and a little patience while it cooks down to perfection.
Customizable:
Not a fan of too much sugar? No problem! You can tweak the sweetness to your liking. Want to add a little twist? Throw in a hint of cinnamon or ginger for extra flavor. This jam is your canvas, so get creative!
Crowd-Pleasing:
Whether you’re sharing it with family or gifting it to a friend, this homemade jam will impress everyone. There’s something so special about giving a jar of homemade goodness, and this one is sure to have people coming back for more.
Disclosure: This post contains affiliate links.If you click and make a purchase, I may earn a small commission at no extra cost to you.


Ingredients in Homemade Orange Jam
Here’s the magic of this jam—it’s made with just a few pantry staples, but the result is SO much more than the sum of its parts. Let’s break it down:
Oranges:
The star of the show. Fresh, juicy oranges that give this jam its vibrant citrus flavor. You’ll want to use the zest and juice for that perfect tangy-sweet balance.
Sugar:
Ah, sugar. It helps to bring all those zesty orange flavors together and gives the jam that perfect spreadable consistency.
Pectin:
This is your secret weapon for getting that thick, jammy texture. You can find it in most stores, and it’s essential for making sure your jam sets just right.
(Note: the full ingredients list, including measurements, is provided in the recipe card directly below.)
Instructions
Let’s dive into the steps to create this sweet masterpiece:
Prepare Your Oranges:
Start by zesting and juicing the oranges. You’ll want to make sure you get all the juicy goodness out, so go ahead and squeeze those oranges until they’re nice and empty. Set aside the zest—it’ll add an extra punch of flavor to your jam!
Combine the Ingredients:
In a large pot, combine the orange juice, zest, and sugar. Stir it all together and let it sit for a bit. This allows the sugar to dissolve and mix nicely with the orange flavors. It’s a simple step, but it’s essential for the perfect consistency.
Add Pectin:
Now it’s time to add the pectin. Sprinkle it in and give everything a good stir. This is what’s going to help your jam set up beautifully, so don’t skip it!
Cook It Down:
Bring the mixture to a boil over medium heat. Keep stirring as it heats up to prevent anything from sticking to the bottom of the pan. Once it’s boiling, reduce the heat and let it simmer for about 10-15 minutes, or until the jam thickens to your liking. You’ll know it’s done when it coats the back of a spoon. Trust me, the aroma while this cooks is going to be AMAZING!
Test for Set:
To make sure your jam is perfect, do a quick set test. Just drop a spoonful of the jam on a cold plate and place it in the freezer for a minute. If it wrinkles when you run your finger through it, you’re good to go!
Jar It Up:
Once your jam has thickened and passed the set test, it’s time to jar it up. Pour the jam into sterilized jars while it’s still hot, leaving a little room at the top. Seal them tightly and let them cool to room temperature.
Enjoy:
Now comes the best part: enjoying your homemade jam! Slather it on toast, pair it with your favorite cheeses, or just eat it by the spoonful (no judgment, I promise!). You’ve earned it.
How to Serve Homemade Orange Jam
This jam is a showstopper on its own, but it pairs wonderfully with a few sides and accompaniments. Here are a few serving suggestions to elevate your experience:
Warm, Toasted Bread:
You can’t go wrong with spreading this orange jam on a warm slice of freshly baked bread. It’s the kind of combo that makes breakfast feel extra special.
Cheese:
Creamy cheeses like goat cheese or brie pair beautifully with the citrusy sweetness of this jam. Spread it on crackers or a cheese board for a sweet and savory treat.
Yogurt or Oatmeal:
For a fresh, tangy twist, swirl some of your homemade jam into your morning yogurt or oatmeal. It’s a simple way to make breakfast feel like a real treat.
Gift It:
Homemade jam also makes the BEST gift. Pack it in a cute jar, tie it with a ribbon, and you’ve got yourself a thoughtful present that’s sure to be appreciated.
Additional Tips
Here are some extra tips to make sure your homemade jam turns out perfectly every time:
Prep Ahead:
Prepare the oranges and sugar the night before to save some time. This way, you can just jump right into cooking the next day.
Experiment with Flavors:
Add a pinch of cinnamon, nutmeg, or even vanilla extract for a unique twist on your jam. If you like it spicier, throw in some ginger!
Storage Tips:
Store your jam in an airtight container in the fridge. It should last about 2-3 weeks, but trust me, it won’t last that long!
Double the Batch:
Why make one jar when you can make two? This recipe doubles easily, so if you’ve got a bunch of oranges, go ahead and make extra to share or store for later.
FAQ Section
Q1: Can I substitute pectin with something else?
A1: If you can’t find pectin, you can make your own by boiling the seeds and skins of citrus fruits, but I highly recommend using store-bought pectin for convenience and consistency.
Q2: How do I know when my jam is done?
A2: Test your jam with the cold plate method. If it wrinkles when you run your finger through it, it’s ready to jar.
Q3: Can I freeze this jam?
A3: Yes! You can freeze your jam in freezer-safe jars for up to 6 months. Just be sure to leave some room at the top of the jar for expansion.
Q4: What if my jam is too runny?
A4: If your jam doesn’t set, you can always cook it a little longer to thicken up. Just keep simmering and stirring until it reaches the right consistency.
Q5: Can I use a different type of citrus for this recipe?
A5: Absolutely! Feel free to experiment with grapefruits, lemons, or even a mix of citrus fruits to make it your own.
Conclusion
And there you have it—a jar of sunshine to brighten your mornings, add some sweetness to your snacks, or give as a thoughtful gift. Homemade Orange Jam is one of those recipes that just feels like a hug in a jar. It’s sweet, tangy, and oh-so-satisfying. You’ve got this—now go ahead and make your kitchen smell amazing!
Print
Homemade Orange Jam
- Prep Time: 30 minutes
- Cook Time: 1-1.5 hours
- Total Time: 1.5-2 hours
- Yield: Approximately 4-5 jars (depending on size)
- Category: Dessert, Breakfast, Snacks, Canning, Preserves
- Method: Stovetop
- Cuisine: American
- Diet: Vegetarian
Description
This Homemade Orange Jam is a sweet and tangy spread made with fresh oranges, sugar, and lemon juice. Perfect for breakfast, brunch, or as a gift!
Ingredients
- 35 oz (about 2.2 lbs) oranges (Seville oranges are traditional, but any variety works)
- 26 oz granulated sugar
- Juice of 1 lemon
- 17 fl oz water
Instructions
- Prepare the oranges: Thoroughly wash the oranges. Peel them, saving the peels. Slice the peels into thin strips (about 1/8 inch wide) and remove as much of the white pith as possible to avoid bitterness. Chop the peeled oranges into segments, discarding any seeds.
- Combine ingredients: In a large pot, combine the chopped oranges, orange peel strips, sugar, lemon juice, and water.
- Cook the jam: Bring the mixture to a boil over medium heat, stirring constantly until the sugar dissolves. Reduce the heat to low and simmer for 45-60 minutes, stirring occasionally, until the jam thickens to your desired consistency.
- Test for doneness: To test, place a small amount of jam on a chilled plate. Run your finger through it—if it wrinkles, it’s ready. Alternatively, use a candy thermometer; the jam should reach 220°F (104°C).
- Jar the jam: Remove the jam from the heat and carefully pour it into sterilized jars, leaving about ¼ inch of space at the top. Wipe the rims clean, then seal with the lids.
- Invert jars: Place the sealed jars upside down on a clean surface to cool completely. This step helps create a vacuum seal.
Notes
- Orange Variety: While Seville oranges are ideal for marmalade due to their high pectin and slightly bitter flavor, you can use any orange you like. If using sweeter oranges, consider adding a bit more lemon juice to balance the sweetness.
- Peel Preparation: Be sure to remove most of the white pith from the orange peels, as it can contribute to bitterness in the jam.
- Cooking Time: Cooking times may vary depending on the juiciness of your oranges and your stove’s heat. Keep an eye on it and test frequently for the right consistency.
- Sterilizing Jars: Sterilize jars and lids by boiling them in water for 10 minutes, or use a dishwasher’s sanitize cycle.
- Storage: Store sealed jars in a cool, dark place. Once opened, refrigerate.
Nutrition
- Serving Size: 2 tbsp
- Calories: 50
- Sugar: 12g
- Sodium: 0mg
- Fat: 0g
- Saturated Fat: 0g
- Unsaturated Fat: 0g
- Trans Fat: 0g
- Carbohydrates: 13g
- Fiber: 1g
- Protein: 0g
- Cholesterol: 0mg


