Homemade Cheez-Its – The Ultimate Snack You Didn’t Know You Needed
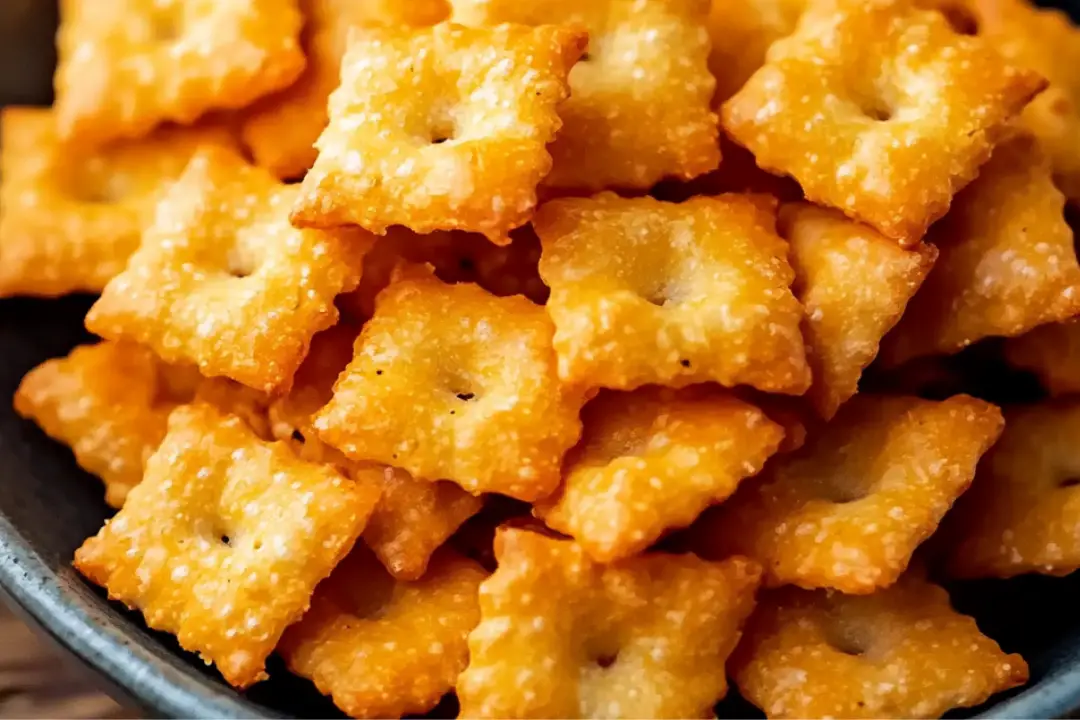
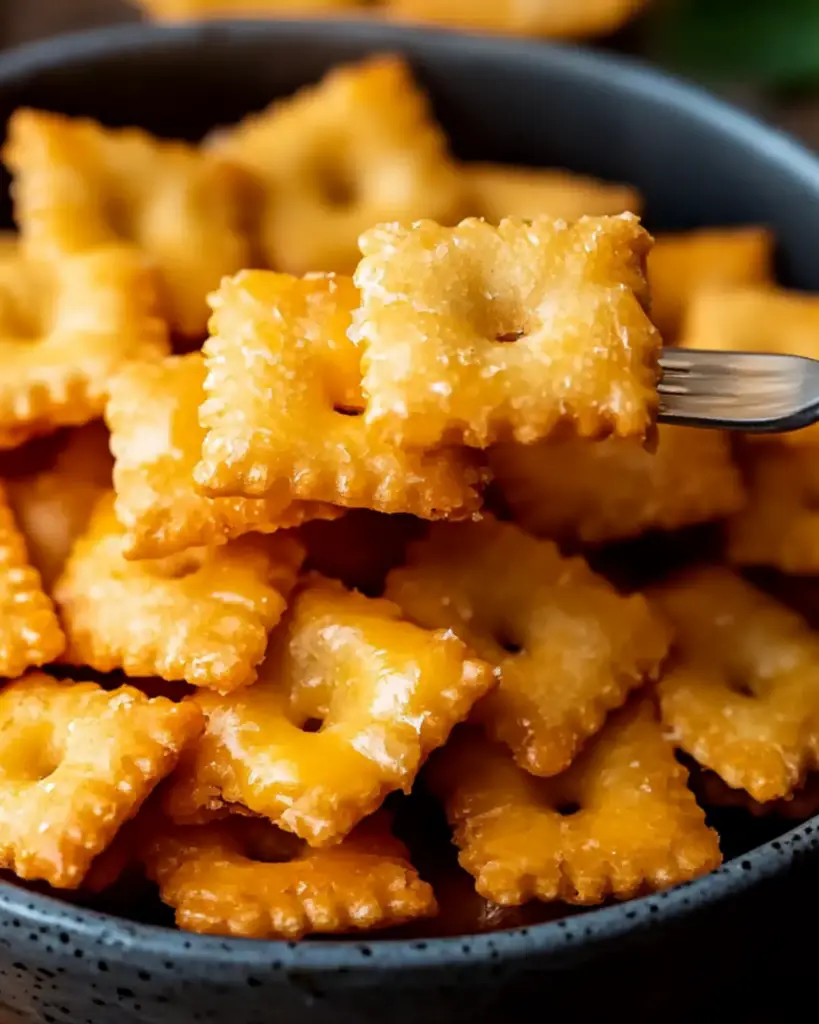
Okay, my snack-loving friend, let me tell you—if you’ve never had homemade Cheez-Its, you are in for a treat. Picture this: crispy, cheesy, perfectly seasoned crackers that break apart just right with every bite. The kind of snack that’s so addictive, you won’t be able to stop at just one. Making these from scratch is not only fun, but they’ll take your snacking game to a whole new level. Trust me, once you try these homemade Cheez-Its, you’ll never look at the store-bought ones the same way again.
Imagine biting into one of these little cheesy squares, and instantly being hit with that rich, buttery, salty goodness. The crispiness combined with that sharp cheddar flavor is next level—and you made it yourself! If you’re looking for a snack that’s comforting, nostalgic, and totally satisfying, these Cheez-Its are exactly what you need. And guess what? You don’t need a ton of fancy ingredients or special skills to pull them off.
Why You’ll Love Homemade Cheez-Its
This recipe isn’t just about making crackers; it’s about bringing people together and creating those moments of pure snack-time bliss. Whether you’re hosting a cozy movie night, packing a lunch for the kids, or just craving something cheesy and crispy, these homemade Cheez-Its are going to become your new go-to. Here’s why they’re a winner:
- Versatile: Perfect for any occasion. Whether you’re snacking solo, having a party, or packing these for lunch, these homemade Cheez-Its hit the spot.
- Budget-Friendly: No need for expensive, hard-to-find ingredients. You can make these with pantry staples you probably already have. It’s an easy and affordable way to enjoy a snack that tastes gourmet.
- Quick and Easy: If you’re tired of buying boxed snacks, this recipe will save you time and stress. It’s simple to whip up, and the result is ridiculously delicious.
- Customizable: Love bold flavors? Add a pinch of cayenne pepper or smoked paprika for a smoky kick. Want a little extra cheesy goodness? Sprinkle in some Parmesan. These Cheez-Its are your canvas!
- Crowd-Pleasing: Whether you’re serving them at a game night, on a charcuterie board, or as an afternoon snack, these crackers are guaranteed to disappear fast. Kids, adults, and everyone in between will love them!
Disclosure: This post contains affiliate links.If you click and make a purchase, I may earn a small commission at no extra cost to you.
Ingredients for Homemade Cheez-Its
Let’s break down the ingredients that make these Cheez-Its extra special. You won’t need anything fancy, but the result will taste amazing:
Cheddar Cheese
The star of the show! You want sharp, flavorful cheddar to give these crackers that unmistakable cheesy kick. Freshly grated cheese works best for that perfect melt and texture.
All-Purpose Flour
This forms the base of the crackers and gives them that perfect crispiness once baked.
Butter
A little butter goes a long way, adding richness and helping to create that delicate, melt-in-your-mouth texture.
Salt
A must to enhance the cheesy flavor and make each bite even more satisfying.
Baking Powder
This helps the crackers puff up slightly, giving them that irresistible, airy crunch.
Water
Just a splash of water brings everything together to form the dough.
(Note: The full ingredient list, including measurements, is provided in the recipe card directly below.)
Instructions
Now, let’s dive into the steps to make these irresistible homemade Cheez-Its. It’s easier than you think!
Preheat Your Oven
First, preheat your oven to 350°F (175°C). This ensures that your crackers bake evenly and come out perfectly crisp.
Make the Dough
In a food processor (or using your hands if you don’t have one), pulse together the grated cheddar cheese, flour, butter, salt, and baking powder until the mixture resembles coarse crumbs. Slowly add in a little bit of cold water, just enough to bring the dough together. You’re looking for a dough that’s not too sticky, but one that holds together when pressed.
Roll Out the Dough
On a lightly floured surface, roll the dough out to about 1/8 inch thickness. The thinner, the crispier! Use a pizza cutter or knife to cut the dough into small squares. You can make them as big or as tiny as you like, but I recommend going for that classic Cheez-It size—bite-sized, but full of cheesy flavor!
Bake to Perfection
Place the dough squares on a parchment-lined baking sheet, and bake them for about 12-15 minutes, or until they’re golden and crisp. Keep a close eye on them toward the end, as they can go from perfectly golden to overdone pretty quickly.
Cool and Enjoy
Let the Cheez-Its cool on the baking sheet for a few minutes before transferring them to a wire rack to cool completely. Then, grab a few (or a handful) and enjoy that satisfying crunch. These little cheesy bites are ready to be devoured
How to Serve Homemade Cheez-Its
These homemade Cheez-Its are the perfect snack on their own, but here are some ideas to make them even more fun to serve:
- With a Dip: Pair these Cheez-Its with some creamy ranch dressing, homemade guacamole, or even a spicy salsa for a next-level snacking experience.
- On a Snack Board: Serve them with a variety of cheeses, olives, and cured meats. These little crackers will shine on a charcuterie platter.
- As a Side for Soup: A warm bowl of tomato soup paired with homemade Cheez-Its is the ultimate comfort food duo.
Additional Tips
Here are a few extra tips to make sure you get the most out of this recipe:
- Grate Your Own Cheese: Pre-shredded cheese contains anti-caking agents that can affect the texture of the crackers. Grate your own cheese for the best results!
- Make a Double Batch: These homemade Cheez-Its are so delicious that they won’t last long. Consider doubling the recipe and storing extras in an airtight container for later.
- Experiment with Flavors: Spice things up by adding garlic powder, onion powder, or even a pinch of red pepper flakes for some heat.
FAQ Section
Q1: Can I use a different type of cheese?
A1: Absolutely! Try using gouda, mozzarella, or even a combination of cheeses for a unique twist. Just keep in mind that the flavor and texture may vary slightly.
Q2: Can I make these Cheez-Its gluten-free?
A2: Yes! Swap the all-purpose flour for a gluten-free flour blend, and these crackers will be just as crispy and delicious.
Q3: How should I store leftover Cheez-Its?
A3: Store any leftovers in an airtight container at room temperature. They should stay fresh for up to a week, but I’m willing to bet they’ll be gone long before then!
Q4: Can I freeze these crackers?
A4: You sure can! Place them in a freezer-safe container or bag and freeze for up to a month. When you’re ready to eat, just pop them in the oven for a few minutes to crisp them back up.
Q5: How can I make these spicier?
A5: Add a pinch of cayenne pepper, chili powder, or smoked paprika to the dough for a little kick!
Q6: Can I make these ahead of time?
A6: Yes! These Cheez-Its can be made in advance and stored. Just let them cool completely before sealing them up to keep them crunchy.
Conclusion
Homemade Cheez-Its are about to become your new favorite snack, and once you make them, I promise you won’t be able to stop at just one! They’re crispy, cheesy, and the perfect balance of savory goodness. Whether you’re making them for yourself or sharing them with friends and family, these little bites will be a hit every time. Give this recipe a try, and you’ll never go back to store-bought again! Enjoy!
Print
Homemade Cheez-Its – The Ultimate Snack You Didn’t Know You Needed
- Prep Time: 15 minutes
- Cook Time: 15 minutes
- Total Time: 1 hour (including 30 minutes of chill time)
- Yield: ~50 crackers
- Category: Snack, Appetizer, Homemade Snacks
- Method: Baking
- Cuisine: American
- Diet: Vegetarian
Description
Make your own homemade Cheez-Its with this simple recipe! Crispy, cheesy, and perfectly bite-sized, these homemade crackers are perfect for snack time or a homemade gift.
Ingredients
1 cup sharp cheddar cheese, shredded
4 tbsp unsalted butter, cold & cubed
¾ cup all-purpose flour (or whole wheat for a nuttier flavor)
½ tsp salt
2 tbsp ice-cold water
Instructions
-
Make the Dough:
-
In a food processor, blend cheese, butter, flour, and salt until the mixture resembles coarse crumbs.
-
Add cold water, 1 tbsp at a time, until the dough comes together.
-
-
Chill:
-
Shape dough into a disc, wrap in plastic wrap, and refrigerate for 30 minutes.
-
-
Roll & Cut:
-
Preheat the oven to 375°F (190°C).
-
Roll dough very thin (~⅛ inch) on a floured surface.
-
Cut into 1-inch squares using a knife or pizza cutter.
-
Use a toothpick to poke a hole in the center of each square.
-
-
Bake:
-
Place crackers on a lined baking sheet.
-
Bake for 12-15 minutes, until crisp and golden.
-
Let cool completely for maximum crunch!
-
Notes
-
Use extra-sharp cheddar cheese for an extra bold flavor!
-
For added crispiness, bake for an additional 2-3 minutes.
-
Store in an airtight container for up to a week.
-
For a nuttier flavor, try substituting whole wheat flour.
Nutrition
- Serving Size: 1 cracker
- Calories: 25 kcal
- Sugar: 0g
- Sodium: 20 mg
- Fat: 2g
- Saturated Fat: 1g
- Unsaturated Fat: 1g
- Trans Fat: 0g
- Carbohydrates: 1g
- Fiber: 0g
- Protein: 1g
- Cholesterol: 5mg

