

Grandmother’s Pie Crust Recipe
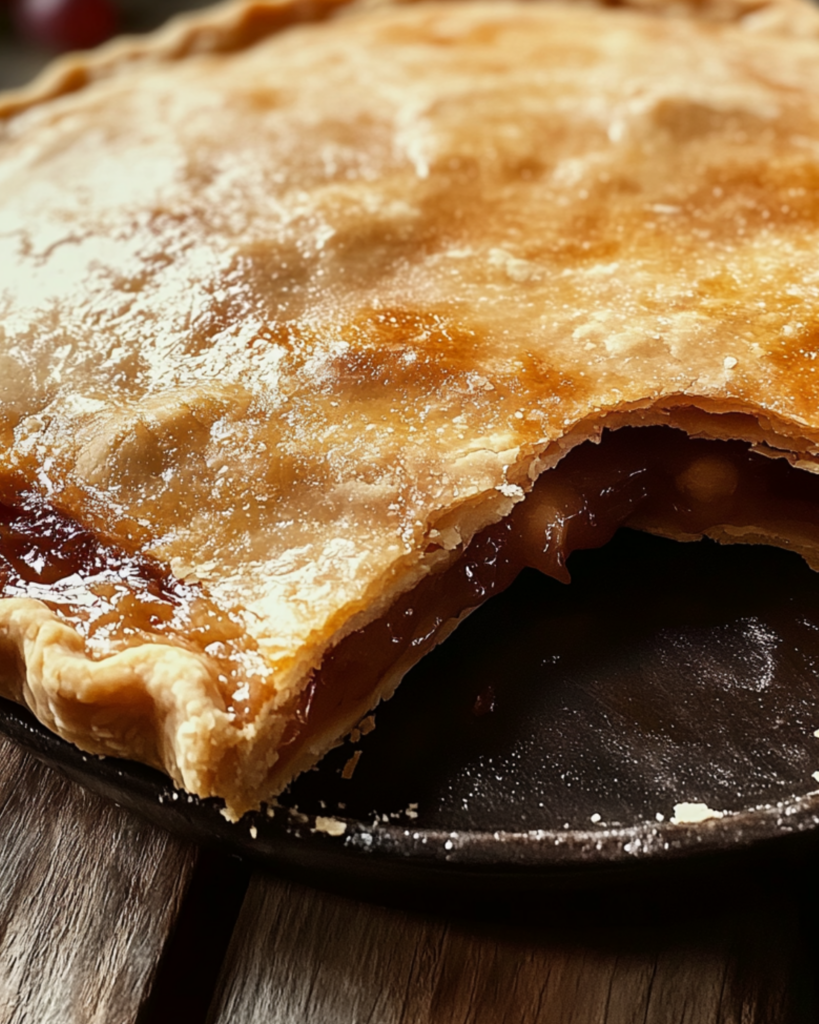
There’s something about making pie crust from scratch that feels so nostalgic, like you’re baking with your grandma in the kitchen, laughing over stories and dusting flour onto the countertop. Trust me, this pie crust recipe is everything you’ve been missing in your homemade pies. It’s buttery, flaky, and golden, with just the right amount of crispiness. It’s the kind of crust that holds up beautifully no matter what filling you choose—whether it’s a classic apple pie or a rich, velvety custard.
Making pie crust from scratch might sound intimidating, but it’s actually a breeze once you know the simple steps. This recipe has been passed down through generations, and it’s truly a game-changer. You won’t believe how much better homemade crust tastes—nothing beats it!
Why You’ll Love Grandmother’s Pie Crust Recipe
This recipe isn’t just about ingredients—it’s about the experience. Picture yourself rolling out dough, your kitchen filled with the comforting scent of butter, flour, and a hint of vanilla. Whether you’re baking for the holidays, a family gathering, or just because you’re craving something special, this pie crust brings warmth and a little bit of magic to any occasion. Here’s why you’ll adore this recipe:
Versatile: This pie crust is the perfect base for both sweet and savory pies. Whether you’re making a fruit-filled dessert or a hearty quiche, it’s the kind of dough that makes everything taste better.
Budget-Friendly: No need to spend extra money on store-bought crusts—this simple recipe uses pantry staples that you likely already have. Flour, butter, and a touch of sugar—those are the magic ingredients here!
Quick and Easy: Despite how fancy it might seem, this dough comes together in a matter of minutes. With just a few easy steps, you’ll have a flaky, tender crust ready to go. Don’t worry; no need to be a pro!
Customizable: Want to add a little twist? You can easily adapt this recipe with different seasonings, such as a pinch of cinnamon for sweet pies or a touch of garlic for savory ones.
Crowd-Pleasing: Whether you’re baking for a holiday dinner, a birthday party, or just a cozy Sunday afternoon, this pie crust will have everyone coming back for seconds. It’s buttery and golden—what’s not to love?
Disclosure: This post contains affiliate links.If you click and make a purchase, I may earn a small commission at no extra cost to you.


Ingredients in Grandmother’s Pie Crust Recipe
Here’s what you need to make this perfect pie crust:
Flour: The foundation of your dough. All-purpose flour is your best friend here—it’s simple and gets the job done.
Butter: For that rich, melt-in-your-mouth flavor. You’ll want to use cold, unsalted butter for the best results. It creates those flaky layers you dream about.
Salt: Just a pinch adds flavor and balances the richness of the butter.
Sugar: A small amount of sugar enhances the buttery goodness, especially for sweet pies.
Ice Water: Cold water is the secret to keeping your dough nice and firm without overworking it.
(Note: The full ingredient list, including measurements, is provided in the recipe card below.)
Instructions
Let’s get baking! Follow these easy steps to create your homemade pie crust masterpiece:
1. Prep the Ingredients
Start by cutting your cold butter into small cubes. If you can, keep it in the fridge until you’re ready to use it. You want that butter to stay cold to help create the flakiness in your crust.
2. Combine the Dry Ingredients
In a large mixing bowl, combine the flour, salt, and sugar. Give it a quick whisk to make sure everything’s evenly distributed.
3. Add the Butter
Add the cold butter cubes into the flour mixture. Use a pastry cutter (or your fingertips if you don’t have one) to cut the butter into the flour until it resembles coarse crumbs. Don’t worry about being perfect here—those little chunks of butter are what make the crust flaky.
4. Add Ice Water
Slowly add the ice water, one tablespoon at a time, mixing gently with a fork. You want the dough to come together but not be too wet. Once it starts forming a dough, stop adding water.
5. Form the Dough
Turn the dough out onto a lightly floured surface and gently knead it a few times to bring it together. Be careful not to overwork the dough; the less you handle it, the flakier your crust will be.
6. Chill the Dough
Divide the dough into two portions, wrap each in plastic wrap, and pop them in the fridge for at least 30 minutes. Chilling helps the dough relax and makes it easier to roll out.
7. Roll Out the Dough
Once chilled, roll out your dough on a lightly floured surface to your desired size. Gently transfer it to your pie dish, pressing it into place. Don’t forget to trim any excess dough around the edges.
8. Bake or Fill
Now, you can either blind bake the crust if you’re making a no-bake pie or fill it with your favorite pie filling and bake as directed.
How to Serve Grandmother’s Pie Crust
This pie crust is the perfect base for both sweet and savory pies. Here are some ideas for pairing:
Sweet Pies: Top this crust with any of your favorite fruit fillings, like apple, cherry, or peach. Add a little crumble topping or a scoop of vanilla ice cream for an extra treat!
Savory Pies: Whether it’s a creamy chicken pot pie or a cheesy quiche, this crust will make your savory pies rich and delicious. Serve with a simple green salad or roasted veggies on the side.
Additional Tips
Here are a few extra tips to ensure your pie crust turns out perfectly every time:
Keep It Cold: The key to a flaky crust is cold butter and water. Don’t rush the chilling process, and try to handle the dough as little as possible.
Double the Batch: If you’re baking multiple pies or want to save some dough for later, double the recipe. This dough freezes well and can be kept for up to three months.
Experiment with Flavors: Add a pinch of cinnamon or nutmeg to the dough for sweet pies or some fresh herbs like thyme or rosemary for savory pies. It’s a simple way to elevate the flavor.
Don’t Skip the Resting: Let the dough chill in the fridge before rolling it out. This helps the gluten relax, making it easier to work with and preventing shrinkage during baking.
FAQ Section
Q1: Can I substitute butter for margarine?
A1: I recommend using butter for the best flavor and texture, but margarine could work as a substitute in a pinch. However, it might affect the flakiness slightly.
Q2: Can I make this pie crust ahead of time?
A2: Yes, you can! Prepare the dough, wrap it in plastic, and refrigerate it for up to 2 days or freeze it for longer storage.
Q3: How do I store leftover pie crust?
A3: If you have leftover dough, wrap it tightly and store it in the fridge for a few days or freeze it for up to 3 months.
Q4: Can I make this dough in a food processor?
A4: Absolutely! A food processor can quickly cut the butter into the flour. Just be careful not to overprocess it.
Q5: How do I prevent my crust from getting soggy?
A5: To prevent a soggy bottom, you can blind-bake the crust before adding your filling, or use a metal pie dish for even baking.
Conclusion
There’s truly nothing like homemade pie crust, and this one—Grandmother’s Pie Crust Recipe—is a classic that will always steal the show. Whether you’re baking for a special occasion or just craving a homemade treat, this buttery, flaky crust is sure to elevate whatever pie you decide to make. Once you try it, you’ll never go back to store-bought again. Happy baking, my friend—you’ve got this!
Print
Grandmother’s Pie Crust Recipe
- Prep Time: 15 minutes
- Cook Time: 15-20 minutes (if blind baking)
- Total Time: 30-35 minutes (not including chilling time)
- Yield: 1 double-crust pie (or 2 single-crust pies)
- Category: Dessert, Pie
- Method: Baking, Mixing, Rolling
- Cuisine: American, Comfort Food
- Diet: Vegetarian
Description
This classic homemade pie crust is buttery, flaky, and made with simple, high-quality ingredients. Perfect for sweet or savory pies, it creates the ideal foundation for all your favorite pie recipes.
Ingredients
- 2 1/2 cups all-purpose flour (plus extra for dusting)
- 1 teaspoon salt
- 1 cup unsalted butter (cold, cut into small cubes)
- 6–8 tablespoons ice water
- Optional Add-Ins:
- 1 tablespoon sugar (for sweet pies like apple or cherry)
- 1 teaspoon vinegar (optional, helps keep the dough tender)
Instructions
- Chill Your Ingredients: Cold ingredients are key to a flaky crust. Ensure that the butter and water are chilled before starting. You can even pop the flour in the fridge for 10 minutes if your kitchen is warm.
- Mix the Dry Ingredients: In a large mixing bowl, whisk together the flour and salt (and sugar, if using). This ensures even distribution of the salt and sugar throughout the dough.
- Cut in the Butter: Add the cold, cubed butter to the flour mixture. Use a pastry cutter, fork, or your fingers to cut the butter into the flour until the mixture resembles coarse crumbs with pea-sized butter pieces. These pieces create the flaky layers in the crust.
- Add the Ice Water: Sprinkle 1 tablespoon of ice water over the mixture at a time. Gently mix with a fork or your hands after each addition. Stop adding water when the dough begins to form a shaggy mass—it should hold together when squeezed but not be overly wet or sticky.
- Form the Dough: Divide the dough in half for a double-crust pie or leave it as one piece for a single-crust pie. Shape each portion into a disc, wrap tightly in plastic wrap, and refrigerate for at least 30 minutes. Chilling the dough firms up the butter and relaxes the gluten, ensuring a tender crust.
- Roll Out the Dough: On a lightly floured surface, roll out one disc of dough into a circle about 1/8-inch thick and 2 inches larger than your pie pan. Carefully transfer the dough to the pan and press gently into the edges. Trim any excess dough, leaving a slight overhang for crimping.
- Blind Bake (Optional): If your recipe calls for a pre-baked crust, prick the bottom with a fork, line it with parchment paper, and fill with pie weights or dried beans. Bake at 375°F (190°C) for 15 minutes, then remove the weights and bake for an additional 5–10 minutes, or until golden brown.
- Assemble and Bake: Fill the pie crust with your favorite filling, top with a second crust if desired, and bake according to your pie recipe’s instructions. For a shiny, golden finish, brush the top crust with an egg wash (1 egg beaten with 1 tablespoon water) before baking.
Notes
- For the flakiest pie crust, it’s important to keep the butter cold and work quickly.
- If you’re making a sweet pie, you can add the optional sugar for a slightly sweetened crust.
- For extra tenderness, the vinegar is optional, but it can help keep the dough soft.
Nutrition
- Serving Size: 1 slice (from a 9-inch pie)
- Calories: 180
- Sugar: 1g
- Sodium: 220mg
- Fat: 13g
- Saturated Fat: 8g
- Unsaturated Fat: 3g
- Trans Fat: 0g
- Carbohydrates: 17g
- Fiber: 1g
- Protein: 2g
- Cholesterol: 30mg


