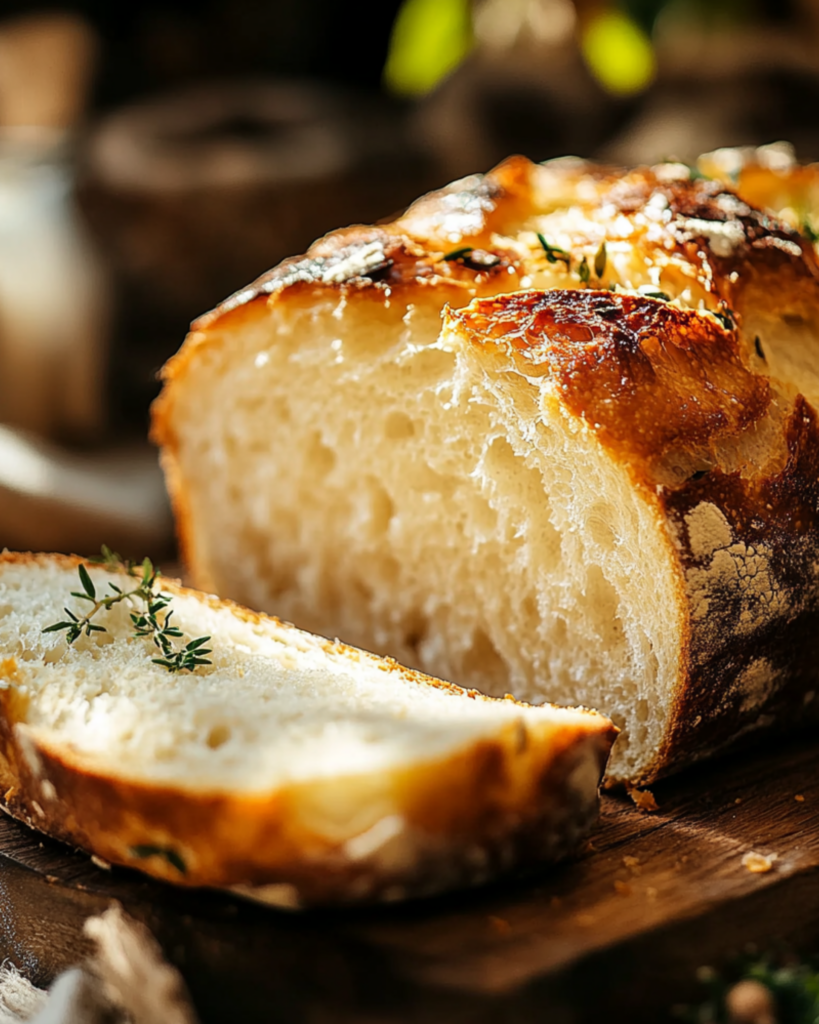
Grandma’s Perfect Homemade Bread
Baking bread is more than just mixing ingredients—it’s a comforting ritual that fills your home with the warm, inviting aroma of freshly baked goodness. This recipe for Grandma’s Perfect Homemade Bread is straight out of her kitchen—a tried-and-true method for creating loaves that are soft, flavorful, and oh-so-satisfying. Trust me, there’s nothing quite like slicing into a warm loaf, butter melting into each fluffy bite. You’re about to learn how to make a classic bread recipe that will leave you feeling like a baking superstar!
Why You’ll Love Grandma’s Perfect Homemade Bread
This bread is so much more than just bread—it’s a little slice of joy. Here’s why you’ll love it:
Classic and Nostalgic
This recipe brings back memories of cozy mornings with a warm slice slathered in butter and jam. It’s the kind of bread that feels like a hug in food form.
Foolproof for Beginners
Even if yeast intimidates you, don’t worry—this recipe is simple, approachable, and practically guaranteed to succeed.
Affordable and Pantry-Friendly
With just a handful of ingredients you probably already have, this bread is budget-friendly and oh-so-satisfying to make.
Versatile
Perfect as toast, sandwich bread, or even French toast—this loaf fits every meal of the day.
A Labor of Love
There’s something so rewarding about kneading dough and watching it transform into something extraordinary. Trust me, you’ll be proud of what you create.
Disclosure: This post contains affiliate links.If you click and make a purchase, I may earn a small commission at no extra cost to you.
Ingredients
(Note: The full ingredient list with measurements is provided in the recipe card directly below.)
All-Purpose Flour
The backbone of this recipe, providing structure and that classic bread texture.
Active Dry Yeast
The magic that makes your bread rise, creating those airy, fluffy layers.
Sugar
A touch of sweetness to enhance the flavor and activate the yeast.
Warm Water
The perfect temperature to wake up the yeast without killing it—think baby-bottle warm!
Salt
Balances the flavors and enhances the overall taste.
Butter
Adds richness and a hint of that irresistible buttery flavor.
Instructions for Grandma’s Perfect Homemade Bread
Step 1: Activate the Yeast
In a large mixing bowl, combine warm water, sugar, and yeast. Let it sit for 5-10 minutes until foamy—this is your yeast saying, “I’m alive and ready to bake!”
Step 2: Mix the Dough
Add flour, salt, and melted butter to the yeast mixture. Stir until a shaggy dough forms.
Step 3: Knead the Dough
Turn the dough out onto a floured surface and knead for 8-10 minutes until smooth and elastic. Feel the magic as the dough comes to life under your hands!
Step 4: Let It Rise
Place the dough in a greased bowl, cover with a clean towel, and let it rise in a warm spot for about an hour or until doubled in size.
Step 5: Shape the Loaves
Punch down the dough (yes, it’s as satisfying as it sounds!) and divide it in half. Shape each portion into a loaf and place them in greased loaf pans.
Step 6: Second Rise
Cover the loaves and let them rise again for 30-40 minutes until they puff up nicely.
Step 7: Bake
Preheat your oven to 375°F (190°C). Bake the loaves for 25-30 minutes, or until golden brown and sounding hollow when tapped.
Step 8: Cool and Enjoy
Let the bread cool in the pans for 10 minutes, then transfer to a wire rack. Slice when cooled (if you can wait!) and enjoy the fruits of your labor.
Nutrition Facts
Servings: 1 slice
Calories per serving: ~120
How to Serve Grandma’s Perfect Homemade Bread
Toast It Up
Spread with butter, jam, or avocado for a quick and delightful breakfast.
Sandwich Style
This bread is sturdy enough to hold all your favorite fillings without falling apart.
Sweeten the Deal
Turn slices into heavenly French toast or bread pudding.
Share the Love
Wrap a loaf in parchment and gift it to someone—it’s a guaranteed way to brighten their day.
Additional Tips
Proof Like a Pro: If your house is chilly, proof the dough in the oven with the light on for extra warmth.
Add a Twist: Sprinkle in cinnamon, raisins, or seeds for fun variations.
Store Smart: Keep the bread in an airtight container at room temperature for up to 3 days or freeze for longer storage.
No Stand Mixer?: No problem! Hand-kneading works just as well—it’s a workout and therapy session in one.
FAQ Section
Q1: Can I use instant yeast instead of active dry yeast?
A1: Absolutely! Just skip the proofing step and mix it directly with the flour.
Q2: How do I know my dough is kneaded enough?
A2: It should feel smooth and elastic, and when you press it, it should spring back slightly.
Q3: Can I make this bread gluten-free?
A3: Unfortunately, this recipe doesn’t translate well to gluten-free flours. You’ll need a specific gluten-free bread recipe.
Q4: What’s the best way to reheat bread?
A4: Pop slices in a toaster or wrap a loaf in foil and warm it in the oven at 300°F (150°C).
Q5: Can I halve the recipe?
A5: Yes, but why would you? Bread this good deserves a full batch!
Q6: How do I keep my bread soft?
A6: Store it in a sealed plastic bag or container to retain moisture.
Q7: What can I do with stale bread?
A7: Make croutons, bread crumbs, or French toast—waste not, want not!
Q8: Can I make this in a bread machine?
A8: Yep! Use the dough cycle, then shape, rise, and bake as instructed.
Q9: Is this bread freezer-friendly?
A9: Totally! Wrap tightly in plastic and foil before freezing for up to 3 months.
Q10: Can I use whole wheat flour?
A10: You can replace up to half the flour with whole wheat, but the texture will be denser.
Conclusion
There’s nothing quite like the satisfaction of homemade bread. Grandma’s Perfect Homemade Bread is simple, nostalgic, and full of heart. Once you take your first warm, buttery bite, you’ll wonder why you ever bought bread from the store. So, roll up your sleeves, preheat your oven, and let’s make some magic happen!
Print
Grandma’s Perfect Homemade Bread
- Prep Time: 2 hours 30 minutes
- Cook Time: 35 minutes
- Total Time: 3 hours 5 minutes
- Yield: 2 loaves
- Category: Bread
- Method: Baking
- Cuisine: American
- Diet: Vegetarian
Description
Discover the ultimate homemade bread recipe, perfected by Grandma herself! This easy, foolproof recipe yields soft, golden loaves every time. Perfect for sandwiches, toast, or enjoying fresh out of the oven.
Ingredients
- 2 1/2 cups warm water: Activates the yeast and provides the liquid base for the dough.
- 1/4 cup sugar: Feeds the yeast and adds a touch of sweetness.
- 1 1/4 teaspoons salt: Enhances flavor and balances sweetness.
- 1 tablespoon yeast: Helps the bread rise and achieve a fluffy texture.
- 5 cups all-purpose flour: The base for the dough, providing structure.
- 2 tablespoons oil: Adds moisture and keeps the bread soft (olive oil recommended).
Instructions
- Proof the yeast: In a stand mixer bowl, combine warm water, sugar, salt, and yeast. Let the mixture sit for 5 minutes until it bubbles.
- Form the dough: Using the dough hook attachment, gradually add flour one cup at a time. Mix until the dough forms and becomes soft.
- Knead the dough: On a floured surface, knead until smooth and elastic. Form into a ball.
- First rise: Add oil to a large bowl and place the dough inside. Cover and let rise until doubled, about 1–1.5 hours.
- Shape the loaves: Punch down the dough to release air. Divide into two portions. Shape each into a loaf and place in greased and floured 9×5-inch pans.
- Second rise: Let the loaves rise again until doubled, another 1–1.5 hours.
- Bake: Preheat the oven to 350°F (175°C). Bake the loaves for 30–35 minutes, or until golden brown.
- Cool: Let the bread cool for 10 minutes before slicing.
Notes
- For a richer flavor, try substituting olive oil with melted butter.
- You can use bread flour for a chewier texture.
- To check doneness, tap the bottom of the loaf; it should sound hollow.
Nutrition
- Serving Size: 1 slice
- Calories: ~120
- Sugar: ~2g
- Sodium: ~180mg
- Fat: ~2g
- Saturated Fat: ~0.3g
- Unsaturated Fat: ~1.7g
- Trans Fat: 0g
- Carbohydrates: ~22g
- Fiber: ~1g
- Protein: ~3g
- Cholesterol: 0mg


