

Finger Buns
Okay, imagine this: you’re sitting down with a warm, sweet treat in front of you, fresh out of the oven. The buttery aroma is wafting through the air, and that soft, pillowy texture? Pure heaven. Finger buns are the kind of treat you want to share with everyone, but let’s be real—you might just want to keep them all to yourself. Trust me, you’re going to love this one. These little buns are sweet, comforting, and so easy to make. Whether you’re enjoying them with a cup of tea or serving them at a gathering, they always steal the show.
Why You’ll Love Finger Buns
These finger buns are not just a treat for your taste buds, but a joy to bake! They’re perfect for a cozy afternoon or a sweet surprise for friends and family. Here’s why they’re a favorite:
Versatile:
You can enjoy them for breakfast, dessert, or a snack. They’re so perfect for any time of day, and they’re great for sharing at get-togethers or even as a lunchbox treat.
Budget-Friendly:
No need for fancy ingredients here—just simple pantry staples that you likely already have. This recipe proves that you can bake something extraordinary without breaking the bank.
Quick and Easy:
Even if you’re not an expert baker, this recipe is foolproof. You don’t need any fancy skills, just follow the simple steps, and you’ll have a batch of soft, sweet buns in no time.
Customizable:
Feel free to get creative with the flavors! Add a sprinkle of cinnamon, or try glazing with your favorite icing. The possibilities are endless, and you can easily adjust the recipe to fit your tastes.
Crowd-Pleasing:
Everyone loves a soft, sweet bun. They’re always a hit at parties, and you’ll find yourself being asked for the recipe. The best part? You’ll feel like a baking pro, even if you’re just starting out.
Disclosure: This post contains affiliate links.If you click and make a purchase, I may earn a small commission at no extra cost to you.


Ingredients for Finger Buns
Here’s the magic of finger buns—they’re made with just a few simple ingredients that you likely have in your pantry. Let’s break it down:
- Flour: The base for these buns, creating the soft, pillowy texture we all crave.
- Yeast: This is what makes them rise and get that lovely fluffy texture.
- Sugar: A little sweetness to make these buns irresistible.
- Butter: For that rich, buttery flavor that melts in your mouth.
- Milk: Adds a soft, moist texture to the buns.
- Salt: To balance out the sweetness and make everything come together perfectly.
- Egg: Gives the buns their golden color and a tender crumb.
(Note: The full ingredients list, including measurements, is provided in the recipe card directly below.)
Instructions for Perfect Finger Buns
Let’s dive into the steps to create these mouthwatering finger buns!
Preheat Your Oven:
Start by preheating your oven to 350°F (175°C). This ensures the buns bake evenly and come out perfectly golden.
Combine the Ingredients:
In a large mixing bowl, combine your flour, sugar, salt, and yeast. Give it a quick whisk to evenly distribute everything. Then, in a separate bowl, melt your butter and mix it with warm milk. Once it’s just the right temperature, add it to your dry ingredients, along with your egg. Mix everything together until a dough forms.
Knead the Dough:
Now, it’s time to knead the dough. Transfer it to a floured surface and knead for about 5-7 minutes until the dough is smooth and elastic. Trust me, this is the fun part—you’ll get that satisfying, stretchy texture. Once kneaded, place it in a lightly greased bowl, cover it with a damp cloth, and let it rise for about an hour, or until it’s doubled in size.
Shape the Buns:
Once the dough has risen, punch it down gently and transfer it to a floured surface. Roll it out into a long rectangle (think about 12 inches). Slice it into strips, then roll each strip into a bun shape—like little fingers. Place them onto a greased baking tray.
Let the Buns Rise Again:
Cover the buns with a cloth and let them rise for another 30 minutes. This second rise ensures they’ll be soft and fluffy when baked.
Bake to Perfection:
Pop the buns into the oven for about 15-20 minutes, or until they’re golden brown. The smell in your kitchen will be absolutely heavenly.
Finishing Touches:
Once baked, remove the buns from the oven and let them cool for a few minutes. If you’re feeling extra indulgent, you can drizzle them with a sweet glaze or a dusting of powdered sugar.
Serve and Enjoy:
Serve the buns warm, and watch them disappear! Pair with a cup of tea or coffee for the ultimate cozy moment. These finger buns are perfect for sharing—or not, no judgment here!
How to Serve Finger Buns
These finger buns are great on their own, but here are a few ideas to make your experience even better:
- Pair with Tea or Coffee: A warm, buttery bun is made for sipping with your favorite hot drink.
- Serve with Jam or Butter: For an extra indulgent touch, spread on some butter or your favorite fruit jam.
- Fresh Fruit: Serve with fresh berries or sliced fruit for a light and refreshing balance to the sweetness.
Additional Tips for Perfect Finger Buns
Here are a few tips to ensure your finger buns are absolutely perfect every time:
- Prep Ahead: If you’re short on time, you can make the dough the night before, store it in the fridge, and bake the next day.
- Experiment with Fillings: Want to add something extra? Try adding chocolate chips, cinnamon sugar, or even fruit preserves to the center before rolling up the dough.
- Storage Tips: These buns are best enjoyed fresh, but if you have leftovers, store them in an airtight container for up to 3 days. You can even freeze them for up to a month—just reheat in the oven when you’re ready to enjoy!
FAQ Section
Q1: Can I make these finger buns ahead of time?
A1: Absolutely! You can make the dough the night before and store it in the fridge. Just let it come to room temperature before shaping and baking.
Q2: Can I freeze the dough?
A2: Yes! You can freeze the dough after the first rise. When you’re ready to bake, just let it thaw and rise before shaping and baking.
Q3: How do I store leftover buns?
A3: Store leftovers in an airtight container for up to 3 days. If you want to enjoy them warm again, just pop them in the oven for a few minutes.
Q4: Can I add different flavors?
A4: Definitely! Try adding a bit of cinnamon to the dough for a spiced version or even a bit of orange zest for a refreshing twist.
Q5: Can I make these vegan?
A5: Yes, you can substitute the butter and egg with plant-based alternatives. They’ll still come out delicious!
Conclusion: The Perfect Finger Buns Await!
And there you have it—finger buns that are soft, sweet, and completely irresistible! Whether you’re baking them to treat yourself, share with friends, or serve at a gathering, these little buns are guaranteed to make everyone smile. The best part? They’re easy to make, budget-friendly, and oh-so-customizable. So, roll up your sleeves, preheat that oven, and get ready to create something delicious. Trust me, once you’ve tasted these, you’ll be baking them again and again. Happy baking, and enjoy every warm, buttery bite!
Print
Finger Buns
- Prep Time: 15 minutes
- Cook Time: 20 minutes
- Total Time: 2 hours 30 minutes (including rising time)
- Yield: 12 finger buns
- Category: Baking, Dessert, Snack
- Method: Baking
- Cuisine: American
- Diet: Vegetarian
Description
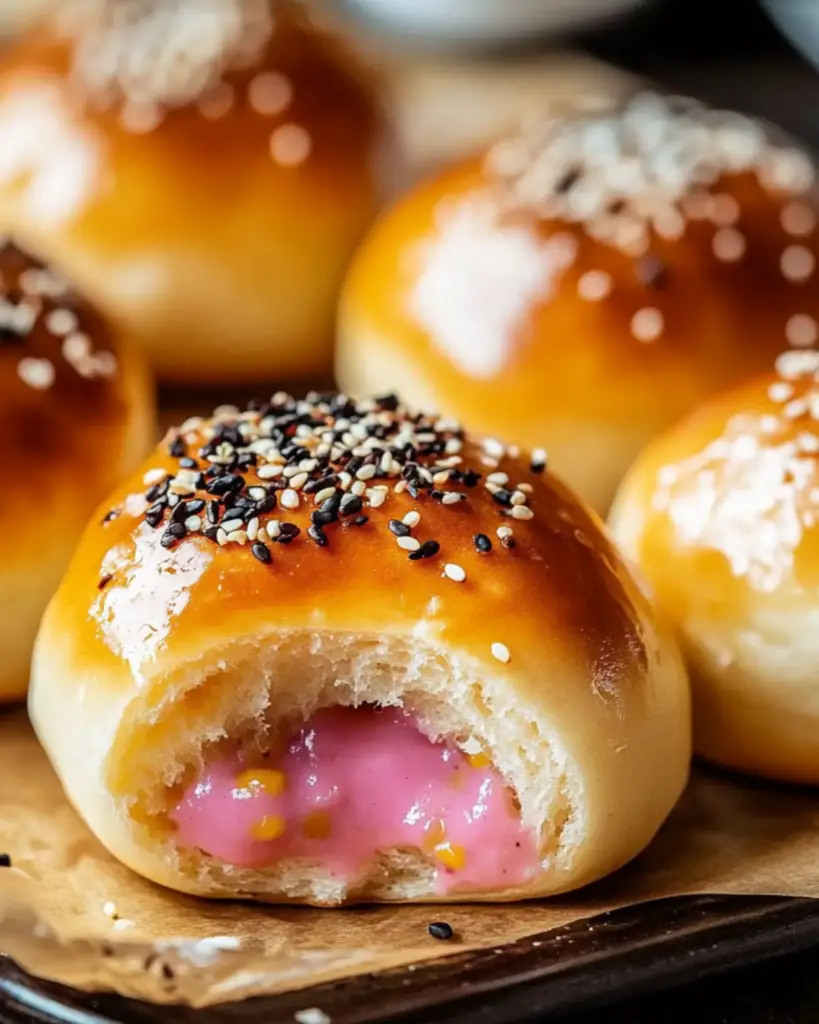
Soft and fluffy Finger Buns are a nostalgic bakery treat. These sweet rolls are topped with a thick layer of icing and sprinkles, perfect for any occasion. Whether served warm with butter or enjoyed as a snack, they’re sure to bring a smile to your face!
Ingredients
For the dough:
455g strong white bread flour (3 ½ cups / 1lb)
⅓ cup white granulated sugar (66g / ~2 ¼oz)
2 ¼ tsp instant yeast (or active dry yeast) (1 sachet / 7g)
¼ tsp salt
1 large egg (room temp)
1 cup whole milk (250ml)
⅓ cup vegetable oil (80ml)
2 tsp vanilla extract
½ cup sultanas or raisins (optional) (75g/~2 ½)
For the icing:
1 ¾ cups icing sugar (powdered sugar) (225g / 8oz)
1-2 tbsp milk
1-3 drops pink or red food coloring
100’s and 1000’s or desiccated coconut for topping
Instructions
-
Make the dough: In the bowl of a stand mixer, pour warm milk (around 40°C or warm to the touch), one tablespoon of sugar, and all of the yeast. Whisk together and let sit for 5-10 minutes until it begins to puff up. Add the flour, remaining sugar, salt, egg, oil, and vanilla to the mixer. Mix using the dough hook until roughly combined. Knead on low-medium for 10-12 minutes until the dough is smooth and elastic. If kneading by hand, continue for 15-18 minutes. Add sultanas (if using) and knead through. Brush the bowl with oil, place the dough inside, and flip it so it’s lightly coated in oil. Cover with plastic wrap and let rise in a warm place for 1 to 1 ½ hours, until doubled in size.
-
Assemble the finger buns: Grease a 26x30cm (10×12 inch) baking tray with butter. Punch down the dough, transfer it to a clean work surface, and cut into 12 even pieces. Roll each piece into a smooth log about 3x11cm (1 ¼ x 4 ¼ inch). Arrange them on the tray, 1-2 inches apart. Cover lightly with plastic wrap and let rise for 45-60 minutes, until doubled in size and puffed.
-
Bake: Preheat the oven to 180°C (160°C fan forced) / 350°F. Bake for 15-18 minutes until golden brown and an internal temperature of 88°C/190°F is reached. Let the buns cool to near room temperature before icing.
-
Ice the buns: Mix icing sugar and milk until you have a thick yet slightly runny consistency. It should level out in 10-12 seconds but not be so runny that it slides off the buns. Add 1-3 drops of food coloring and stir well until you achieve a pale pink color. Spread the icing thickly over the buns and top with 100’s and 1000’s or desiccated coconut.
-
Serve: Enjoy the buns as they are or cut them in half and spread with butter for a delicious treat.
Notes
-
You can adjust the sweetness of the icing by adding more or less milk.
-
Sultanas/raisins are optional, so feel free to leave them out or replace them with other dried fruits.
-
Finger buns can be stored in an airtight container for up to 2 days.
Nutrition
- Serving Size: 1 bun
- Calories: 270
- Sugar: 20g
- Sodium: 180mg
- Fat: 7g
- Saturated Fat: 1g
- Unsaturated Fat: 6g
- Trans Fat: 0g
- Carbohydrates: 43g
- Fiber: 1g
- Protein: 5g
- Cholesterol: 20mg


