Easter Marble Chocolate Chip Cookies
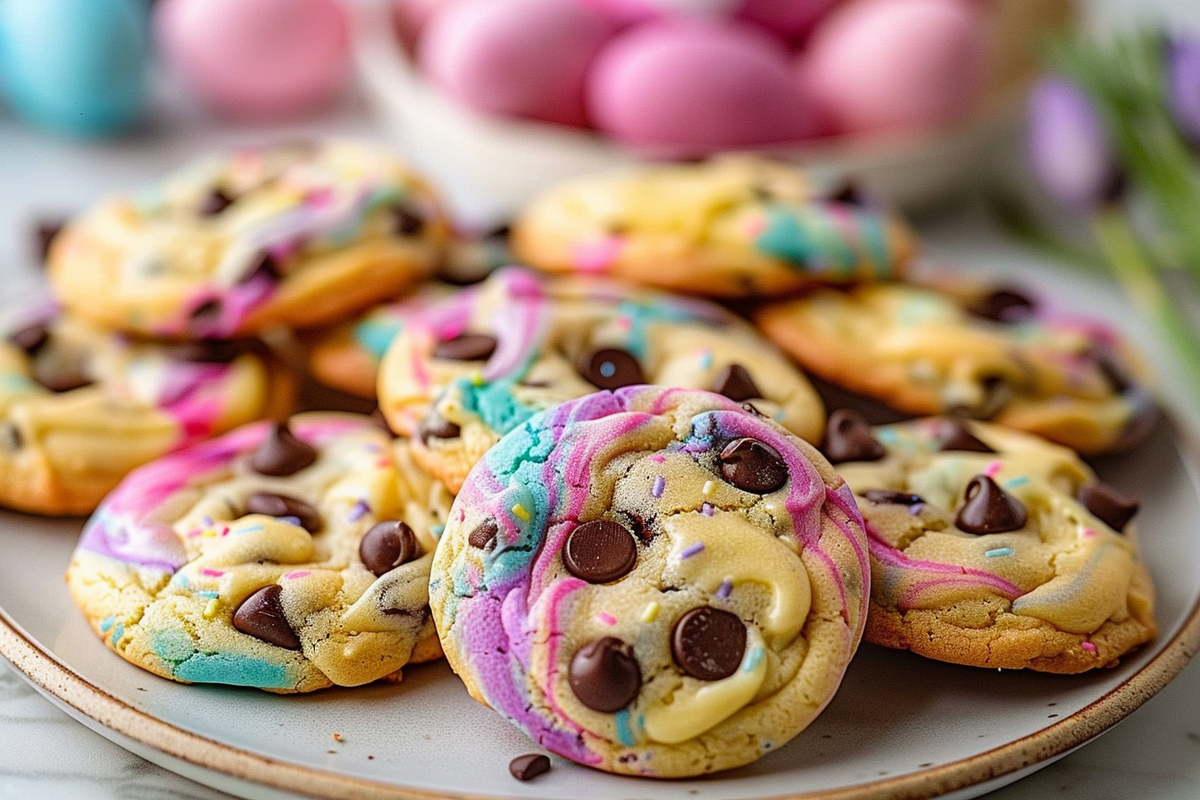
These Easter Marble Chocolate Chip Cookies are the perfect way to celebrate spring with their vibrant pastel swirls and delightful flavor. Ideal for gatherings or simply sharing with friends and family, these cookies are chewy, colorful, and loaded with chocolate chips. Follow this detailed recipe to create a batch that brings festive cheer to your holiday celebrations!
Why You Will Love This Recipe
Cookie lovers rejoice! These Easter Marble Chocolate Chip Cookies are not just visually stunning but also satisfyingly delicious. The combination of buttery dough, rich chocolate chips, and pastel hues creates an inviting treat that captures the essence of spring. With a chewy texture and a delightful marbled appearance, these cookies are sure to be a hit at any Easter gathering or occasion. Plus, they make for a wonderful addition to colorful cookie boxes, making them the ideal gift for loved ones or friends.
Ingredients
To create these beautiful cookies, you’ll need the following ingredients:
- 2 cups all-purpose flour
- 1 teaspoon baking soda
- 1 teaspoon salt
- 1 cup softened butter
- ¾ cup white sugar
- ¾ cup brown sugar
- 2 large eggs
- 2 teaspoons vanilla extract
- Gel food coloring (pastel pink, purple, yellow, blue)
- 2 cups chocolate chips
Directions
Step 1: Preheat your oven to 350°F (175°C) and line a baking tray with parchment paper. This will ensure that your cookies don’t stick and make cleanup a breeze.
Step 2: In a large mixing bowl, whisk together the flour, baking soda, and salt until well combined. This step is crucial as it ensures the leavening and flavoring agents are evenly distributed throughout the flour.
Step 3: In another bowl, cream the softened butter with both the white and brown sugars until the mixture is fluffy and light in color. This step introduces air into the mixture, which results in a tender cookie texture.
Step 4: Add the eggs and vanilla extract to the butter-sugar mixture and beat until well combined. The eggs enhance the cookie’s structure and provide moisture, while the vanilla adds a warm, inviting flavor.
Step 5: Gradually add the dry ingredients into the wet ingredients, mixing just until they are combined. Overmixing at this stage can lead to toughness, so mix until you no longer see any dry flour.
Step 6: Divide the dough into four equal portions. Use gel food coloring to tint each portion with a different pastel color—pink, purple, yellow, and blue. Knead in the coloring gently until you achieve your desired shade.
Step 7: Take small pieces from each colored dough and swirl them together to form marbled dough balls. The beauty of these cookies lies in their marbled appearance, so don’t be afraid to experiment with the swirls!
Step 8: Place the marbled dough balls on the lined baking tray. Press chocolate chips on top of each dough ball and slightly flatten them to help retain their shape while baking.
Step 9: Bake in the preheated oven for 10-12 minutes or until the edges are golden brown. The centers should look slightly underbaked; they will continue to firm up while cooling.
Step 10: Allow the cookies to cool on the tray for about 5 minutes before transferring them to a wire rack to cool completely. This helps them set properly and enhances their chewy texture.
FAQ
Can I use different types of chocolate chips?
Yes, you can substitute semi-sweet chocolate chips with milk chocolate, dark chocolate, or even white chocolate chips based on your preferences.
How should I store the cookies?
Store the cookies in an airtight container at room temperature for up to a week. For longer storage, consider freezing them in a sealed container, where they can last for up to three months.
Can I make the dough ahead of time?
Absolutely! You can prepare the dough in advance, shape it into balls and freeze them. Just remember to bake them directly from the freezer; they may require a few extra minutes in the oven.
What can I substitute for butter in this recipe?
You may use margarine or a dairy-free butter substitute to make this recipe suitable for vegan or dairy-free diets, ensuring the ratio remains the same.
Are these cookies suitable for kids to help make?
Yes, these cookies are a fun project to make with kids! They can help swirl the colored dough and press the chocolate chips on top, making the baking process enjoyable and engaging.
Conclusion
Easter Marble Chocolate Chip Cookies are not only a delightful treat for your taste buds but also a visual celebration of spring. With their festive colors and rich flavor, they will surely be the star of your Easter festivities. Follow this easy-to-follow recipe, and watch as friends and family delight in these beautiful and tasty cookies. Happy baking!

