

Easter Egg Oreo Balls Recipe
Let’s talk about something that will make your taste buds do a little happy dance—these Easter Egg Oreo Balls! These little bites of heaven are a sweet treat that combines the creamy deliciousness of cream cheese, the rich flavor of Oreos, and a colorful, festive twist that’ll make them the highlight of any gathering. Seriously, once you take a bite, you’re going to wonder how something so simple can taste so unbelievably good. Trust me on this one—these Easter Egg Oreo Balls are going to become your new go-to treat for every holiday and get-together. They’re easy, fun, and ridiculously delicious. And I can practically hear your friends and family begging for the recipe already
Why You’ll Love Easter Egg Oreo Balls
This recipe isn’t just about satisfying your sweet tooth—it’s about making memories. Whether you’re getting ready for Easter, celebrating a birthday, or just in the mood for something sweet, these Oreo Balls are the ultimate crowd-pleasers. Here’s why they’re so special:
Versatile: You can make these Oreo balls for any occasion, but let’s be honest, they’re especially perfect for Easter with their egg-shaped charm. And don’t even get me started on how they’ll look on your dessert table! They’ll be the first thing gone, guaranteed.
Budget-Friendly: All you need are a few ingredients you probably already have in your pantry, like Oreos and cream cheese. No fancy ingredients needed here!
Quick and Easy: I’m talking no-bake, minimal effort, and maximum flavor. You’ll be done in a flash, and no one will believe you when you tell them how simple they were to make.
Customizable: You can change up the colors to match any holiday or theme! Feel free to dip them in your favorite colored candy melts, or roll them in sprinkles for extra fun.
Crowd-Pleasing: From the little ones to the grown-ups, these Oreo Balls are always a hit. Seriously, it’s like magic when you combine chocolate and cream cheese. Everyone will want seconds.
Disclosure: This post contains affiliate links.If you click and make a purchase, I may earn a small commission at no extra cost to you.


Ingredients
These little bites of joy are made with just a few ingredients, but the flavor is out of this world. Here’s what you’ll need:
- Oreos: The base of this recipe, the star ingredient. Their chocolatey crunch and creamy filling make the perfect foundation.
- Cream Cheese: This is the magic ingredient that binds everything together. It gives the Oreo Balls that melt-in-your-mouth creaminess.
- Candy Melts: The perfect way to coat your Oreo Balls with a smooth, colorful layer that’s as pretty as it is delicious. You can use any color you want to fit your theme!
- Sprinkles (optional): For a little extra flair and crunch, add sprinkles on top!
(Note: the full ingredients list, including measurements, is provided in the recipe card directly below.)
Instructions
Step 1: Crush the Oreos
Take those Oreos and crush them to pieces! I like to throw them in a food processor for a quick and even crumble, but a good old-fashioned Ziploc bag and rolling pin work just as well. You want those Oreos crushed into fine crumbs—no big chunks here!
Step 2: Mix with Cream Cheese
Once you’ve got those Oreos all crushed up, toss them into a large mixing bowl. Add in your softened cream cheese and stir it all together until it’s well combined. The cream cheese should bring everything together into a dough-like consistency. It’s going to get a little messy, but that’s part of the fun!
Step 3: Roll into Balls
Now, roll the Oreo mixture into bite-sized balls. You’ll probably get about 20 to 25 of them, depending on how big you make them. Make sure they’re compact and round, so they hold their shape when you dip them in the candy melts later.
Step 4: Chill for Perfect Coating
Place the balls on a parchment-lined baking sheet and pop them in the fridge for about 30 minutes. This helps them firm up so that when you dip them in the candy melts, they won’t fall apart.
Step 5: Dip in Candy Melts
Melt your candy melts according to the package instructions. Once they’re nice and smooth, dip each Oreo ball into the melted candy, making sure it’s fully coated. Tap off any excess chocolate, then place the ball back onto the baking sheet.
Step 6: Decorate & Chill Again
If you’re feeling festive, now’s the time to add some sprinkles or any other fun decoration. Then, back to the fridge they go! Let the candy coating set for another 15-20 minutes, and boom—your Easter Egg Oreo Balls are ready to go!
Step 7: Serve & Enjoy
Serve these beauties on a pretty platter, and get ready for the compliments. They’re perfect for your Easter spread, or any celebration where you want something sweet and adorable.
How to Serve Easter Egg Oreo Balls
These little guys are perfect as-is, but if you want to get extra fancy, try pairing them with a few of these suggestions:
- Fresh Fruit: Serve with some fresh strawberries or raspberries for a refreshing contrast to the richness of the Oreo balls.
- Milk or Coffee: These are amazing with a nice cold glass of milk or even a cozy cup of coffee. The creamy Oreo filling just pairs perfectly with a warm drink.
- Easter-Themed Desserts: Since they’re so festive, they go great with other Easter-inspired desserts, like carrot cake cupcakes or pastel macarons.
Additional Tips
Here are a few extra tips to make your Oreo Balls even more magical:
- Prep Ahead: These Oreo balls can be made the night before. Just store them in an airtight container in the fridge and they’ll be good to go the next day!
- Freezer-Friendly: If you have leftovers, don’t worry! You can store them in the freezer for up to 2-3 months. Just make sure to place them in an airtight container, and let them thaw for a bit before serving.
- Make Them Your Own: Experiment with different flavors! You can swap out regular Oreos for other varieties, like mint, peanut butter, or golden Oreos. The possibilities are endless.
FAQ Section
Q1: Can I use something other than candy melts to coat the balls?
A1: Yes, you can use melted chocolate chips if you prefer. Just make sure it’s fully melted and smooth before dipping.
Q2: Can I make these in advance?
A2: Absolutely! Make them a day or two ahead of time and keep them in the fridge. They’ll stay fresh and perfect.
Q3: How do I store leftovers?
A3: Store them in an airtight container in the fridge for up to 1 week, or freeze them for longer storage.
Q4: Can I freeze the Oreo balls before coating them?
A4: Yes! You can freeze the balls before dipping them in the candy melts. Just make sure to let them thaw for a few minutes before coating them.
Q5: Can I double the recipe?
A5: Definitely! Just make sure you have enough space in your fridge for the extra balls to chill.
Conclusion
These Easter Egg Oreo Balls are not only easy to make, but they’re sure to bring smiles and full bellies to anyone who tries them. Whether you’re making them for Easter, a birthday, or just because you’re craving something sweet, they’re bound to be a hit. So grab those Oreos, get rolling, and get ready to wow your friends and family. You’ve got this!

Easter Egg Oreo Balls Recipe
- Prep Time: 20 minutes
- Cook Time: None (freezing and setting time)
- Total Time: 30 minutes (including freezing and setting time)
- Yield: 12-15 Oreo egg balls (depending on size)
- Category: Dessert, Candy, Easter Treats
- Method: No-Bake
- Cuisine: American
- Diet: Vegetarian
Description
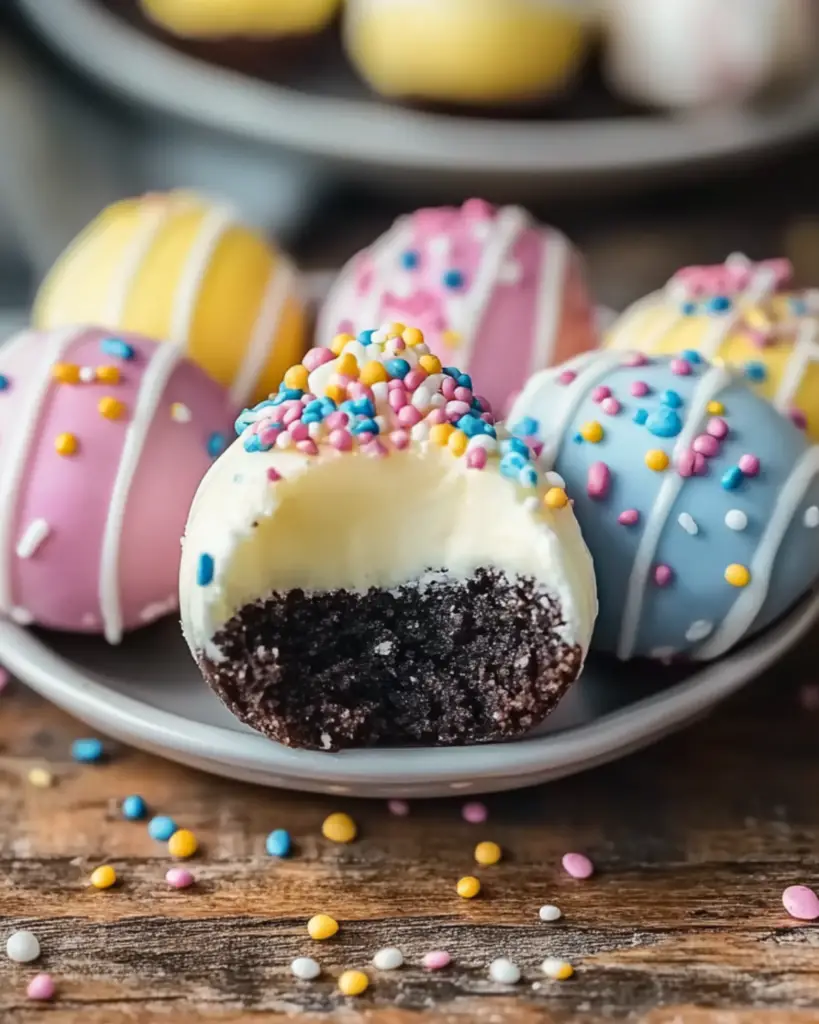
These fun and festive Easter Egg Oreo Balls are a delightful treat, perfect for spring celebrations! With a creamy Oreo filling, a smooth white chocolate coating, and colorful sprinkles, these egg-shaped bites are the ultimate dessert for your Easter gathering.
Ingredients
- 1 package (14 oz) Oreo cookies
- 8 oz cream cheese, softened
- 2 cups white chocolate or candy melts (assorted colors)
- Sprinkles and colored drizzle for decoration
Instructions
- In a food processor, crush the Oreo cookies into fine crumbs.
- In a mixing bowl, combine the crushed Oreos with softened cream cheese. Mix until a dough forms.
- Shape the mixture into small egg shapes and place them on a lined baking sheet. Freeze for 20 minutes.
- Melt the white chocolate or candy melts in a microwave-safe bowl in 30-second intervals, stirring until smooth.
- Dip each Oreo egg into the melted chocolate, coating completely. Let excess chocolate drip off.
- Place coated eggs back on the lined baking sheet and immediately add sprinkles or drizzle with additional colored chocolate.
- Let them set at room temperature or refrigerate for 10 minutes until firm.
Enjoy or store in an airtight container in the fridge for up to a week.
Notes
- These Oreo balls can be made ahead of time and stored in the fridge for up to 1 week.
- Feel free to use different colored candy melts for different occasions or holidays.
- If you prefer, you can add a little vanilla extract to the mixture for extra flavor.
Nutrition
- Serving Size: 1 ball
- Calories: 150 kcal
- Sugar: 12g
- Sodium: 50mg
- Fat: 8g
- Saturated Fat: 5g
- Unsaturated Fat: 2g
- Trans Fat: 0g
- Carbohydrates: 20g
- Fiber: 1g
- Protein: 2g
- Cholesterol: 15mg


