Easter Egg Cheesecake Jars
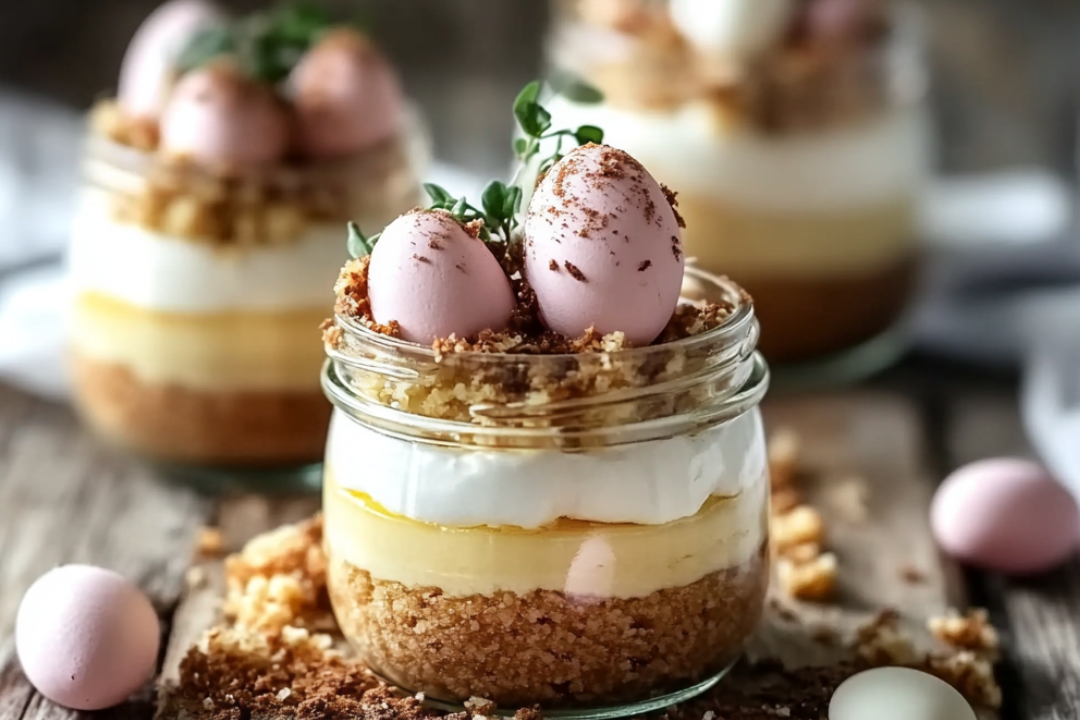
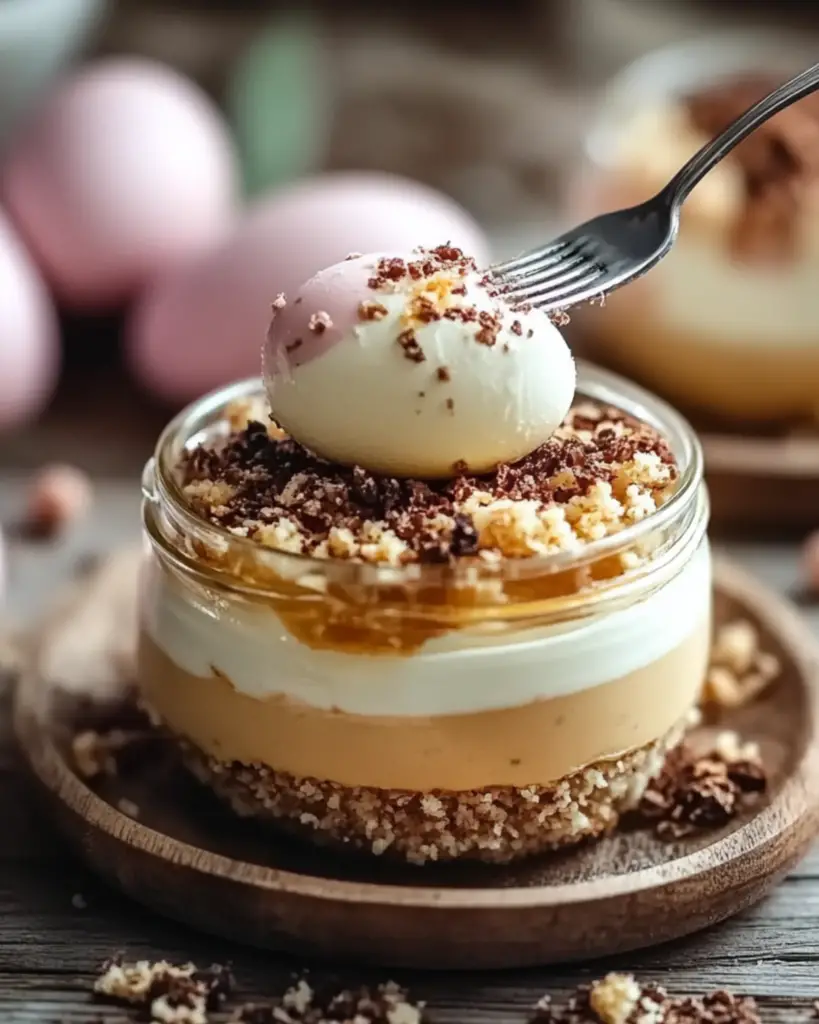
Oh my goodness, have I got a treat for you! If you’re a fan of cheesecake (and who isn’t?), then you are going to fall in love with these Easter Egg Cheesecake Jars. Imagine the creamy, dreamy texture of a classic cheesecake, but in an adorable, individual-sized jar that’s just begging to be devoured. And because it’s Easter-inspired, we’ve got a little twist with some colorful candy eggs that not only add the perfect festive touch but also give every bite a pop of sweetness. Trust me, you’re going to love this!
These jars are a game-changer. They’re the kind of dessert that gets oohs and aahs at your next gathering (or just from your own family if you’re feeling selfish and keeping them to yourself!). Whether you’re serving them at an Easter dinner, a spring brunch, or just because you deserve something sweet today, these little jars will become the star of the show.
Why You’ll Love Easter Egg Cheesecake Jars
This recipe isn’t just about putting ingredients together; it’s about creating something memorable. There’s something about a no-bake cheesecake that makes you feel like you’re treating yourself to a slice of indulgence without the heavy lifting. Here’s why these jars will quickly become a favorite:
Versatile
Perfect for springtime gatherings or Easter brunch, but let’s be honest—you don’t need an occasion to enjoy these. They’re great for a casual dessert after a weeknight meal or to surprise someone with a little sweet treat. Anytime you want something that feels special, these jars are your go-to.
Budget-Friendly
No need for exotic ingredients or expensive supplies—this recipe uses simple pantry staples that you probably already have in your kitchen. It’s proof that you don’t have to break the bank to create something delicious and impressive.
Quick and Easy
Not into complicated recipes? No worries! These cheesecake jars come together super easily. With minimal prep and no oven involved, they’re ideal for anyone who wants to make something impressive without spending hours in the kitchen.
Customizable
Want to mix it up? No problem! You can add your favorite Easter candy, throw in some fresh fruit, or top it with a drizzle of caramel or chocolate. These jars can be customized to fit whatever flavors you love most.
Fun to Serve
There’s something extra charming about serving dessert in little jars. They make every bite feel like a special treat, and they’re perfect for portion control (if you can manage it!). Plus, you get the joy of seeing everyone’s reaction when they take the lid off and see the creamy, decadent layers inside.
Disclosure: This post contains affiliate links.If you click and make a purchase, I may earn a small commission at no extra cost to you.
Ingredients in Easter Egg Cheesecake Jars
Here’s the magic of these cheesecake jars—it’s all about the balance of creamy, tangy, and sweet. Check out what you’ll need to make this delightful dessert:
Cream Cheese
The star of the show! Cream cheese gives the cheesecake its ultra-creamy texture and tangy richness. You want it to be soft and smooth for the best results.
Powdered Sugar
For that sweetness that makes the cheesecake feel like a treat, powdered sugar works wonders. It dissolves easily and gives the perfect sweetness without any grit.
Vanilla Extract
A touch of vanilla brings out the flavors and ties everything together beautifully. It’s like the little black dress of dessert—simple but essential!
Heavy Whipping Cream
This is what takes the cheesecake filling to the next level, making it light and fluffy while still maintaining that luscious richness. It’s the secret to creating that dreamy texture.
Graham Cracker Crumbs
For the base, graham crackers add a deliciously crunchy, slightly sweet contrast to the creamy cheesecake filling. It’s the perfect balance in every bite.
Easter Candy Eggs
For the fun part! Choose your favorite pastel-colored candy eggs to top each jar, adding some whimsy and extra sweetness.
(Note: the full ingredients list, including measurements, is provided in the recipe card directly below.)
Instructions
Let’s dive into the steps to create this sweet little masterpiece:
Preheat Your Equipment
No preheating needed for this no-bake recipe! You’re good to go without firing up the oven. Instead, get your jars ready by making sure they’re clean and dry. Trust me, the jars make the whole thing feel extra special!
Prepare the Crust
In a small bowl, combine graham cracker crumbs with melted butter and a pinch of sugar. Stir until everything’s well mixed and it starts to hold together. Press this mixture into the bottom of each jar. It should be firm enough to hold its shape when you add the cheesecake layer, but not too thick.
Make the Cheesecake Filling
In a medium bowl, beat together softened cream cheese and powdered sugar until smooth and creamy. Add the vanilla extract, then slowly pour in the heavy whipping cream while continuing to beat. The mixture should start to thicken and become fluffy. Don’t overmix, just get it nice and smooth!
Layer It Up
Spoon the cheesecake filling over the graham cracker crust in each jar. Don’t worry if it’s a little messy—this is a rustic dessert! Aim for about two-thirds full to leave room for your candy eggs. Smooth the top with a spatula for an even layer.
Decorate with Candy Eggs
Top each jar with a few colorful candy eggs. This is your chance to get creative—add a few eggs for a pop of color or go all out and pile them high for an extra indulgent touch. You can even sprinkle some extra graham cracker crumbs on top if you like a little extra crunch.
Chill to Set
Pop the jars into the fridge and let them chill for at least 2 hours (but longer if you can stand it!). This allows the cheesecake to set and lets all those delicious flavors mingle.
Serve and Enjoy
When you’re ready to dig in, take the jars out of the fridge and serve them chilled. You can even add a few extra eggs on top before serving if you want to make them even more festive. Trust me, everyone will love them!
How to Serve Easter Egg Cheesecake Jars
These jars are adorable as-is, but you can easily pair them with a few sides or accompaniments for an extra special treat. Here are a few ideas:
Fresh Fruit
Add a little fresh fruit like strawberries or blueberries on the side to balance the sweetness of the cheesecake. A scoop of fruit salad could add a refreshing contrast.
Coffee or Tea
Serve your cheesecake jars with a hot cup of coffee or tea to complement the rich flavors. A creamy latte would pair especially well with this dessert!
Chocolate-Dipped Strawberries
For a fancy twist, pair these jars with a few chocolate-dipped strawberries. The sweetness and richness of the chocolate go perfectly with the tangy cheesecake filling.
Additional Tips
Here are some extra tips to help you get the most out of this recipe:
Prep Ahead
These jars are perfect for making ahead! You can prep them the night before, store them in the fridge, and they’ll be ready to serve when you are.
Spice It Up
If you’re feeling adventurous, try adding a little cinnamon or nutmeg to the graham cracker crust for a touch of warmth.
Dietary Adjustments
To make these jars dairy-free, use a non-dairy cream cheese and substitute coconut cream for the heavy whipping cream. You can also use gluten-free graham crackers for a gluten-free option.
Storage Tips
Store any leftovers in an airtight container in the fridge for up to 3 days. These little jars hold up well, so you can enjoy them for a few days!
Double the Batch
Need more? These jars are so easy to double, and they make great party favors! Just make sure you have enough jars to go around.
FAQ Section
Q1: Can I substitute the cream cheese with something else?
A1: Yes, you can use a dairy-free cream cheese alternative if you want to make it vegan or dairy-free. The texture will be a little different, but it will still be creamy and delicious!
Q2: Can I make these jars ahead of time?
A2: Absolutely! In fact, they’re better when they’ve had a little time to chill in the fridge. Prep them the night before and let them set overnight.
Q3: How do I store leftovers?
A3: Keep them in the fridge for up to 3 days in an airtight container. Make sure the jars are sealed tightly to keep everything fresh!
Q4: Can I freeze these?
A4: It’s best to enjoy these fresh, but you can freeze the cheesecake filling in a separate container. Just be aware that the texture of the graham cracker crust may change after freezing.
Q5: What’s the best way to serve them?
A5: Serve them chilled, and maybe add an extra egg or two on top for that fun, Easter-inspired look!
Conclusion
These Easter Egg Cheesecake Jars are a delightful way to celebrate Easter, or honestly, any time you’re craving something sweet and a little bit fancy. With their creamy texture, crunchy graham cracker base, and festive candy topping, they’re sure to steal the show at your next gathering! Enjoy making these and don’t forget to share them with the ones you love—or keep them all for yourself… no judgment here!
Print
Easter Egg Cheesecake Jars
- Prep Time: 15 minutes
- Cook Time: None
- Total Time: 15 minutes (plus chilling time)
- Yield: 6-8 mini jars
- Category: Dessert, No-Bake
- Method: No-Bake
- Cuisine: American
- Diet: Vegetarian
Description
These adorable Easter Egg Cheesecake Jars are the perfect festive treat! Creamy cheesecake layers with a graham cracker crust, topped with whipped cream, pastel candy eggs, and colorful sprinkles. The perfect dessert for your Easter celebrations!
Ingredients
For the Crust:
1 cup graham cracker crumbs
2 tablespoons granulated sugar
4 tablespoons unsalted butter, melted
For the Cheesecake Layers:
8 oz (1 block) cream cheese, softened
½ cup powdered sugar
1 teaspoon vanilla extract
1 cup heavy cream, whipped to stiff peaks
Pink gel food coloring or 1 tablespoon freeze-dried strawberry powder (optional)
For the Topping:
Whipped cream (for piping or spooning on top)
12–18 pastel candy eggs (2–3 per jar)
Instructions
-
Prepare the Crust:
-
In a bowl, combine graham cracker crumbs, sugar, and melted butter. Stir until it resembles wet sand.
-
Spoon the crumb mixture into mini jars and press gently to form the crust base.
-
-
Prepare the Cheesecake Layers:
-
In a mixing bowl, beat the cream cheese until smooth.
-
Add powdered sugar and vanilla, then beat again until fluffy.
-
Fold whipped cream into the cream cheese mixture in two batches until fully combined.
-
Divide the mixture into two bowls. Tint one with pink food coloring or strawberry powder for a fruity layer.
-
-
Assemble the Jars:
-
Spoon or pipe the pink cheesecake layer over the crust in each jar.
-
Follow with the white cheesecake layer on top.
-
-
Add the Topping:
-
Add a swirl of whipped cream on each jar.
-
Decorate with pastel candy eggs and sprinkles.
-
-
Chill and Serve:
-
Chill the jars until ready to serve, ideally for 1-2 hours.
-
Notes
-
These cheesecake jars can be made ahead of time and stored in the fridge for up to 2-3 days before serving.
-
If you prefer a more intense strawberry flavor, use freeze-dried strawberry powder instead of food coloring.
-
You can substitute any pastel-colored candy or mini chocolate eggs if you can’t find candy eggs.
Nutrition
- Serving Size: 1 mini jar
- Calories: 350
- Sugar: 28g
- Sodium: 160mg
- Fat: 23g
- Saturated Fat: 14g
- Unsaturated Fat: 6g
- Trans Fat: 0g
- Carbohydrates: 34g
- Fiber: 1g
- Protein: 4g
- Cholesterol: 50mg

