

Dreamy No-Bake Tiramisu Cheesecake Delight
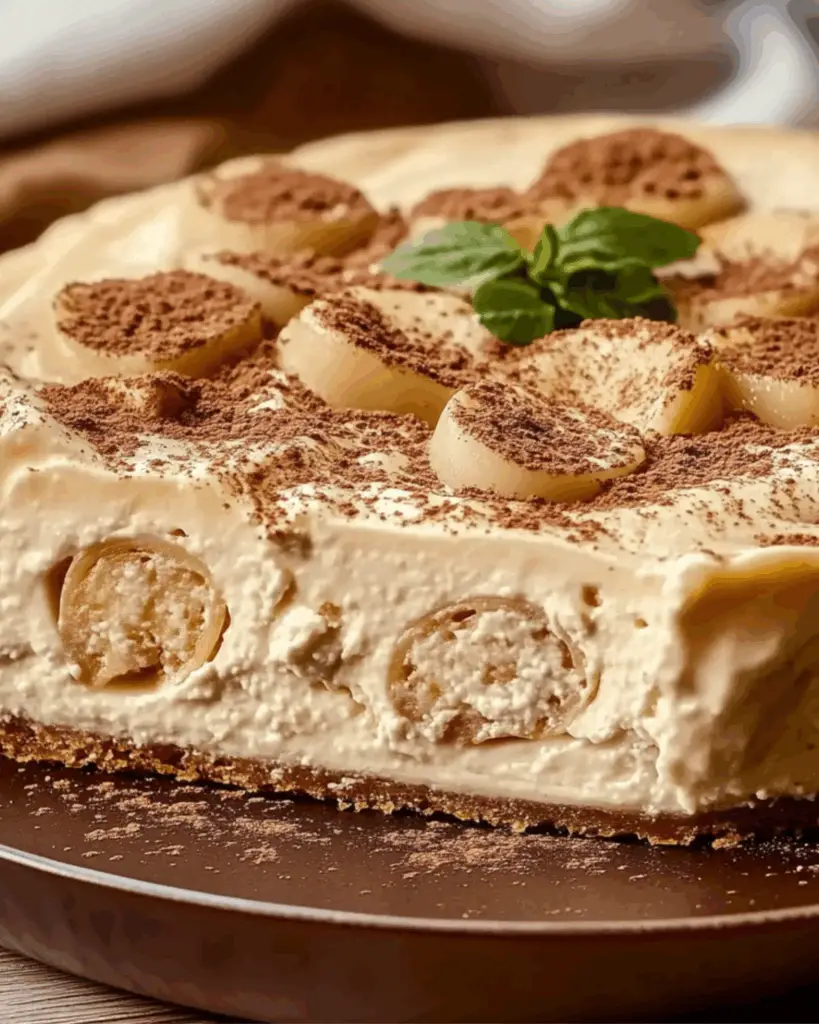
Okay, friend—this is the dessert you didn’t know you needed but will now crave forever. Introducing the Dreamy No-Bake Tiramisu Cheesecake Delight—a creamy, coffee-kissed, no-fuss treat that brings together two iconic desserts in the most irresistible way. Imagine the rich, velvety texture of cheesecake mingling with the bold espresso notes and soft ladyfingers of classic tiramisu… all without turning on your oven. Trust me, you’re going to love this.
This cheesecake is fancy enough for date night or holidays but simple enough to whip up on a whim (which you will do often). Each bite delivers layers of creamy mascarpone bliss, subtle sweetness, and that signature coffee flavor that just melts in your mouth. It’s indulgent, elegant, and, best of all—effortless. No water baths, no baking drama. Just chill, set, and swoon.
Why You’ll Love Dreamy No-Bake Tiramisu Cheesecake Delight
Versatile Perfect for a dinner party, birthday celebration, or just because it’s Tuesday and you deserve something special. It’s a guaranteed showstopper wherever it lands.
Budget-Friendly Uses simple pantry staples and no fancy equipment required. You probably have most of this in your kitchen already.
Quick and Easy If you can stir and layer, you can make this. It’s beginner-friendly but has the wow factor of a pro dessert.
Customizable Adjust the coffee strength, sweetener, or toppings to make it yours. Add cocoa, chocolate chips, or a splash of coffee liqueur for a grown-up twist.
Crowd-Pleasing Creamy, coffee-flavored, and decadent—this dessert checks all the boxes. Even non-coffee lovers end up licking their plates clean.
Disclosure: This post contains affiliate links.If you click and make a purchase, I may earn a small commission at no extra cost to you.


Ingredients in Dreamy No-Bake Tiramisu Cheesecake Delight
Mascarpone Cheese
The Italian star of the show. Creamy, rich, and slightly tangy, it gives the cheesecake that dreamy texture and authentic tiramisu flavor.
Cream Cheese
Balances the mascarpone and adds that classic cheesecake tang. Together, they’re a match made in dessert heaven.
Ladyfingers
Soft and sponge-like, these absorb the coffee soak like magic and create that perfect “cake” layer inside the cheesecake.
Espresso or Strong Coffee
Bold and beautiful. This is what gives tiramisu its signature kick and aroma. Use freshly brewed and cooled for best results.
Whipped Cream
Lightens the filling and makes it airy and luscious. Fold it in gently for that soft, mousse-like texture.
Powdered Sugar
Sweetens the filling without making it grainy. It blends perfectly into the cream mixture.
Vanilla Extract
Adds warmth and depth to the flavor profile. A little goes a long way.
Cocoa Powder
The finishing touch. A generous dusting on top adds elegance and a touch of bitterness that balances all the sweetness.
Optional: Coffee Liqueur
For a grown-up version, spike your espresso soak with a splash of Kahlúa or Baileys. It’s a game-changer.
(Note: the full ingredients list, including measurements, is provided in the recipe card directly below.)
Instructions
Preheat Your Equipment
No oven required here! Just clear a space in your fridge and prep a springform pan or a deep pie dish lined with parchment or greased lightly.
Combine Ingredients
In a large mixing bowl, beat the cream cheese and mascarpone until smooth and creamy. Add the powdered sugar, vanilla extract, and mix until fully blended. Fold in the whipped cream until the mixture is light and fluffy.
Prepare Your Cooking Vessel
Dip each ladyfinger quickly in cooled espresso (don’t soak too long or they’ll fall apart) and line the bottom of your prepared pan with them.
Assemble the Dish
Spread half the cheesecake mixture over the ladyfingers, smoothing the top. Add another layer of espresso-dipped ladyfingers, then finish with the remaining cheesecake mixture. Smooth again.
Cook to Perfection
Pop the cheesecake in the fridge for at least 6 hours or overnight so it sets up beautifully. This chill time is key to getting clean slices and that firm yet creamy texture.
Finishing Touches
Before serving, dust the top with cocoa powder and garnish with chocolate shavings or espresso beans if you’re feeling fancy.
Serve and Enjoy
Slice, serve, and savor every luxurious bite. It’s velvety, cool, and layered with rich flavors that’ll make you feel like you’re eating dessert in a cozy Italian café.
How to Serve Dreamy No-Bake Tiramisu Cheesecake Delight
Espresso Pairing Serve with a hot cup of espresso or cappuccino to double down on those coffee vibes.
Fresh Berries A few raspberries or strawberries on the side can brighten the plate and balance the richness.
Chocolate Garnish Add curls of dark chocolate or mini chips for a fancy final touch.
As a Mini Dessert Make individual portions in small jars or cups for an adorable twist at parties or brunches.
Holiday Style Sprinkle crushed peppermint or cinnamon around the edges for seasonal flair.
Additional Tips
Prep Ahead This dessert is even better the next day, so it’s perfect for making ahead of time.
Spice It Up Add a touch of cinnamon or nutmeg to the filling for extra depth.
Dietary Adjustments Use dairy-free alternatives for the cream and cheese if needed—just make sure they’re thick and creamy.
Storage Tips Keep leftovers covered in the fridge for up to 4–5 days. The texture holds beautifully.
Double the Batch Feeding a crowd? Double the recipe and build it in a large trifle bowl or baking dish for a stunning presentation.
FAQ Section
Q1: Can I substitute mascarpone with cream cheese?
A1: Yes, but the flavor will be slightly tangier. For a closer match, use part cream cheese, part whipped cream.
Q2: Can I make this dish ahead of time?
A2: Absolutely! It actually gets better as it sets overnight in the fridge.
Q3: How do I store leftovers?
A3: Store covered in the refrigerator for up to 5 days. It stays creamy and delicious.
Q4: Can I freeze this dish?
A4: Yes, though the texture may change slightly. Freeze in slices, then thaw in the fridge before serving.
Q5: What’s the best way to slice this cheesecake cleanly?
A5: Use a sharp knife dipped in hot water and wiped clean between each cut for perfect slices.
Q6: Can I double the recipe?
A6: Definitely! Just use a larger pan or dish and give it extra chilling time.
Q7: Is this recipe suitable for gluten-free diets?
A7: Yes—just use gluten-free ladyfingers or a GF graham crust as a base.
Q8: What can I use instead of espresso?
A8: Strong brewed coffee works great. Decaf is fine too if you want to skip the caffeine.
Q9: How can I make this less sweet?
A9: Reduce the powdered sugar slightly or use unsweetened whipped cream.
Q10: What’s the best pan to use?
A10: A springform pan makes slicing easy and gives a beautiful edge, but any deep pie dish or glass baking dish works too.
Conclusion
And there you have it—your new favorite no-bake treat, Dreamy No-Bake Tiramisu Cheesecake Delight. It’s indulgent, foolproof, and guaranteed to turn dessert skeptics into believers. It’s the kind of recipe you’ll want to make again and again—whether for celebrations or just because you need a little moment of magic in your week.
Print
Dreamy No-Bake Tiramisu Cheesecake Delight
- Prep Time: 35 minutes
- Cook Time: 0 minutes
- Total Time: 4 hours 35 minutes (includes chilling)
- Yield: 10 slices
- Category: Dessert
- Method: No-Bake
- Cuisine: Italian
- Diet: Vegetarian
Description
This no-bake Tiramisu Cheesecake is an irresistible fusion of two classic desserts—creamy cheesecake and rich tiramisu. Featuring layers of coffee-soaked ladyfingers, a velvety mascarpone filling, and a fluffy coffee whipped cream topping, it’s indulgent, elegant, and surprisingly easy to make. #TiramisuCheesecake #NoBakeDessert #CoffeeLoversDessert
Ingredients
- 32 (250 g) ladyfinger cookies, crushed
- 1/3 cup (76 g) butter, melted
- 12 oz (340 g) cream cheese, softened
- 12 oz (340 g) mascarpone
- 1 1/2 cups (100 g) powdered sugar
- 1 tsp vanilla extract
- 1 tbsp (30 g) granulated gelatin
- 3 tbsp water, warm
- 3 tbsp coffee, warm
- 3/4 cup (180 ml) heavy cream, very cold
- 1/4 cup (25 g) cocoa powder
- Approx. 12 ladyfinger cookies (for dipping layer)
- 1 cup (240 ml) strong coffee (for dipping)
- 1 1/2 cups (360 ml) cold heavy cream (for whipped cream)
- 1/2 cup (65 g) powdered sugar (for whipped cream)
- 1 tsp instant coffee (for whipped cream)
Instructions
- In a food processor, crush the ladyfinger cookies into crumbs. Mix with melted butter until fully combined. Press into the base of a springform pan. Chill for at least 30 minutes.
- In a bowl, beat softened cream cheese, mascarpone, powdered sugar, and vanilla extract until smooth.
- In a small bowl, dissolve the gelatin in warm water and coffee. Let sit briefly to bloom, then stir until fully dissolved.
- Add the gelatin mixture to the cheesecake batter and mix well.
- In a separate bowl, whip the cold heavy cream to stiff peaks. Gently fold into the cheesecake mixture.
- Dip approx. 12 ladyfinger cookies into strong coffee and layer them on top of the chilled crust.
- Pour cheesecake batter over the ladyfingers, smoothing the top. Chill for at least 4 hours or overnight until set.
- In a chilled bowl, whip cold heavy cream with powdered sugar and instant coffee until stiff peaks form.
- Spread whipped cream over the set cheesecake. Dust with cocoa powder.
- Slice and serve chilled. Enjoy!
Notes
- Use full-fat cream cheese and mascarpone for best texture and flavor.
- Ensure heavy cream is very cold for successful whipping.
- Don’t soak ladyfingers too long in coffee or they will become soggy.
- Chilling overnight yields best results for slicing.
- Dust cocoa powder just before serving to keep it looking fresh.
Nutrition
- Serving Size: 1 slice
- Calories: 430
- Sugar: 24g
- Sodium: 180mg
- Fat: 32g
- Saturated Fat: 20g
- Unsaturated Fat: 10g
- Trans Fat: 0g
- Carbohydrates: 29g
- Fiber: 1g
- Protein: 6g
- Cholesterol: 110mg


