

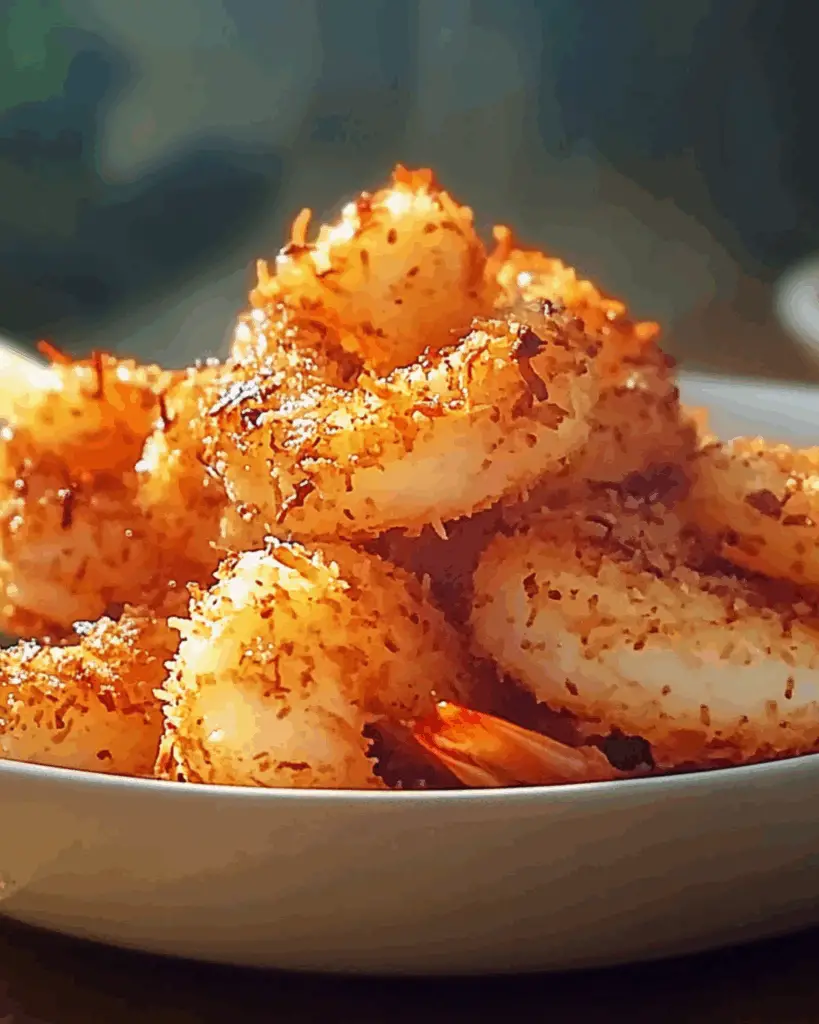
Crispy Coconut Bliss Shrimp
You know those dishes that make you close your eyes with the first bite because they’re just that good? This is one of them. These golden, crunchy, juicy shrimp are everything: sweet from the coconut, savory from the seasoned breading, and so satisfyingly crispy it’s basically a flavor fireworks show in your mouth. Whether you’re making this for a sunny weekend treat, a fun dinner date at home, or just because you deserve something delicious today—trust me, you’re going to love this. It’s a tropical escape in every bite, minus the plane ticket.
These shrimp are a game-changer. Light enough to snack on, satisfying enough for dinner, and fancy-looking without actually being hard to make. And the dipping sauce? Don’t even get me started. Let’s just say you might want to double the batch.
Why You’ll Love Crispy Coconut Bliss Shrimp
This recipe isn’t just about the ingredients—it’s about creating moments. Whether you’re cooking for a casual family dinner, hosting a get-together with friends, or simply indulging in some comforting flavors for yourself, this dish is versatile enough to fit the occasion. Here’s why it’s a favorite:
Versatile: Perfect for busy weeknights or as a standout dish at gatherings. Imagine coming home after a long day, knowing you can whip up something delicious and comforting in no time. Or envision serving this at a party, where guests ask for the recipe before the night ends.
Budget-Friendly: Uses ingredients you likely already have in your kitchen. No need for exotic items; this dish proves that simple ingredients can create extraordinary flavors. It’s perfect for when you’re trying to stick to a budget but still want something hearty and satisfying.
Quick and Easy: Straightforward steps that even beginners can follow. If you’re someone who usually avoids complex recipes, this one is for you. It’s designed to be foolproof, so you can enjoy cooking without stress.
Customizable: Easy to tweak with different flavors to suit your preferences. For example, if you love bold flavors, add a pinch of cayenne or smoked paprika. Prefer something milder? You can adjust the seasoning to make it kid-friendly.
Crowd-Pleasing: A guaranteed hit with both kids and adults. It’s always a win when a single dish can satisfy everyone at the table. This recipe strikes the perfect balance of flavor and comfort, making it a universal favorite.
Disclosure: This post contains affiliate links.If you click and make a purchase, I may earn a small commission at no extra cost to you.


Ingredients in Crispy Coconut Bliss Shrimp
Here’s what makes this dish shine—it’s built on simple, delicious components that come together beautifully:
Shrimp
Large, peeled, and deveined shrimp bring juicy texture and mild sweetness that pairs perfectly with the coconut coating.
Shredded Sweetened Coconut
Gives the shrimp a golden, crunchy crust with tropical sweetness in every bite.
Panko Breadcrumbs
Adds irresistible crispiness and lightness to the coating.
Flour
Helps bind the egg wash to the shrimp so the coating sticks beautifully.
Eggs
Used for dipping the shrimp and creating that perfect breading layer.
Seasonings
Salt, pepper, garlic powder, and optional cayenne for a flavorful punch that enhances the coconut crust.
Oil for Frying
Choose a neutral oil like vegetable or canola oil for a crispy golden finish.
(Note: the full ingredients list, including measurements, is provided in the recipe card directly below.)
Instructions
Let’s dive into the steps to create this flavorful masterpiece:
Prep Your Station
Set up your dredging station with three bowls—one for flour and seasoning, one with beaten eggs, and one with a mix of panko and coconut.
Coat the Shrimp
Dip each shrimp first in flour, then egg, then the coconut-panko mix. Press gently so the coating sticks nicely.
Heat the Oil
In a deep skillet or fryer, heat oil to 350°F. Hot oil is key to getting that perfect golden crunch.
Fry to Perfection
Fry shrimp in small batches for 2–3 minutes per side until golden brown. Don’t overcrowd the pan or they’ll steam instead of crisp.
Drain and Cool
Remove shrimp and place on a paper towel-lined plate to drain. Let them cool for a minute or two so they firm up slightly.
Serve with Sauce
Pair with a sweet chili or pineapple dipping sauce for the ultimate flavor combo.
How to Serve Crispy Coconut Bliss Shrimp
These shrimp are delightfully versatile and can shine in multiple settings:
As an Appetizer: Serve on a platter with tiny dipping bowls for that perfect finger-food vibe.
Over a Salad: Toss onto a bed of baby greens with mango chunks and a honey-lime vinaigrette.
With Rice or Noodles: Spoon over jasmine rice or coconut noodles for a tropical dinner bowl.
Taco Night Twist: Slide a few shrimp into corn tortillas with slaw and a drizzle of lime crema for island-style tacos.
Party Platter: Stack them on a bamboo skewer with pineapple chunks for an easy, festive finger food.
Additional Tips
Prep Ahead: You can bread the shrimp a few hours ahead and keep them in the fridge until ready to fry.
Bake Instead: Want a lighter option? Bake at 425°F for 12–15 minutes, flipping halfway through.
Air Fryer Method: Cook at 375°F for 8–10 minutes. Spray with oil for extra crispiness.
Spicy Lovers: Add cayenne or chili flakes to the flour mixture for a kick of heat.
Sweet Sauce Hack: Mix apricot preserves with sriracha and lime juice for a quick DIY dipping sauce.
Storage Tips: Store leftovers in an airtight container in the fridge for up to 2 days. Reheat in the oven for best results.
FAQ Section
Q1: Can I use frozen shrimp?
A1: Yes! Just thaw them completely and pat dry before breading to avoid soggy coating.
Q2: Can I make this gluten-free?
A2: Absolutely—use gluten-free flour and panko breadcrumbs. The result is just as crispy and delicious.
Q3: What dipping sauces go best?
A3: Sweet chili sauce, mango salsa, pineapple chutney, or even a tangy lime aioli are all amazing choices.
Q4: Can I bake instead of fry?
A4: Definitely. Bake at 425°F for 12–15 minutes or use an air fryer for a lighter version.
Q5: How do I prevent the coating from falling off?
A5: Make sure the shrimp are dry before coating, and press the coconut-panko mix firmly onto each one.
Q6: Can I make these in advance?
A6: You can prep and coat them ahead of time—just fry or bake them fresh for the best texture.
Q7: Is this recipe kid-friendly?
A7: Very much so! You can tone down the seasoning and serve with a fruity dipping sauce for a kid-approved meal.
Q8: What oil is best for frying?
A8: Neutral oils like vegetable, canola, or peanut oil work best for high-heat frying.
Q9: Can I use unsweetened coconut?
A9: You can, but sweetened coconut gives the best flavor balance and crisp caramelization.
Q10: What’s the best way to reheat leftovers?
A10: Reheat in the oven at 375°F for 8–10 minutes to restore crispiness.
Conclusion
There you have it—Crispy Coconut Bliss Shrimp, a bite-sized tropical vacation you can whip up anytime. Whether you’re serving them at a backyard bash, date night in, or just treating yourself (because why not?), these shrimp deliver serious flavor and texture without a fuss. Once you try them, they might just become your new go-to. Trust me, this one’s a keeper.
Print
Crispy Coconut Bliss Shrimp
- Prep Time: 15 minutes
- Cook Time: 20 minutes
- Total Time: 35 minutes
- Yield: 6 servings
- Category: Appetizer
- Method: Frying
- Cuisine: American
- Diet: Vegetarian
Description
Crispy on the outside and irresistibly cheesy on the inside, these St. Louis Toasted Ravioli are a beloved Midwest appetizer perfect for dipping in warm marinara and sharing with friends.
Ingredients
- 1 (16 ounce) jar marinara sauce
- 1 large egg
- 2 tablespoons whole milk
- ¾ cup Italian seasoned bread crumbs
- ½ teaspoon salt (Optional)
- ½ (25 ounce) package frozen cheese ravioli, thawed
- 3 cups vegetable oil for frying, or as needed
- 1 tablespoon grated Parmesan cheese
Instructions
- Heat the vegetable oil in a large skillet or deep fryer over medium-high heat.
- In a shallow bowl, whisk together the egg and whole milk.
- In another shallow bowl, combine the Italian seasoned bread crumbs and salt (if using).
- Dip each ravioli into the egg mixture, then coat with the breadcrumb mixture, pressing gently to ensure it sticks.
- Carefully place the coated ravioli in the hot oil, frying in batches to avoid overcrowding. Fry for 2–3 minutes per side, or until golden and crispy.
- Remove the ravioli from the oil and place on a paper towel-lined plate to drain excess oil.
- Heat the marinara sauce in a small saucepan over medium heat.
- Serve the toasted ravioli with marinara sauce for dipping and sprinkle with grated Parmesan cheese.
Notes
- Toasted ravioli can also be baked at 400°F for 15–20 minutes as a lighter alternative.
- Serve with a sprinkle of fresh parsley or extra Parmesan for added flavor.
- Try meat-filled ravioli for a heartier version.
- Best served immediately while hot and crispy.
Nutrition
- Serving Size: 5-6 pieces
- Calories: 390
- Sugar: 4g
- Sodium: 660mg
- Fat: 22g
- Saturated Fat: 4.5g
- Unsaturated Fat: 15g
- Trans Fat: 0g
- Carbohydrates: 36g
- Fiber: 2g
- Protein: 11g
- Cholesterol: 50mg


