Chocolate Meringue Easter Nests
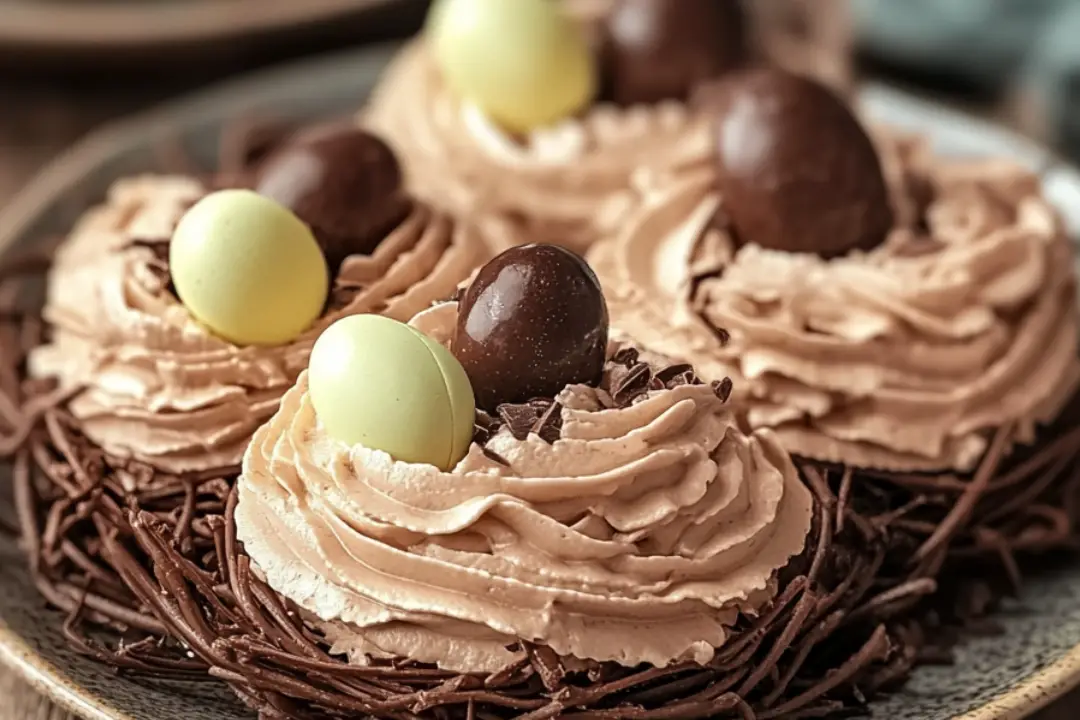
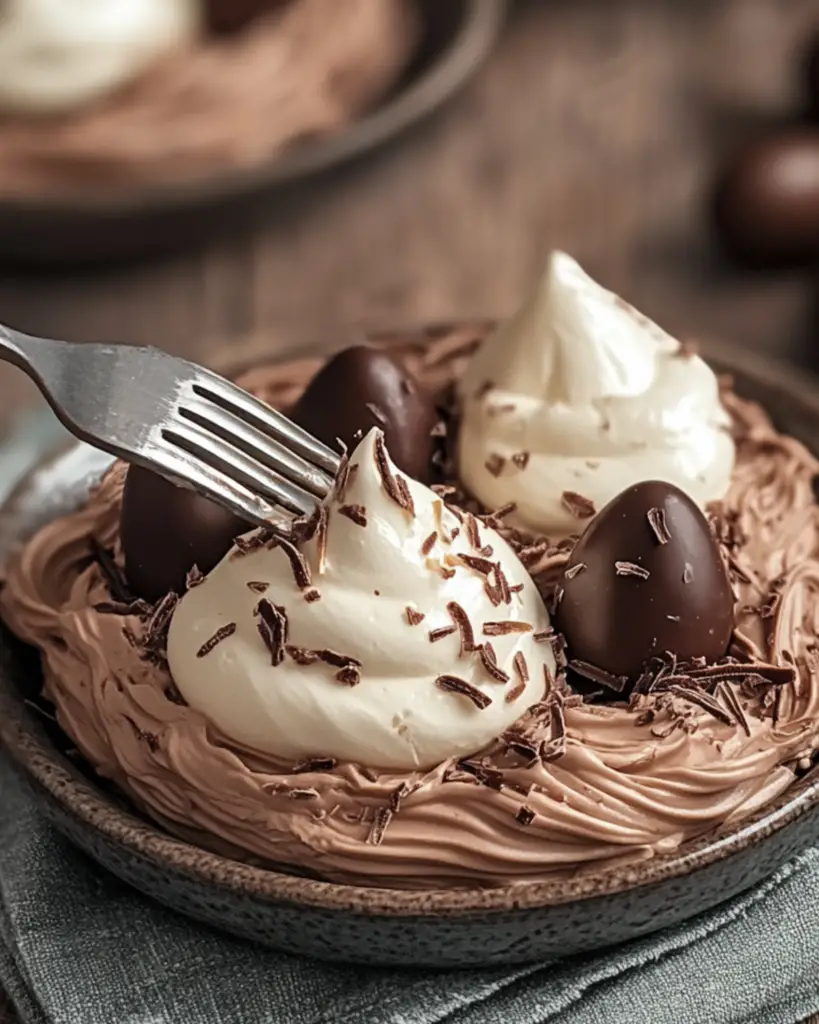
Hey there, sweet tooth! Get ready to fall in love with this playful, indulgent treat: Chocolate Meringue Easter Nests. Trust me, this is a dessert that’ll have everyone asking for seconds. Imagine crispy, golden meringue nests filled with rich, velvety chocolate and topped with colorful candy eggs—perfect for Easter, but let’s be honest, these are delightful any time of year. The best part? They’re super simple to make, and you’ll feel like a baking pro in no time. Whether you’re a novice in the kitchen or a seasoned baker, this recipe is approachable, fun, and utterly delicious. Let’s get started, shall we?
Why You’ll Love Chocolate Meringue Easter Nests
This isn’t just any dessert—it’s an experience. From the crunch of the meringue to the sweetness of the chocolate, it’s a delightful little bite of joy. Here’s why this one’s a keeper:
- Versatile: Perfect for Easter celebrations, but equally fantastic for a weekend treat, or even as a fun afternoon project with the kids. It’s as versatile as it is delicious.
- Budget-Friendly: You don’t need to break the bank to create these scrumptious nests. With just a handful of ingredients, you’ll have a treat that looks and tastes expensive, but isn’t.
- Quick and Easy: You’ll love how simple this is. Whip up those meringues, melt the chocolate, and voilà—you’re just a few steps away from a crowd-pleasing dessert.
- Customizable: While the traditional Easter candy eggs are a classic, feel free to make these nests your own! Swap out the candy eggs for mini marshmallows, dried fruit, or even a little sprinkle of sea salt for an unexpected twist.
- Crowd-Pleasing: If there’s one thing I know, it’s that everyone—kids and adults alike—can’t resist these chocolatey meringue nests. They’re just that good!
Disclosure: This post contains affiliate links.If you click and make a purchase, I may earn a small commission at no extra cost to you.
Ingredients in Chocolate Meringue Easter Nests
The magic of these nests is in their simplicity. With just a handful of pantry staples, you’ll have all you need to make these irresistible treats. Let’s take a look:
- Egg Whites: These are the key to creating the light and airy meringue. When whipped, they transform into the perfect base for the crispy nests.
- Sugar: Sweetens the meringue and helps it crisp up in the oven.
- Vanilla Extract: Adds that comforting, warm flavor that makes the meringue melt in your mouth.
- Cornstarch: This little ingredient helps stabilize the meringue and gives it that perfect texture.
- Chocolate: Rich, smooth, and delicious. Whether you go dark or milk chocolate, it’ll be the perfect finishing touch for your nests.
- Candy Eggs: These colorful little gems are the star of the show. They add the Easter vibe and make these nests look so festive!
(Note: The full ingredients list, including measurements, is provided in the recipe card directly below.)
Instructions for Chocolate Meringue Easter Nests
Now, let’s bring these meringue nests to life. It’s easier than you think, I promise! Here’s how to do it:
Preheat Your Oven
Start by preheating your oven to 250°F (120°C). This low temperature will allow the meringues to dry out properly without browning too quickly.
Whip the Egg Whites
In a clean, dry bowl, whip your egg whites until they form soft peaks. This means they should hold a shape but still be a bit floppy. Once you’ve got those soft peaks, slowly add the sugar, a little at a time, until the mixture forms stiff, glossy peaks. You want it to look smooth and shiny—almost like marshmallow fluff!
Add Cornstarch and Vanilla
Next, gently fold in the cornstarch and vanilla extract. This will stabilize the meringue and give it that melt-in-your-mouth texture we all love.
Shape the Nests
On a parchment-lined baking sheet, spoon or pipe the meringue mixture into little round nest shapes. You can use the back of a spoon to create a little well in the center of each nest, where the chocolate will sit later. Don’t worry about making them perfect—they’re rustic and charming as they are!
Bake to Perfection
Pop the meringue nests into the oven and bake for about 1 to 1.5 hours. You want them to be crisp on the outside but soft on the inside. Once they’re done, turn off the oven and let them cool completely inside. This helps them firm up and get that signature crispy texture.
Melt the Chocolate
While the nests are cooling, melt your chocolate. You can do this in a microwave in short bursts, stirring between each, or use a double boiler if you prefer. Once it’s melted, set it aside to cool just a bit.
Assemble the Nests
Once your meringue nests are cool, spoon a little melted chocolate into the center of each one. Then, top with your candy eggs! The colorful eggs are like the cherry on top, giving these nests that fun, festive vibe.
Serve and Enjoy
Let the chocolate set for a few minutes, and then serve your beautiful, bite-sized meringue nests. Whether you’re sharing them with family or enjoying them solo, they’re bound to bring a smile to anyone who takes a bite!
How to Serve Chocolate Meringue Easter Nests
These meringue nests are perfect all on their own, but if you’re looking for a little something extra, here are some ideas:
- Fresh Fruit: Pair with a side of fresh berries for a burst of flavor that complements the sweetness of the chocolate.
- Whipped Cream: Add a dollop of fresh whipped cream for an extra indulgent experience.
- Coffee or Tea: A warm cup of your favorite brew makes a wonderful pairing with these sweet treats.
Sometimes, simple is best! Serve them on a festive platter, and watch everyone swoon over how pretty and delicious they are.
Additional Tips
Here are a few tips to make sure your meringue nests turn out perfectly every time:
- Room Temperature Eggs: Make sure your egg whites are at room temperature before you start whipping them. This helps them reach their full volume.
- Don’t Rush the Baking: Low and slow is the key to perfect meringues. Don’t be tempted to crank up the heat.
- Customizable Filling: If you’re not a fan of candy eggs, swap them out for dried fruit, chopped nuts, or even mini marshmallows. The possibilities are endless!
FAQ Section
Q1: Can I use a different type of chocolate?
A1: Absolutely! Dark, milk, or even white chocolate would work perfectly. Choose your favorite!
Q2: Can I make these ahead of time?
A2: Yes, these nests store beautifully! Make them the day before and store them in an airtight container. The meringues stay crisp, and the chocolate holds up perfectly.
Q3: How do I store leftovers?
A3: Store them in an airtight container at room temperature for up to a week. If you have any leftover chocolate, it’s also great for melting and drizzling over other desserts.
Q4: Can I freeze these?
A4: Yes, you can freeze the meringue nests (without the chocolate) for up to a month. Just thaw them at room temperature before adding the chocolate and eggs.
Q5: How do I make sure the meringues don’t crack?
A5: Low oven temperature and slow cooling are key! Let the meringues cool gradually in the oven to prevent cracking.
Q6: Can I double the recipe?
A6: Definitely! Just make sure to use a larger baking sheet and give each nest a bit more space to spread.
Conclusion
These Chocolate Meringue Easter Nests are the perfect combination of light, crispy meringue and rich, decadent chocolate, with a festive twist that’s perfect for any occasion. With their simple ingredients and easy instructions, you’ll have an irresistible treat that everyone will love. So, what are you waiting for? Get baking and enjoy a little sweetness in every bite!
Print
Chocolate Meringue Easter Nests
- Prep Time: 15 minutes
- Cook Time: 1 hour
- Total Time: 1 hour 15 minutes
- Yield: 12-15 nests (depending on size)
- Category: Dessert, Easter Treats
- Method: Baking
- Cuisine: American, Spring Desserts
- Diet: Vegetarian
Description
These crispy, light chocolate meringue nests are the perfect Easter treat! They have a delicate crunch, a rich chocolate flavor, and are topped with whipped cream or chocolate ganache and candy eggs for a festive touch. Ideal for spring celebrations and Easter gatherings.
Ingredients
-
For the Meringue Nests:
- 4 large egg whites, room temperature
- 1 cup granulated sugar
- ¼ tsp cream of tartar
- ¼ cup unsweetened cocoa powder
- 1 tsp vanilla extract
- 1 oz melted dark chocolate (optional, for richer flavor)
For the Toppings:
- 1 cup whipped cream or chocolate ganache
- Mini chocolate eggs, jelly beans, or malted milk eggs
- Chocolate shavings (optional, for decoration)
Instructions
-
Make the Meringue:
Preheat oven to 250°F (120°C) and line a baking sheet with parchment paper.
In a clean, dry mixing bowl, beat egg whites with an electric mixer on medium speed until foamy.
Add cream of tartar and continue beating while slowly adding the sugar, one tablespoon at a time.
Beat until stiff, glossy peaks form (about 5-6 minutes).
Gently fold in cocoa powder, vanilla extract, and melted chocolate (if using) until combined. -
Shape the Nests:
Spoon the meringue into a piping bag fitted with a large star tip (or use a spoon to shape nests).
Pipe or shape small nest circles (about 3 inches wide) on the prepared baking sheet.
Use the back of a spoon to make a small indentation in the center of each nest. -
Bake & Cool:
Bake for 1 hour, then turn off the oven and let the meringues cool inside for another 30 minutes to prevent cracking. -
Decorate & Serve:
Fill the center of each nest with whipped cream or chocolate ganache.
Top with chocolate eggs, jelly beans, or malted milk eggs.
Sprinkle with chocolate shavings for an extra chocolatey touch!
Notes
- Let the meringues cool completely to avoid cracking.
- You can substitute the whipped cream with chocolate ganache for a richer topping.
- Meringue nests can be made ahead and stored in an airtight container for up to a week.
Nutrition
- Serving Size: 1 nest
- Calories: 120
- Sugar: 15g
- Sodium: 20mg
- Fat: 4g
- Saturated Fat: 1g
- Unsaturated Fat: 3g
- Trans Fat: 0g
- Carbohydrates: 20g
- Fiber: 1g
- Protein: 2g
- Cholesterol: 25mg

