Chocolate Marble Cake
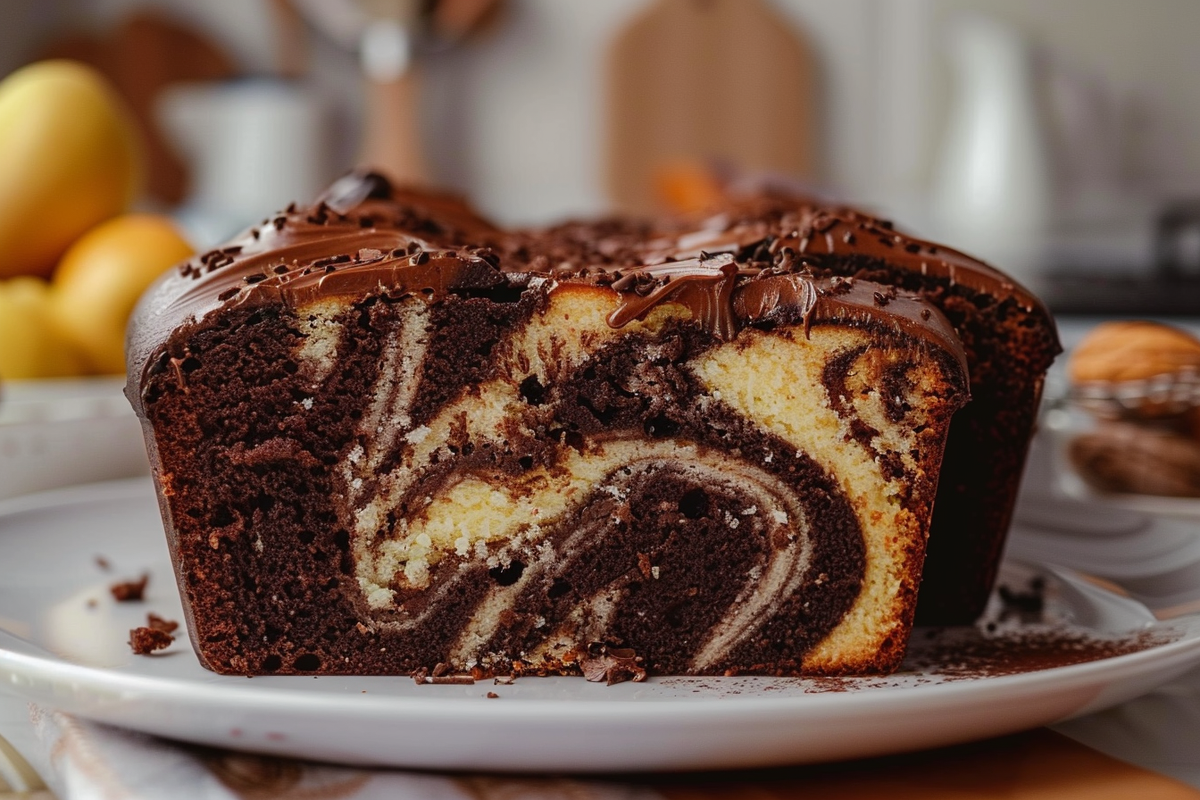
Indulge in the delight of Chocolate Marble Bread, a soft, fluffy masterpiece perfect for any occasion. This baked good combines luscious chocolate and rich vanilla batters swirled together to create a visually stunning and delicious treat that’s sure to impress family and friends. Whether enjoyed at breakfast, as an afternoon snack, or as a dessert, this recipe is a winning choice.
Why You Will Love This Recipe
This Chocolate Marble Bread is not only visually appealing but also offers a harmonious blend of flavors that cater to all taste buds. The moist texture and rich flavors of chocolate and vanilla create a balanced taste. With simple ingredients and straightforward instructions, even novice bakers can enjoy the process and the results. It’s a versatile recipe that can be served alone or with a dollop of whipped cream or ice cream for extra decadence.
Pro Tips for Making Chocolate Marble Bread
- For a richer chocolate flavor, use high-quality bittersweet chocolate.
- Make sure your butter and eggs are at room temperature for easier mixing.
- Don’t overmix the batters to maintain a beautiful marbled effect.
- If you want an extra layer of flavor, add a teaspoon of espresso powder to the chocolate mixture.
- Let the bread cool in the pan for about 10 minutes before transferring it to a wire rack to avoid breaking.
Ingredients
Here’s what you’ll need to create this delicious Chocolate Marble Bread:
- 4 ounces (115 grams) semisweet or bittersweet chocolate, coarsely chopped
- 2 tablespoons coffee or water
- 1 1/2 cups plus 2 tablespoons (195 grams) cake flour, sifted
- 2 teaspoons baking powder
- 1/4 teaspoon salt
- 1/2 cup (113 grams) unsalted butter, at room temperature
- 1 cup (200 grams) granulated white sugar
- 2 large eggs
- 1 teaspoon pure vanilla extract
- 1/2 cup (120 ml) sour cream or plain yogurt, at room temperature
Directions
Follow these steps for a successful bake:
- Step 1: Preheat your oven to 350°F (175°C) and grease a loaf pan.
- Step 2: Melt the chopped chocolate with the coffee or water in a heatproof bowl over simmering water, stirring until smooth. Set aside to cool.
- Step 3: In a bowl, whisk together the cake flour, baking powder, and salt. Set aside.
- Step 4: In a mixing bowl, cream together the unsalted butter and sugar until light and fluffy.
- Step 5: Add the eggs one at a time, mixing well after each addition. Stir in the vanilla extract.
- Step 6: Alternate adding the flour mixture and sour cream to the butter mixture, mixing just until combined.
- Step 7: Divide the batter in half, mixing half with the melted chocolate.
- Step 8: In the prepared loaf pan, spoon the vanilla batter and alternate with the chocolate batter. Use a knife or skewer to swirl the batters together gently.
- Step 9: Bake for 50-60 minutes or until a toothpick inserted into the center comes out clean.
- Step 10: Allow the bread to cool in the pan for 10 minutes before transferring to a wire rack to cool completely.
FAQs
- Can I use whole wheat flour instead of cake flour?
- While whole wheat flour can be used, it will alter the texture and density of the cake. Cake flour is recommended for a lighter, fluffier result.
- Is there a substitute for sour cream?
- You can use plain Greek yogurt or buttermilk as a substitute for sour cream in this recipe.
- Can I make this recipe in advance?
- Yes, Chocolate Marble Bread can be made in advance and stored in an airtight container for up to a week, or frozen for longer storage.
- How do I know when the bread is done baking?
- The bread is done when a toothpick inserted in the center comes out clean or with just a few moist crumbs.
- Can I add nuts or chocolate chips to the batter?
- Absolutely! Adding chopped nuts or chocolate chips can enhance the texture and flavor of the bread.
Conclusion
Chocolate Marble Bread is a wonderfully indulgent treat that showcases the best of both chocolate and vanilla flavors. Easy to prepare and perfect for any occasion, this cake will not disappoint. Whether served plain or with a scoop of ice cream, it’s a delightful addition to your baking repertoire. Embrace the swirl and enjoy every slice!

