Butter-Based Red Velvet Cake
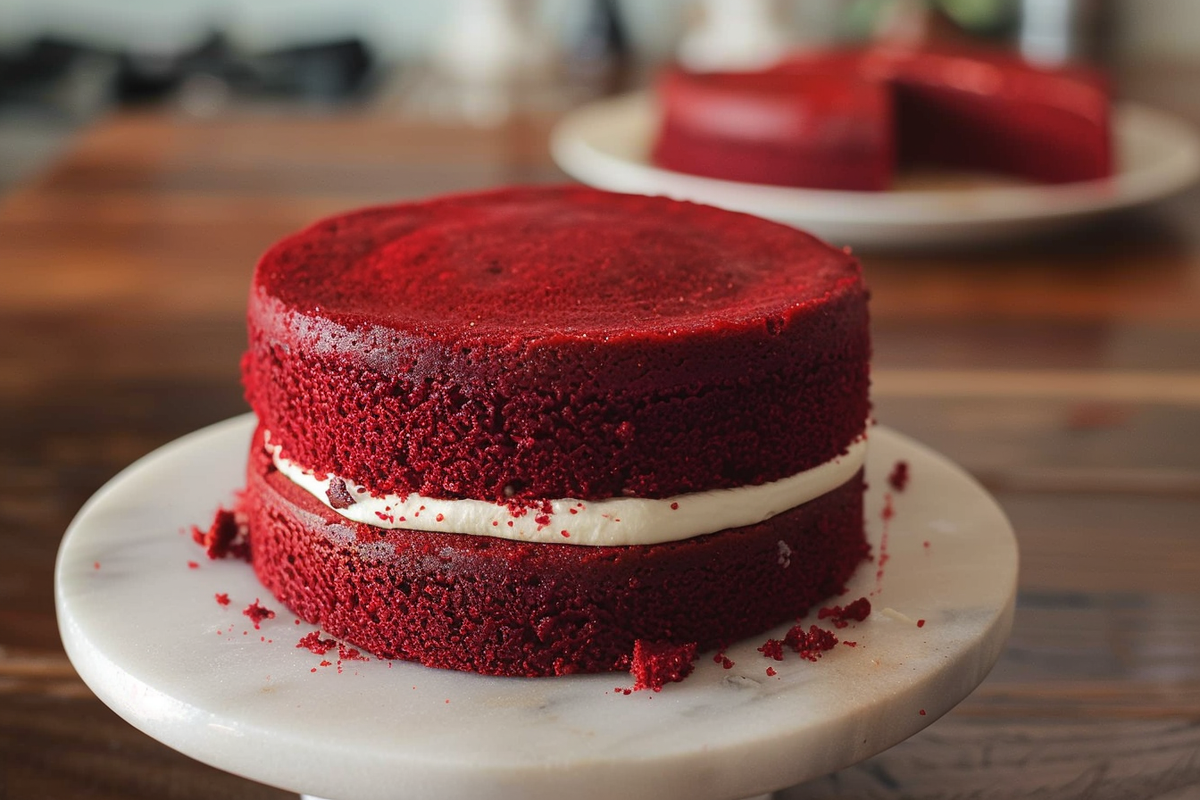
Butter-Based Red Velvet Cake is a classic dessert that tantalizes the taste buds with its rich texture and vibrant color. This cake is perfect for celebrations, anniversaries, or any occasion where you want to impress your guests with a stunning centerpiece. With its soft, moist layers and subtle chocolate flavor, paired with irresistible cream cheese frosting, this cake is a true crowd-pleaser.
Why You Will Love This Recipe
This Butter-Based Red Velvet Cake is not just visually appealing; it also delivers on flavor and texture. The cake boasts a perfect balance of sweetness and chocolate from the cocoa powder, while the buttermilk keeps it moist and tender. The vibrant red hue adds a festive touch that makes it suitable for any occasion, whether it’s a birthday, a wedding, or simply a delightful treat for yourself. Pair it with cream cheese frosting, and you’ll find that the tanginess of the frosting complements the cake perfectly, elevating your dessert experience.
Pro Tips for Making the Butter-Based Red Velvet Cake
1. **Use Room Temperature Ingredients**: Ensure that your butter, eggs, and buttermilk are at room temperature for better emulsification and incorporation, which leads to a lighter cake.
2. **Don’t Overmix the Batter**: When combining your wet and dry ingredients, mix just until combined. Overmixing can lead to a dense cake texture.
3. **Quality Food Coloring**: Use high-quality red food coloring for a beautiful, rich color. Gel food colorings typically yield better results than liquid ones.
4. **Invest in Good Pans**: Non-stick pans that are greased and floured properly are essential for releasing the cake easily without sticking.
5. **Cool Completely Before Frosting**: Allow your cakes to cool completely before applying frosting. This helps prevent melted frosting and assures a neat finish.
Ingredients
Gathering the right ingredients is crucial to creating a delightful Butter-Based Red Velvet Cake. Here’s what you’ll need:
- 2 cups (312g) all-purpose flour
- 2 tablespoons (10g) unsweetened cocoa powder
- 1 teaspoon baking soda
- 1/2 teaspoon salt
- 1 cup (227g) unsalted butter, softened
- 1 cup (350g) granulated sugar
- 2 large eggs
- 1 cup (240ml) buttermilk
- 2 tablespoons liquid red food coloring or 1 teaspoon gel
- 2 teaspoons vanilla extract
- 1 teaspoon white vinegar
Instructions
Step 1: Preheat your oven to 175°C (350°F). Grease and flour two 8-inch (20cm) round cake pans, ensuring the bottoms are lined with parchment paper to prevent sticking.
Step 2: In a medium-sized bowl, whisk together the all-purpose flour, cocoa powder, baking soda, and salt until well combined. This mixture will help achieve an even texture throughout the cake.
Step 3: In a large mixing bowl, beat the softened butter and granulated sugar together on medium speed until the mixture is light and fluffy. This usually takes about 3-5 minutes. By incorporating air, this step will ensure a soft cake base.
Step 4: Add the eggs, one at a time, to the butter mixture, beating well after each addition to ensure they are fully incorporated into the batter.
Step 5: In a separate bowl, combine the buttermilk, red food coloring, and vanilla extract. Stir this mixture until well combined. The food coloring will yield the cake its signature red hue.
Step 6: With the mixer on low speed, alternate adding the dry mixture and the buttermilk mixture to the butter mixture, starting and ending with the dry ingredients. Be careful not to overmix; stop as soon as no flour streaks remain.
Step 7: Stir in the white vinegar by hand, ensuring it is evenly distributed throughout the batter. Vinegar helps activate the baking soda for that perfect rise.
Step 8: Divide the batter evenly between the two prepared pans and smooth the tops with a spatula.
Step 9: Bake the cakes in the preheated oven for 30-35 minutes, or until a toothpick inserted into the center comes out clean. Start checking at the 30-minute mark to avoid overbaking.
Step 10: Allow the cakes to cool in the pans for about 10 minutes before carefully transferring them to wire racks to cool completely.
Step 11: Once cooled, frost with cream cheese frosting or your favorite buttercream, and savor every delightful bite!
FAQ
Can I use different food coloring?
Yes, while red is traditional for red velvet cake, you can experiment with different colors for various occasions. Just be sure to use cake-safe food dyes for the best results.
What can I use instead of buttermilk?
You can make a substitute for buttermilk by mixing 1 tablespoon of vinegar or lemon juice into 1 cup of milk and letting it sit for 5-10 minutes until it thickens slightly.
Is it possible to make this cake gluten-free?
Yes, you can use a gluten-free all-purpose flour blend in place of regular all-purpose flour. Be sure it has a one-to-one substitute ratio.
How should I store the cake?
If you have leftover cake, store it in an airtight container at room temperature for up to 3 days. If you live in a humid climate, refrigerate it to maintain freshness, but let it come to room temperature before serving for the best flavor.
Can I freeze the cake layers?
Yes, you can freeze red velvet cake layers. Wrap them tightly in plastic wrap and foil before freezing. They can last up to 3 months in the freezer. Thaw in the refrigerator overnight before frosting.
Conclusion
The Butter-Based Red Velvet Cake is a stunning confection that combines visual appeal with indulgent flavor. With its moist layers and rich cream cheese frosting, it’s sure to impress at any gathering. Use the tips outlined above for the best results, and enjoy creating this delicious dessert that will have everyone coming back for seconds.


