

Brown Gravy Without Drippings
Alright, let’s talk about a little secret that will take your dinners from good to “wow, I didn’t know gravy could taste this amazing!” Trust me, this Brown Gravy without drippings is a complete game-changer. No roast leftovers, no turkey drippings required—just pantry staples, a little patience, and magic in a skillet. The result? A rich, savory gravy that’s thick, velvety, and perfect for pouring over mashed potatoes, steaks, roasted chicken, or anything that could use a little extra love from a sauce.
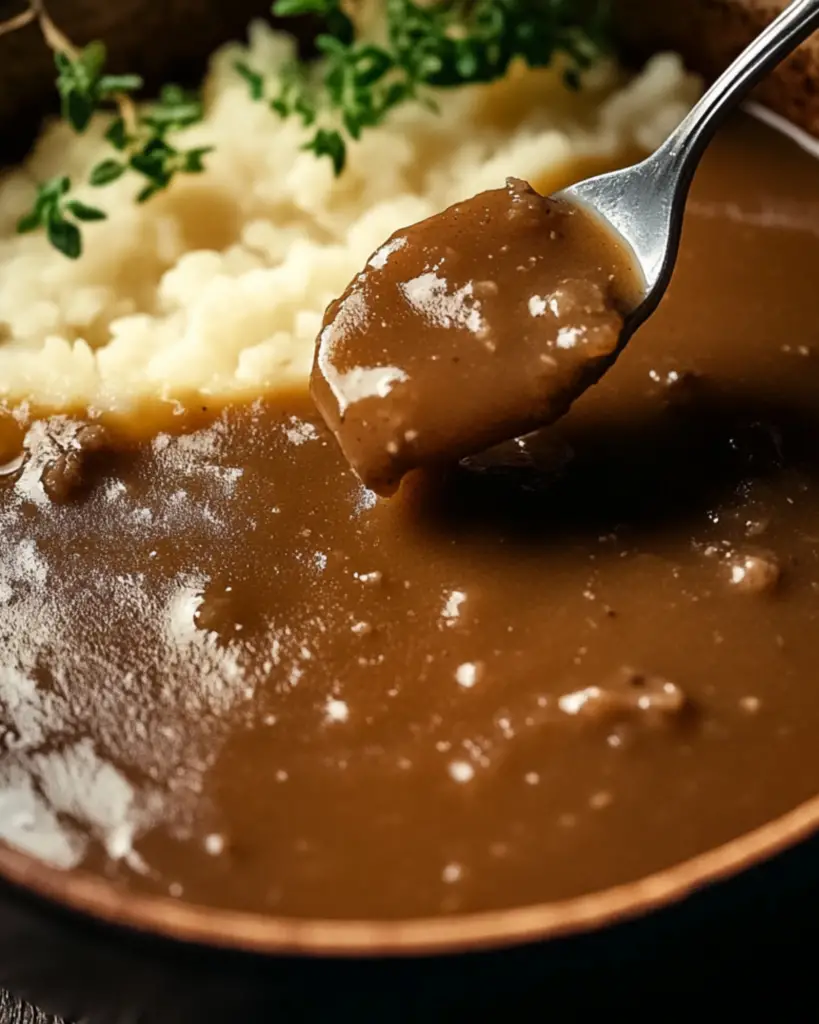
Picture this: You’re sitting down to a meal, and you drizzle this gorgeous brown gravy over everything. The flavors are deep, savory, and just the right amount of rich. It’s like wrapping your meal in a cozy blanket of comfort. It’s smooth, satisfying, and oh-so-versatile. And the best part? You can make this anytime—no special roast or complicated ingredients needed!
Why You’ll Love Brown Gravy Without Drippings
This gravy recipe isn’t just any ordinary sauce. It’s your go-to for quick, fuss-free flavor that works with almost anything. Here’s why you’re going to adore it:
- Versatile: Whether you’re topping mashed potatoes, a juicy steak, or even roasted veggies, this gravy is your new best friend. It’s the kind of recipe that makes everything it touches better.
- Budget-Friendly: You probably already have all the ingredients in your kitchen! No fancy drippings, just simple pantry staples like flour, butter, and stock. This dish proves that great flavor doesn’t need to come with a hefty price tag.
- Quick and Easy: Forget about waiting around for hours to make gravy. This one is done in under 15 minutes, making it perfect for weeknight dinners or when you’re craving comfort food but don’t want to spend too much time in the kitchen.
- Customizable: Want a richer flavor? Add a splash of Worcestershire sauce or a dash of soy sauce. Prefer a milder version? Adjust the seasoning to suit your taste. The options are endless!
- Crowd-Pleasing: Trust me, no one will ever complain about a little extra gravy. This one’s a hit every time, whether you’re serving up a family dinner or hosting friends.
Disclosure: This post contains affiliate links.If you click and make a purchase, I may earn a small commission at no extra cost to you.


Ingredients in Brown Gravy Without Drippings
This gravy comes together with just a handful of ingredients, and I bet you already have most of them on hand. Here’s what you’ll need to create this savory magic:
- Butter: The base for the gravy, adding richness and a smooth texture. You can’t go wrong with butter.
- Flour: This helps thicken the gravy to the perfect consistency. It’s the secret to that velvety finish.
- Beef or Chicken Broth: The heart and soul of the flavor. Choose your favorite, or even combine them for a deeper taste.
- Salt and Pepper: Essential seasonings that make everything pop. Adjust to your taste!
- Optional Add-Ins: A dash of Worcestershire sauce or soy sauce for an extra umami kick (trust me, it’s worth it).
(Note: the full ingredients list, including measurements, is provided in the recipe card directly below.)
Instructions
Let’s dive into the steps to create this rich, savory brown gravy:
Step 1: Melt the Butter
In a medium saucepan, melt the butter over medium heat. It should bubble and foam a little, which means you’re on the right track. Be sure to stir it occasionally to prevent it from browning too much.
Step 2: Add the Flour
Once the butter has melted, sprinkle in the flour. Stir it constantly to form a smooth roux (that’s the fancy name for the flour-butter mixture). Keep stirring for about 2 minutes to cook out the raw flour taste. It should look a little golden and smell wonderfully nutty.
Step 3: Gradually Add the Broth
Slowly pour in the broth, a little at a time, while whisking continuously. This ensures the gravy stays smooth with no lumps. Keep whisking until the gravy starts to thicken—this usually takes about 3 to 5 minutes.
Step 4: Season to Taste
Once the gravy has thickened to your liking, add salt and pepper to taste. You can also add a splash of Worcestershire sauce or soy sauce if you like a deeper flavor profile. Stir well and taste it; adjust the seasoning if needed.
Step 5: Let It Simmer
Let the gravy simmer on low heat for another couple of minutes, just to allow all those flavors to meld together. If you find the gravy too thick, you can always add a little more broth to thin it out.
Step 6: Serve and Enjoy!
Once the gravy is perfectly seasoned and thickened, pour it over mashed potatoes, steaks, chicken, or anything else you crave. Enjoy that comforting, rich flavor in every bite.
How to Serve Brown Gravy Without Drippings
Brown gravy is incredibly versatile, and here are a few ideas for how to enjoy it:
- Mashed Potatoes: You can’t go wrong with a classic pairing of brown gravy over creamy mashed potatoes. It’s comfort food at its finest.
- Steak: A rich, savory gravy over a juicy steak? It’s a match made in heaven.
- Roast Chicken or Pork: Whether you’ve made a roast or grilled chicken, this gravy adds the perfect finishing touch.
- Vegetable Sides: It’s also great poured over roasted veggies like carrots, Brussels sprouts, or green beans.
Presentation matters too! Serve it in a gravy boat, or pour it generously over your favorite dishes for that wow factor.
Additional Tips
- Prep Ahead: You can make this gravy ahead of time and store it in the fridge for up to 3 days. Just reheat gently on the stove, adding a little extra broth if needed.
- Spice It Up: Feel free to add a pinch of garlic powder, onion powder, or even cayenne pepper for a little extra kick.
- Dietary Adjustments: If you’re avoiding gluten, swap the flour for a gluten-free flour blend, or use cornstarch as a thickener.
FAQ Section
Q1: Can I use vegetable broth instead of beef or chicken broth?
A1: Absolutely! Vegetable broth will give you a slightly different flavor but still works wonderfully in this gravy.
Q2: Can I make this gravy ahead of time?
A2: Yes! Make it ahead, store it in the fridge, and reheat when needed. Just remember to stir in a bit more broth to thin it out if it thickens too much in the fridge.
Q3: How do I store leftovers?
A3: Store any leftover gravy in an airtight container in the fridge for up to 3 days. Just reheat gently on the stovetop.
Q4: Can I freeze this gravy?
A4: Yes! Freeze it in a freezer-safe container for up to 3 months. Thaw in the fridge overnight and reheat on the stove.
Q5: What’s the best way to reheat this gravy?
A5: Reheat it gently on the stovetop over low heat, adding a splash of broth if it’s too thick.
Q6: Can I double the recipe?
A6: Definitely! Just be sure you have a larger pan to accommodate the extra volume. You might need to simmer it a little longer.
Q7: Is this recipe suitable for a vegetarian diet?
A7: Yes! Just use vegetable broth, and you’ve got yourself a rich, flavorful vegetarian gravy.
Q8: What side dishes go well with this recipe?
A8: Mashed potatoes, rice, roasted veggies, or even simple pasta—this gravy elevates any side dish.
Q9: How can I make this dish healthier?
A9: Use low-sodium broth and consider swapping the butter for olive oil to reduce the fat content.
Q10: What’s the best cookware to use for this recipe?
A10: A medium-sized saucepan works best to make sure your gravy cooks evenly.
Conclusion
This Brown Gravy without drippings will change the way you think about sauces. It’s simple, rich, and utterly satisfying, and it works with so many different dishes. Whether you’re cooking for a crowd or just making a cozy meal for yourself, this gravy is the perfect finishing touch. Trust me, once you try it, you’ll never go back to the store-bought stuff. So, let’s get cooking!
Print
Brown Gravy Without Drippings
- Prep Time: 5 minutes
- Cook Time: 7 minutes
- Total Time: 12 minutes
- Yield: About 2 cups
- Category: Sauce / Gravy
- Method: Stovetop
- Cuisine: American
- Diet: Vegetarian
Description
This rich and savory brown gravy is made without drippings! It’s the perfect addition to mashed potatoes, roast beef, or any dish that needs a flavorful finishing touch. Made with beef stock, butter, and spices, this easy-to-make gravy is ready in just a few minutes
Ingredients
- 4 cups beef stock
- 1/4 cup butter
- 1/4 cup cornstarch
- 2 tbsp Worcestershire sauce
- 1 tsp onion powder
- 1 tsp garlic powder
- 1/4 tsp black pepper
Instructions
- Melt the Butter: In a large saucepan, melt the butter over medium heat.
- Brown the Cornstarch: Add the cornstarch and sauté until it turns a light brownish color.
- Add the Seasonings and Stock: Stir in Worcestershire sauce, onion powder, garlic powder, and beef stock.
- Whisk to Combine: Whisk constantly to make sure the cornstarch blends well with the beef stock.
- Thicken the Gravy: Continue whisking for about 5-7 minutes, or until the gravy reaches your desired thickness.
- Season and Serve: Season with black pepper to taste, then serve warm. Enjoy!
Notes
- You can adjust the thickness by whisking longer for a thicker gravy or adding a bit more beef stock for a thinner consistency.
- This gravy can be made ahead and stored in the fridge for up to 3 days. Reheat it on low heat, adding a little water or stock if it thickens too much.
Nutrition
- Serving Size: 1/4 cup
- Calories: 50
- Sugar: 0g
- Sodium: 450mg
- Fat: 4g
- Saturated Fat: 2g
- Unsaturated Fat: 2g
- Trans Fat: 0g
- Carbohydrates: 3g
- Fiber: 0g
- Protein: 1g
- Cholesterol: 15mg


