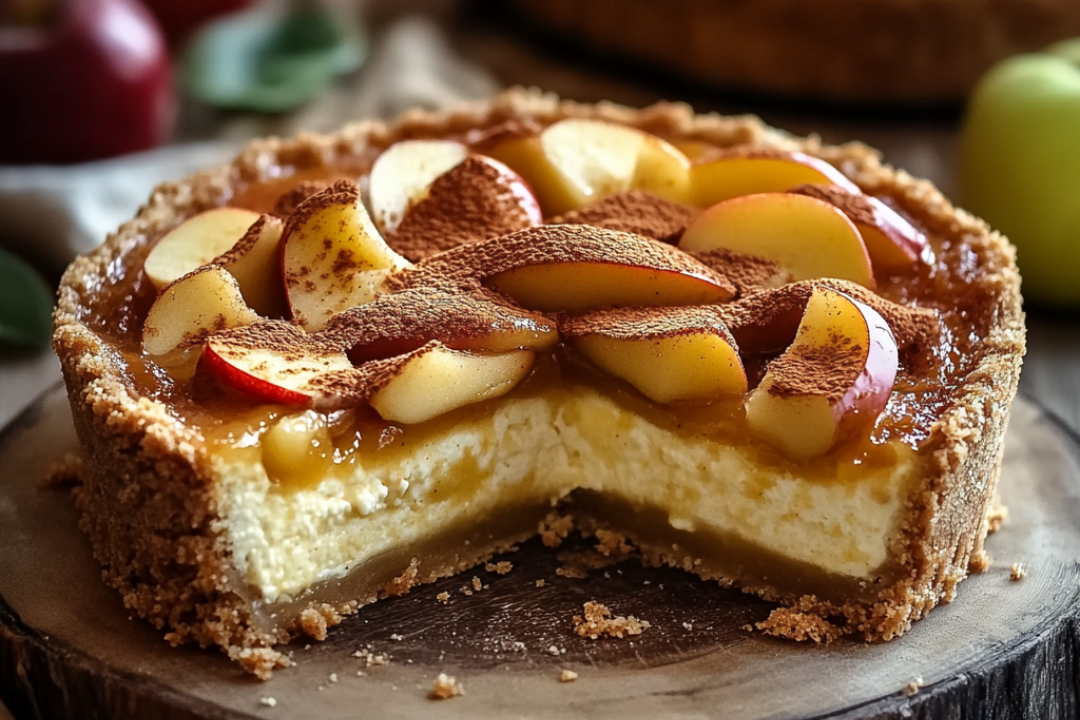
Apple Pie Stuffed Cheesecake
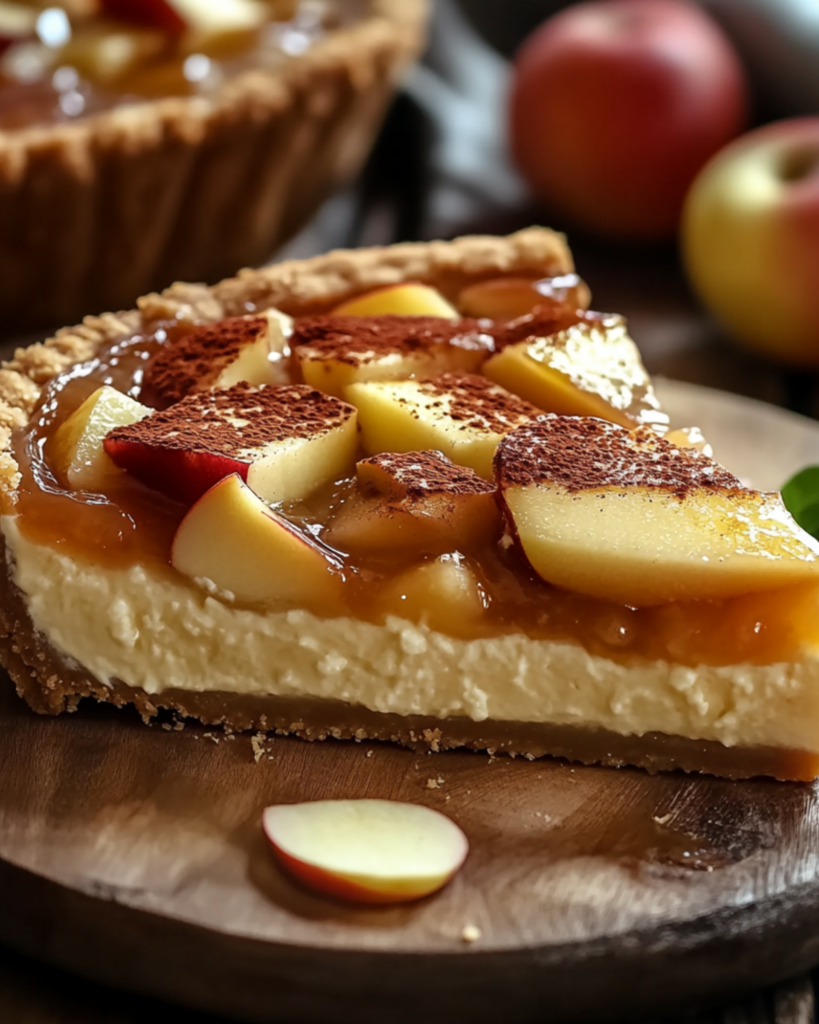
Okay, imagine this: a creamy cheesecake, perfectly sweetened, with layers of spiced apple pie filling tucked inside. You’re getting the best of both worlds—the rich decadence of cheesecake with the cozy warmth of apple pie. Trust me, you’re going to love this! If you’ve been dreaming of the ultimate dessert mash-up that makes every bite feel like a hug from the inside, then this Apple Pie Stuffed Cheesecake is your ticket to dessert heaven. It’s got that perfect balance of tangy cheesecake and sweet apple filling, all topped off with a buttery, cinnamon-sugar crust. What more could you want? Whether you’re serving it for a special occasion or just treating yourself to something extra special, this one is a total game-changer!
Why You’ll Love Apple Pie Stuffed Cheesecake
This isn’t just a dessert, it’s an experience. Whether you’re making it for a dinner party, a family get-together, or just because you deserve something amazing, this cheesecake will be the talk of the table. Here’s why it’s a favorite:
- Versatile: Whether it’s a holiday celebration or a casual weeknight treat, this dessert fits any occasion. It’s fancy enough for a special dinner, but simple enough to enjoy any time.
- Budget-Friendly: No need to splurge on fancy ingredients. With basic pantry items, you’ll create a dessert that tastes like it came from a five-star bakery.
- Quick and Easy: With clear steps and a foolproof method, this cheesecake is surprisingly simple to make—no culinary expertise required!
- Crowd-Pleasing: Everyone loves a good cheesecake, and when you add apple pie into the mix, it’s practically guaranteed to be a hit. Expect plenty of “Can I have the recipe?” questions after the first bite.
Disclosure: This post contains affiliate links.If you click and make a purchase, I may earn a small commission at no extra cost to you.
Ingredients
Here’s what you need to make this delightful treat come together. No surprises here, just some simple ingredients to make magic happen:
Apple Pie Filling: The perfect, spiced, sweet apple filling. Think cinnamon, nutmeg, and tender apples that will melt right into that creamy cheesecake layer.
Cheesecake Filling: A rich and creamy base made with cream cheese, sugar, eggs, and a touch of vanilla. It’s the creamy foundation that makes this dessert so irresistible.
Graham Cracker Crust: The buttery, slightly crunchy base that adds a little texture and a whole lot of flavor. The graham cracker crust will soak up the juices from the apple pie filling, making every bite even better.
Butter: Because everything tastes better with butter, right? It helps bind the crust together and adds richness to the entire dessert.
(Note: The full ingredient measurements are provided in the recipe card directly below.)
Instructions
Let’s dive into the steps to create this flavor-packed masterpiece:
Preheat Your Oven:
Start by preheating your oven to 325°F (165°C). This ensures your cheesecake will bake evenly and get that beautiful golden-brown finish.
Prepare the Apple Pie Filling:
In a saucepan, combine your apple slices, sugar, cinnamon, nutmeg, and a bit of lemon juice. Cook them over medium heat until the apples are tender and the syrup has thickened. Set it aside to cool while you prepare the cheesecake layer.
Make the Graham Cracker Crust:
In a bowl, combine crushed graham crackers, sugar, and melted butter. Press the mixture into the bottom of your springform pan to create a sturdy base for your cheesecake. Bake it for 8-10 minutes until lightly golden. Let it cool while you prepare the cheesecake batter.
Mix the Cheesecake Filling:
In a large mixing bowl, beat the cream cheese until smooth. Add sugar, vanilla, and eggs, mixing until completely combined. Pour this creamy mixture over the cooled graham cracker crust in the springform pan.
Add the Apple Pie Filling:
Once your cheesecake layer is smooth and ready, spoon the apple pie filling over the top. Gently swirl it into the cheesecake to create a beautiful marbled effect.
Bake to Perfection:
Place your cheesecake in the oven and bake for 45-50 minutes, or until the edges are set, but the center still has a slight wobble. Turn off the oven and let it cool for about an hour. After that, place it in the fridge for at least 4 hours (overnight is even better!) to fully set.
Serve and Enjoy:
When you’re ready to serve, remove the cheesecake from the springform pan and cut into slices. Top with a dollop of whipped cream if you’re feeling extra indulgent. Each bite is like a little piece of heaven!
Nutrition Facts
Servings: 1 slice
Calories per serving: 450 kcal
Preparation Time
Prep Time: 25 minutes
Cook Time: 80 minutes
Total Time: 4 hours 30 minutes (including cooling and chilling)
How to Serve Apple Pie Stuffed Cheesecake
This cheesecake is amazing on its own, but here are a few ideas to make your serving even more spectacular:
- Whipped Cream: Top each slice with a dollop of freshly whipped cream for that classic dessert experience.
- Caramel Sauce: Drizzle with warm caramel sauce for an extra indulgent touch.
- Ice Cream: Serve alongside a scoop of vanilla ice cream to take it to the next level.
- Cinnamon Sprinkles: Sprinkle a little extra cinnamon or nutmeg on top to bring out those cozy, autumnal flavors.
Additional Tips
- Make-Ahead: This cheesecake is actually better when made ahead of time! Let it sit in the fridge overnight for the flavors to meld and the texture to firm up.
- Don’t Skip the Cooling: Cooling the cheesecake completely before removing it from the pan is essential to avoid cracking or spilling.
- Freezer-Friendly: Got leftovers? This cheesecake freezes beautifully. Just slice it up and store it in an airtight container for up to a month.
FAQ Section
Q1: Can I use a store-bought pie filling instead of making my own? A1: Absolutely! If you’re short on time, a store-bought apple pie filling will work just fine.
Q2: Can I make this recipe ahead of time? A2: Yes, this cheesecake is perfect for make-ahead. Just chill it in the fridge for at least 4 hours, preferably overnight, before serving.
Q3: How do I store leftovers? A3: Store leftovers in an airtight container in the fridge for up to 3 days. You can also freeze slices for up to a month.
Q4: Can I add other fruits, like pears or peaches? A4: Yes! You can swap in other fruits, but make sure to adjust the cooking time for the filling, as different fruits may soften at different rates.
Q5: Can I make a gluten-free version of this cheesecake? A5: Absolutely! Use gluten-free graham crackers for the crust, and you’re all set.
Q6: How do I prevent my cheesecake from cracking? A6: Make sure to bake the cheesecake in a water bath, or just let it cool gradually in the oven with the door slightly ajar. This will help prevent cracking.
Q7: Can I make this recipe without a springform pan? A7: You can, but a springform pan makes it much easier to remove the cheesecake without damaging it. If you don’t have one, try using a deep-dish pie pan.
Q8: Can I use a different type of crust? A8: Yes, if you don’t have graham crackers, you can use crushed cookies or even an oat-based crust.
Q9: How do I make sure the cheesecake cooks evenly? A9: Be sure to preheat the oven and place the cheesecake in the center. Don’t open the oven door too often while baking, as sudden temperature changes can affect the texture.
Q10: What’s the best way to slice cheesecake? A10: Use a sharp knife dipped in hot water, wiping it off after each slice for a clean cut. This ensures each slice looks as beautiful as it tastes!
Conclusion
This Apple Pie Stuffed Cheesecake is the kind of dessert that makes you feel warm and fuzzy inside with every bite. Whether you’re a cheesecake lover or an apple pie fanatic, this dessert has a little something for everyone. It’s easy to make, super satisfying, and sure to impress. So go ahead, get in the kitchen, and make something that will make you (and everyone around you) smile!
Print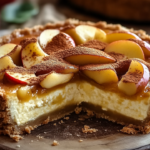
Apple Pie Stuffed Cheesecake
- Prep Time: 25 minutes
- Cook Time: 80 minutes
- Total Time: 4 hours 30 minutes (including cooling and chilling)
- Yield: 12 slices
- Category: Dessert
- Method: Baking
- Cuisine: American
- Diet: Vegetarian
Description
A delicious twist on the classic apple pie, this cheesecake features a creamy filling topped with a warm, spiced apple pie filling and a buttery graham cracker crust. Perfect for fall, family gatherings, or any special occasion!
Ingredients
- For the Crust:
- 1 1/2 cups graham cracker crumbs
- 1/4 cup granulated sugar
- 1/2 cup unsalted butter, melted
- For the Apple Pie Filling:
- 3 large apples (Granny Smith or Honeycrisp), peeled and sliced
- 1/4 cup granulated sugar
- 1/4 cup brown sugar
- 1 tsp cinnamon
- 1/4 tsp nutmeg
- 1 tbsp cornstarch
- 1 tbsp lemon juice
- 1/4 cup water
- For the Cheesecake Filling:
- 32 oz cream cheese, softened
- 1 1/4 cups granulated sugar
- 3 large eggs
- 1 tsp vanilla extract
- 1/2 cup sour cream
- 1/2 tsp cinnamon (optional, for swirling)
Instructions
- Prepare the Crust:
- Preheat your oven to 350°F (175°C). Grease a 9-inch springform pan and line the bottom with parchment paper.
- In a bowl, mix graham cracker crumbs, sugar, and melted butter until combined. Press the mixture into the bottom of the pan. Bake for 8-10 minutes and let it cool.
- Prepare the Apple Pie Filling:
- In a saucepan, combine apples, sugars, cinnamon, nutmeg, cornstarch, lemon juice, and water. Cook over medium heat for 8-10 minutes until softened and thickened. Let it cool.
- Prepare the Cheesecake Filling:
- Beat the softened cream cheese and sugar until smooth. Add eggs one at a time, mixing well after each addition. Stir in vanilla and sour cream.
- (Optional) Mix 1/2 teaspoon of cinnamon into the batter for a swirl effect.
- Assemble the Cheesecake:
- Pour half of the cheesecake batter over the crust. Spoon half of the apple pie filling on top.
- Add the remaining cheesecake batter, then spoon the rest of the apple pie filling on top. Swirl with a knife if desired.
- Bake:
- Wrap the bottom of the springform pan with aluminum foil to prevent leaks. Place the cheesecake in a roasting pan and add hot water halfway up the sides. Bake for 60-70 minutes or until the center is slightly jiggly.
- Turn off the oven and leave the cheesecake for 1 hour. Cool to room temperature, then refrigerate for at least 4 hours or overnight.
- Serve:
- Slice and enjoy!
Notes
- Be sure to allow the cheesecake to cool in the oven to avoid cracks.
- This cheesecake pairs wonderfully with a dollop of whipped cream.
Nutrition
- Serving Size: 1 slice
- Calories: 450 kcal
- Sugar: 32g
- Sodium: 350mg
- Fat: 30g
- Saturated Fat: 14g
- Unsaturated Fat: 13g
- Trans Fat: 0g
- Carbohydrates: 46g
- Fiber: 1g
- Protein: 6g
- Cholesterol: 95mg

