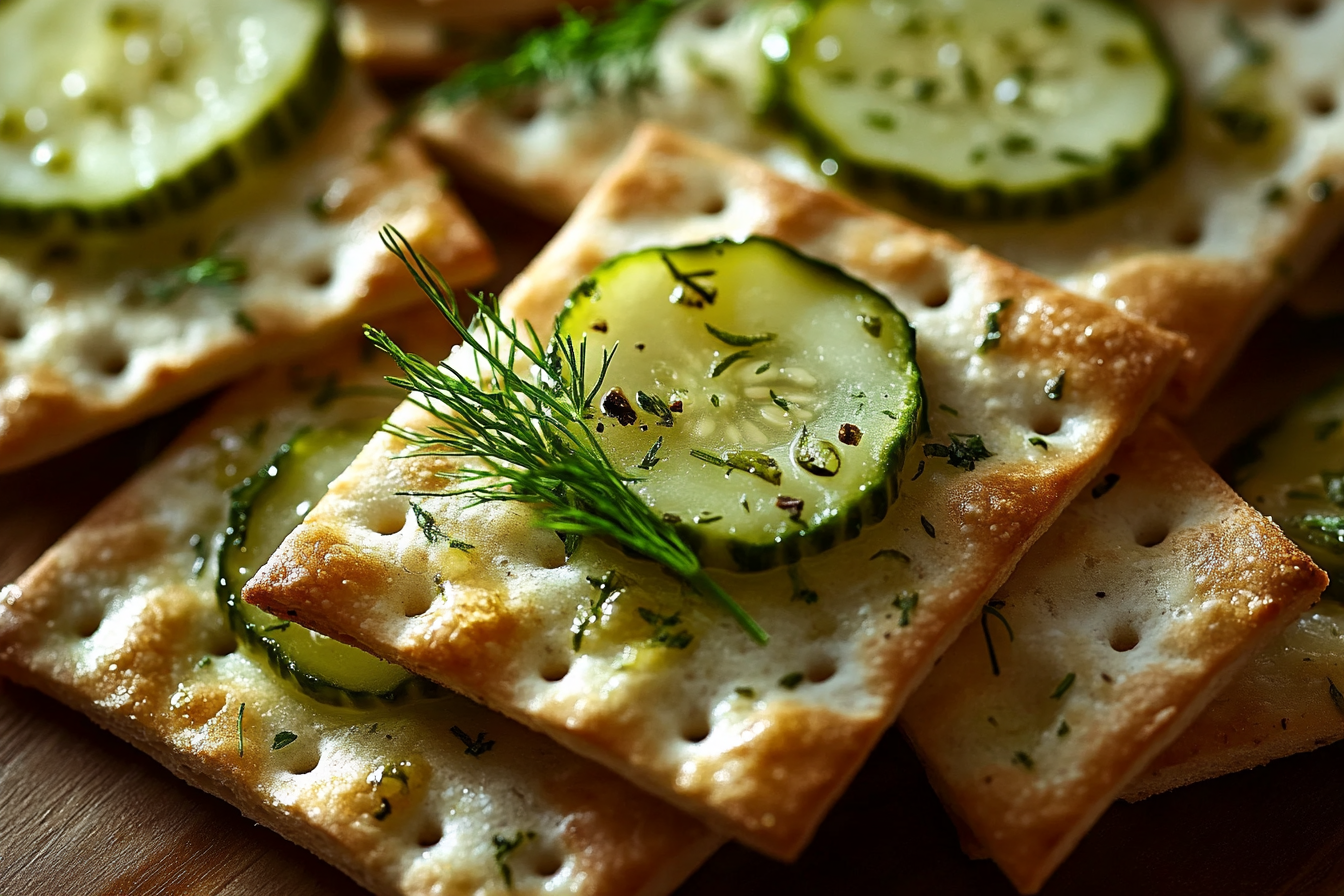
Dill Pickle Saltines Recipe That Elevates Snack Time
If you’re craving a snack that combines crunch, tang, and a bit of salty goodness, Dill Pickle Saltines are about to become your new favorite treat. This simple yet delicious recipe turns everyday saltine crackers into a zesty snack that’s packed with flavor and easy to whip up in minutes. Whether you’re hosting a casual get-together or just looking for a quick nibble to keep your taste buds happy, Dill Pickle Saltines deliver a satisfying bite that keeps you coming back for more.
Why You’ll Love This Recipe
- Quick and Easy: Ready in under 10 minutes, perfect when you need a fast snack.
- Bold Flavor: Combines the tang of pickles with a salty crunch that’s addictively good.
- Minimal Ingredients: Uses common pantry staples you likely already have on hand.
- Versatile Snack: Great for parties, game days, or afternoon cravings.
- Kid-Friendly: Fun and tasty enough to please even picky eaters.
Ingredients You’ll Need
The beauty of Dill Pickle Saltines lies in the simplicity of the ingredients. Each component adds a crucial layer to the snack’s irresistible flavor profile—from salty and crispy to tangy and a little bit spicy.
- Saltine Crackers: Choose fresh, crispy saltines for the best crunch and base for flavor.
- Dill Pickle Juice: The star ingredient that provides that distinct tangy, salty pickle flavor.
- Butter or Margarine: Adds richness and helps the seasoning stick to the crackers.
- Dill Weed or Fresh Dill: Brings a fresh herbal note that complements the pickle flavor.
- Garlic Powder: Adds depth and a subtle kick.
- Onion Powder: Enhances the savory profile and balances the tanginess.
- Salt: Use sparingly based on your preference and the saltiness of your crackers and pickle juice.
- Black Pepper (optional): Provides a mild heat that can be adjusted to taste.
Variations for Dill Pickle Saltines
Feel free to tailor Dill Pickle Saltines to suit your taste or dietary needs. This recipe is flexible and invites creativity, so don’t hesitate to experiment with flavors and add-ins.
- Spicy Kick: Add a pinch of cayenne or crushed red pepper flakes for heat.
- Vegan Version: Use vegan butter and ensure your saltines are dairy-free to keep it plant-based.
- Cheesy Twist: Sprinkle grated Parmesan or cheddar before baking for a cheesy layer.
- Herb Mix: Swap dill for fresh chives or parsley for a different herbal depth.
- Lemon Zest: Add lemon zest for a bright, citrusy lift that complements the pickle juice.
How to Make Dill Pickle Saltines
Step 1: Preheat and Prepare
Preheat your oven to 250°F (120°C). Line a baking sheet with parchment paper or foil for easy cleanup, and spread the saltine crackers out in a single layer.
Step 2: Melt Butter and Mix Seasonings
In a small saucepan or microwave-safe bowl, melt thebutter. Stir in dill pickle juice, garlic powder, onion powder, dill weed, and black pepper until well combined. The pickle juice infuses the butter with that signature tangy flavor.
Step 3: Coat the Crackers
Drizzle the butter and seasoning mixture evenly over the crackers. Use a spatula or spoon to gently toss and coat the crackers thoroughly but carefully to prevent breaking.
Step 4: Bake to Crisp
Bake the coated saltines for 15 to 20 minutes, stirring occasionally to ensure every cracker is evenly toasted and infused with flavor. The low temperature helps the crackers absorb the seasoning without burning.
Step 5: Cool and Serve
Remove from the oven and let the crackers cool completely on the baking sheet. This step enhances their crispness and allows the flavors to settle. Once cooled, your Dill Pickle Saltines are ready to enjoy!
Pro Tips for Making Dill Pickle Saltines
- Use Quality Pickle Juice: Fresh, refrigerated pickle juice from a good brand makes a huge flavor difference.
- Even Coating: Toss the crackers gently to ensure every piece gets coated without breaking.
- Low and Slow Baking: Keep the oven temperature low to avoid burning and ensure the flavors soak in well.
- Customize Seasonings: Adjust garlic, onion, and dill amounts according to your taste for a personalized snack.
- Store Properly: Keep the finished crackers in an airtight container to maintain crispness.
How to Serve Dill Pickle Saltines
Garnishes
Sprinkle freshly chopped dill or a light dusting of paprika over the top before serving for a burst of color and extra aroma that complements the dill pickle flavor.
Side Dishes
Pair these crackers with creamy ranch dip, sour cream, or even a sharp cheese spread to balance the tangy and salty notes perfectly during snack time or gatherings.
Creative Ways to Present
Serve Dill Pickle Saltines in a rustic wooden bowl or a vintage mason jar for a charming, casual look when entertaining guests or simply enjoying at home.
Make Ahead and Storage
Storing Leftovers
Store leftover Dill Pickle Saltines in an airtight container at room temperature for up to 3 days to keep them crunchy and fresh.
Freezing
For longer storage, freeze the crackers in a sealed freezer bag for up to a month; thaw at room temperature before enjoying to regain crispness.
Reheating
If your crackers lose some crunch, reheat briefly in a 250°F oven for 5–7 minutes to revive that signature crisp texture.
FAQs
Can I use other types of crackers instead of saltines?
Absolutely! While saltines offer the perfect neutral base and crisp texture, you can experiment with other crackers like water crackers or Ritz for a different twist.
Is this recipe gluten-free?
Traditional saltines contain gluten, but you can use gluten-free crackers to make this snack gluten-friendly while enjoying the same dill pickle flavor.
How much dill pickle juice should I use?
Typically, about 2 to 3 tablespoons of dill pickle juice mixed into the butter works well, but feel free to adjust for your preferred tanginess.
Can I make Dill Pickle Saltines without butter?
Yes! You can substitute butter with olive oil or another oil of your choice to keep it dairy-free while still coating the crackers effectively.
Do I need to refrigerate the finished snack?
No refrigeration is necessary. Keeping Dill Pickle Saltines in an airtight container at room temperature is best to maintain their crunch and flavor.
Final Thoughts
Dill Pickle Saltines are one of those simple pleasures that brighten any snack time with a burst of bold, tangy flavor and satisfying crunch. They’re easy to make, customizable, and sure to please a crowd, whether you’re relaxing solo or sharing with friends. Give this recipe a try and watch your usual salty snack take on a whole new level of deliciousness!
Related Posts
- Garlic Butter Beef Bites With Creamy Mashed Potatoes Delight
- Garlic Chili Roasted Okra Fires Up Your Veggie Game
- Keto Chicken Bacon Ranch Casserole for Low-Carb Comfort
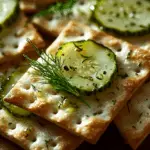
Dill Pickle Saltines
- Prep Time: 5 minutes
- Cook Time: 15-20 minutes
- Total Time: 20-25 minutes
- Yield: Approximately 4 cups of seasoned crackers 1x
- Category: Appetizers
- Method: Baking
- Cuisine: American
- Diet: Vegetarian (can be vegan with substitutions)
Description
Dill Pickle Saltines are a quick and easy snack that transforms crispy saltine crackers into a flavorful, tangy, and salty treat. Infused with dill pickle juice and a blend of savory seasonings, these crackers are perfect for snacking, parties, game days, or anytime you crave a bold, crunchy bite.
Ingredients
Main Ingredients
- approximately 45–50 Saltine Crackers (1 sleeve)
- 3 tablespoons Butter or Margarine
- 2 to 3 tablespoons Dill Pickle Juice
- 1 teaspoon Dill Weed or 1 tablespoon Fresh Dill, finely chopped
- 1/2 teaspoon Garlic Powder
- 1/2 teaspoon Onion Powder
- Salt to taste (start with 1/4 teaspoon)
- Black Pepper, freshly ground, to taste (optional, about 1/8 teaspoon)
Instructions
- Preheat and Prepare: Preheat your oven to 250°F (120°C). Line a baking sheet with parchment paper or foil for easy cleanup, then spread the saltine crackers out in a single layer.
- Melt Butter and Mix Seasonings: In a small saucepan or microwave-safe bowl, melt the butter. Stir in the dill pickle juice, garlic powder, onion powder, dill weed, and black pepper until well combined. This mixture infuses the butter with tangy, savory flavors.
- Coat the Crackers: Drizzle the butter and seasoning mixture evenly over the crackers. Use a spatula or spoon to gently toss and coat the crackers thoroughly but carefully to prevent breaking.
- Bake to Crisp: Bake the coated saltines for 15 to 20 minutes, stirring occasionally to ensure even toasting and flavor absorption. The low temperature allows the crackers to soak in the seasoning without burning.
- Cool and Serve: Remove from the oven and let the crackers cool completely on the baking sheet. Cooling enhances their crispness and allows the flavors to settle. Once cooled, enjoy your Dill Pickle Saltines!
Notes
- Use quality, fresh refrigerated pickle juice for the best tangy flavor.
- Toss the crackers gently to coat evenly without breaking them.
- Bake at a low temperature to avoid burning and ensure full flavor absorption.
- Adjust garlic, onion, and dill amounts to taste for a personalized flavor.
- Store finished crackers in an airtight container at room temperature to maintain crispness up to 3 days.
- Freeze leftovers in a sealed bag for up to one month; thaw before serving.
- Reheat crackers briefly in a 250°F oven for 5–7 minutes if they lose crispness.
Nutrition
- Serving Size: 1/2 cup (approx. 15 crackers)
- Calories: 120
- Sugar: 0.5 g
- Sodium: 350 mg
- Fat: 7 g
- Saturated Fat: 4 g
- Unsaturated Fat: 2.5 g
- Trans Fat: 0 g
- Carbohydrates: 12 g
- Fiber: 0.3 g
- Protein: 1.5 g
- Cholesterol: 20 mg

