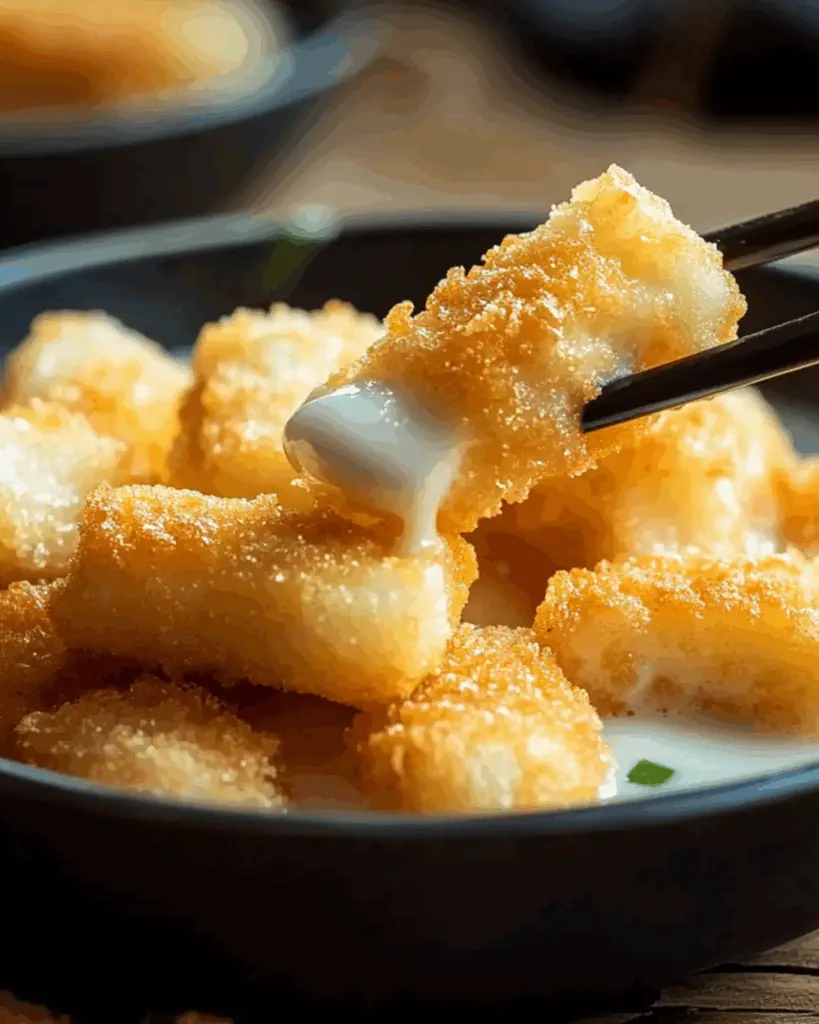
Milky Crunch Bites: Irresistibly Crispy Chinese Fried Milk
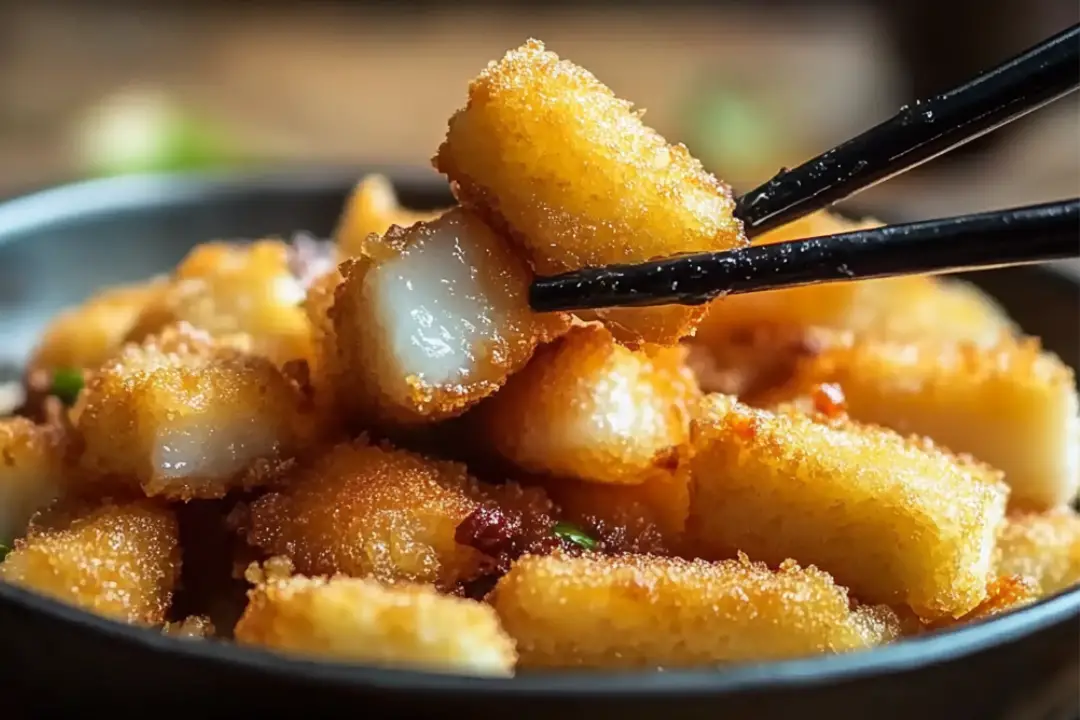
Imagine biting into a golden, crispy exterior only to be met with a creamy, velvety center that melts in your mouth—that, my friend, is the magic of these Milky Crunch Bites. They’re sweet, silky, and satisfyingly crunchy, a little like if milk pudding and churros had a delicious baby. Whether you’re serving them up for a cozy night in, impressing guests with a platter of bite-sized delights, or just craving something that feels both nostalgic and new, this one’s a game-changer. Trust me, you’re going to love this.
And don’t let the idea of frying scare you off—this recipe is simple, fun, and beginner-friendly. It’s like making pudding sticks, dipping them in crunchy magic, and frying until golden perfection. Let’s get you hooked on a dessert that’s light, crisp, and outrageously good.
Why You’ll Love Milky Crunch Bites
This recipe isn’t just about the ingredients—it’s about creating moments. Whether you’re cooking for a casual family dinner, hosting a get-together with friends, or simply indulging in some comforting flavors for yourself, this dish is versatile enough to fit the occasion. Here’s why it’s a favorite:
Versatile: Serve them hot for dessert, snack on them cold, or even plate them with ice cream for a fancy finish. These bites are crowd-friendly and occasion-flexible.
Budget-Friendly: Made with everyday staples—milk, flour, and a little sugar magic. No need to run out for fancy ingredients.
Quick and Easy: No complicated steps, no deep-frying expertise needed. Just cook, chill, coat, and fry.
Customizable: Want to flavor the milk base with vanilla, cinnamon, or even matcha? Go wild.
Crowd-Pleasing: Kids, adults, even the picky eaters—they all fall in love at first bite.
Disclosure: This post contains affiliate links.If you click and make a purchase, I may earn a small commission at no extra cost to you.
Ingredients in Milky Crunch Bites
Here’s the magic of this dessert—it’s creamy on the inside, crisp on the outside, and made from ingredients you probably already have. Let’s break it down:
Whole Milk
The creamy base of the dessert. Using whole milk gives it a rich texture and flavor, though you could experiment with coconut milk for a fun twist.
Cornstarch
This is what thickens the milk into a custard-like texture. It sets firm but stays smooth once chilled.
Granulated Sugar
Sweetens the base just enough to bring out that classic pudding-like taste.
All-Purpose Flour
Used to coat the chilled milk cubes before frying. Helps lock in the creamy interior.
Eggs
Acts as the glue to hold the coating together. Dipping in beaten egg ensures your breadcrumb layer sticks.
Panko Breadcrumbs
The key to that signature crunch. Panko stays light and airy even after frying.
Oil for Frying
Use a neutral oil with a high smoke point—canola or vegetable oil both work great.
Optional: Vanilla Extract or Cinnamon
Adds warm, aromatic depth to the milk base. Just a touch makes a big difference.
Instructions
Let’s dive into the steps to create this flavorful masterpiece:
Prepare the Milk Mixture
In a saucepan over medium heat, whisk together milk, sugar, and cornstarch. Stir constantly until the mixture thickens to a smooth, pudding-like consistency. You’ll know it’s ready when it holds shape and pulls slightly from the pan.
Flavor and Pour
Once thickened, stir in your vanilla or cinnamon (if using). Immediately pour the mixture into a parchment-lined square dish and smooth it out evenly. Cover and refrigerate for at least 2–3 hours, or until completely firm.
Cut and Prep
Once chilled and set, lift the milk block out of the dish and cut it into bite-sized squares. These little cubes are about to become fried bites of heaven.
Coat for Frying
Set up a breading station with flour, beaten eggs, and panko. Dip each cube first in flour, then egg, then breadcrumbs. Press gently so the panko adheres well on all sides.
Heat the Oil
In a deep pan or skillet, heat your oil over medium-high heat until shimmering. You can test it by dropping in a breadcrumb—it should sizzle immediately.
Fry Until Golden
Carefully lower the coated milk cubes into the oil. Fry in batches, turning occasionally, until golden brown and crispy on all sides. This should take about 2–3 minutes per batch.
Drain and Serve
Use a slotted spoon to transfer the fried milk to a paper towel-lined plate. Let them cool slightly before serving—they’re best warm, with a dusting of powdered sugar or a drizzle of honey if you like extra flair.
How to Serve Milky Crunch Bites
These crispy bites are divine straight from the fryer, but you can elevate them even more with these fun pairings:
With Sweet Dips: Serve alongside condensed milk, honey, or a creamy vanilla sauce for dipping.
Next to Ice Cream: The hot-and-cold contrast is next-level—try pairing with a scoop of vanilla or matcha ice cream.
As a Party Dessert: Skewer a few on toothpicks and serve on a platter for a playful party treat.
Topped with Cinnamon Sugar: A simple sprinkle of cinnamon sugar post-fry adds bakery-level flavor.
With Coffee or Tea: They make a delightful afternoon snack with your favorite hot beverage.
Additional Tips
Chill Thoroughly: Don’t rush the chilling process or your milk won’t set firmly enough to fry.
Oil Temperature Matters: Too hot and the coating will burn before the inside heats through; too cold and they’ll get greasy. Aim for around 350°F.
Double Coating Trick: For ultra-crispy bites, do a second layer of egg and panko.
Storage: Best enjoyed fresh, but you can store leftovers in the fridge and reheat in the air fryer for crunch.
Make-Ahead: You can prepare and coat the cubes in advance—just fry them right before serving.
FAQ Section
Q1: Can I use plant-based milk?
A1: Yes! Oat milk or coconut milk works well, though the flavor and texture may vary slightly.
Q2: Can I make this ahead of time?
A2: You can chill and coat the cubes ahead of time. Fry them fresh for best results.
Q3: How do I store leftovers?
A3: Store in an airtight container in the fridge for up to 2 days. Reheat in the oven or air fryer.
Q4: Can I freeze the milk cubes?
A4: You can freeze them before frying. Let them thaw slightly, then fry from semi-frozen.
Q5: What oil should I use for frying?
A5: Neutral oils like canola, vegetable, or peanut oil are perfect due to their high smoke points.
Q6: Is this recipe kid-friendly?
A6: Absolutely! Kids love the crispy texture and creamy filling—just make sure they cool down before serving.
Q7: Can I make them sweet and savory?
A7: Yes! Try skipping the sugar and adding cheese or herbs for a savory twist.
Q8: How do I keep them crispy longer?
A8: Place fried bites on a wire rack instead of a plate while they cool to maintain crunch.
Q9: What should I do if my milk mixture doesn’t thicken?
A9: Keep stirring and make sure you’re using the right cornstarch ratio—it needs time to activate fully.
Q10: What’s the best pan to use for frying?
A10: A heavy-bottomed skillet or deep saucepan works best to hold steady heat.
Conclusion
And there you have it—your ticket to golden, melt-in-your-mouth Crispy Chinese Fried Milk that’ll have everyone asking, “Wait… how did you make this?!” It’s the perfect balance of creamy, crunchy, and just the right hint of sweetness. Whether you’re serving it up as a fun dessert twist, impressing guests at a dinner party, or simply treating yourself to something extra special (because, yes, you deserve it!), this dish is bound to become a new favorite.
Trust me, once you try that first bite—crispy on the outside, silky and milky on the inside—you’ll be hooked. So go ahead, give it a whirl. Fry up a batch, pour some tea, and enjoy every warm, comforting bite. This one’s a game-changer!
Print
Milky Crunch Bites: Irresistibly Crispy Chinese Fried Milk
- Prep Time: 20 minutes
- Cook Time: 15 minutes
- Total Time: 4 hours 35 minutes
- Yield: 16–20 pieces 1x
- Category: Dessert
- Method: Frying
- Cuisine: Chinese
- Diet: Vegetarian
Description
Crispy on the outside, soft and custardy on the inside—this Crispy Chinese Fried Milk is a dreamy dessert that feels like biting into a cloud. It’s creamy, sweet, and golden-fried to perfection, making it an unforgettable treat. Trust me, once you try it, you’ll crave it again and again! #FriedMilkMagic #ChineseDesserts #CrispyOnTheOutsideCreamyOnTheInside
Ingredients
Fried Milk
- 500 ml 2% or whole milk
- 60 ml condensed milk
- 120 ml evaporated milk
- 1 tsp vanilla extract
- 45 g white sugar
- ¼ tsp table salt
- 25 g unsalted butter
- 75 g cornstarch
Breading
- 100 g panko bread crumbs
- 60 g cornstarch
- 1½ large eggs
Instructions
- In a saucepan over medium-low heat, combine the milk, condensed milk, evaporated milk, vanilla extract, sugar, salt, and butter. Stir gently until the butter melts and the mixture is warmed through.
- Gradually whisk in the cornstarch to avoid lumps. Increase heat to medium and cook, stirring constantly, until the mixture thickens to a pudding-like consistency.
- Pour the thickened mixture into a greased or parchment-lined shallow dish. Smooth the top and refrigerate for at least 4 hours or until completely firm.
- Once chilled and firm, cut the set milk mixture into squares or rectangles using a sharp knife.
- Set up a breading station with three bowls: one with cornstarch, one with beaten eggs, and one with panko bread crumbs.
- Carefully coat each milk square first in cornstarch, then dip into beaten eggs, and finally press into panko breadcrumbs to coat thoroughly.
- Heat oil in a deep fryer or deep saucepan to 350°F (175°C). Fry the coated milk pieces in batches until golden brown and crispy, about 2–3 minutes per batch.
- Use a slotted spoon to remove the fried milk pieces and place them on paper towels to drain excess oil.
- Serve immediately while hot and crispy for the best texture and flavor.
Notes
- Use a nonstick saucepan to prevent sticking when thickening the milk mixture.
- For a sweeter version, dust with powdered sugar or drizzle with honey after frying.
- Make sure the milk custard is fully chilled and firm before slicing—it helps with easier breading and frying.
- Use a thermometer to maintain the oil temperature for even frying.
- Serve as a unique dessert or a fun snack for gatherings!
Nutrition
- Serving Size: 1 piece
- Calories: 110
- Sugar: 6g
- Sodium: 55mg
- Fat: 5g
- Saturated Fat: 2.5g
- Unsaturated Fat: 1.5g
- Trans Fat: 0g
- Carbohydrates: 13g
- Fiber: 0.5g
- Protein: 2g
- Cholesterol: 20mg

