Frosty Dream Loaf: A Vintage Ice Cream Bread Adventure
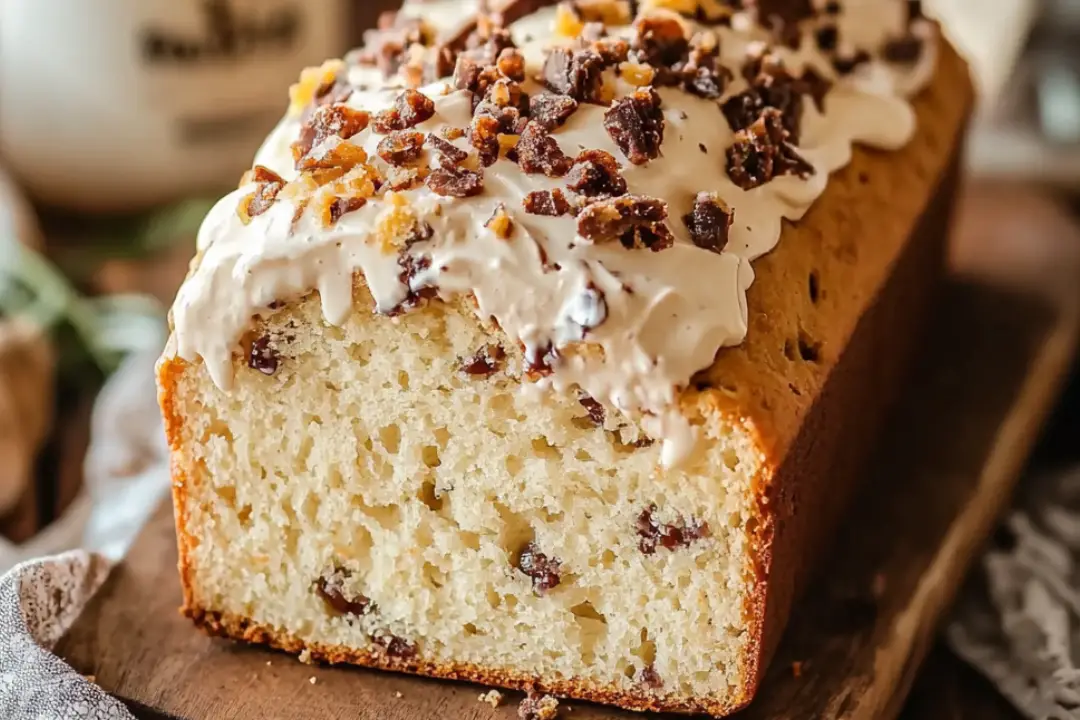
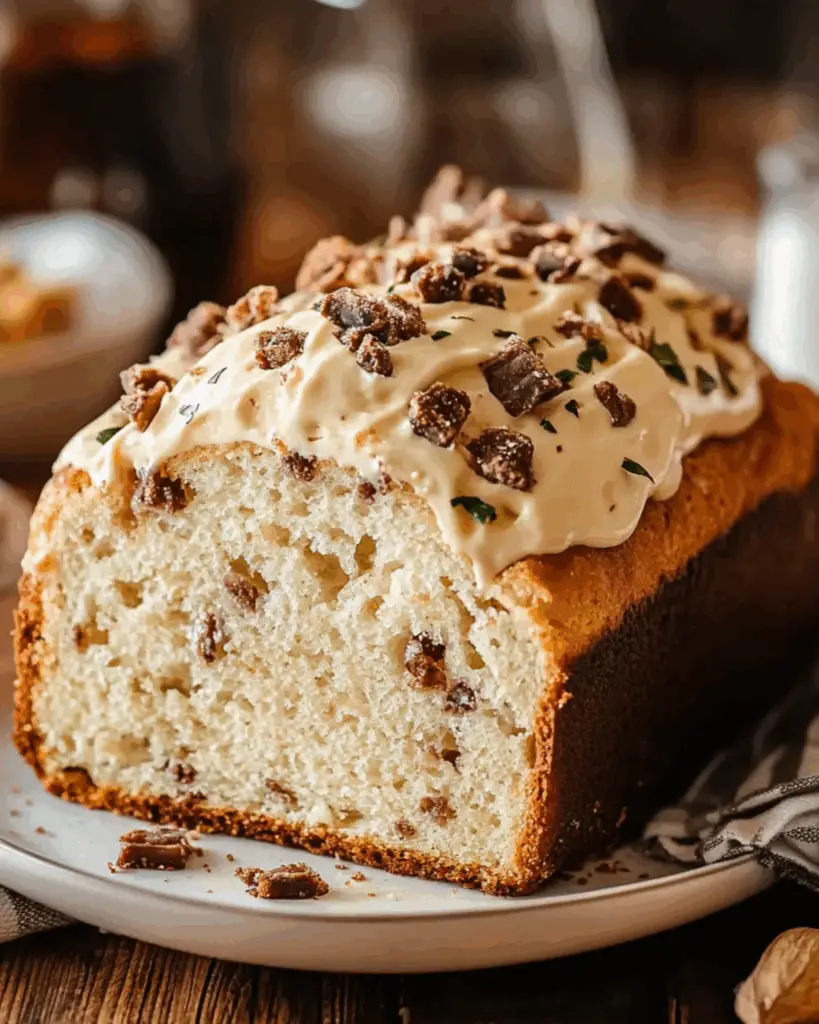
Hey friend! Have you ever thought about turning your favorite ice cream into a cozy, soft bread? Sounds wild, right? But trust me, this Vintage Ice Cream Bread is an absolute game-changer. Imagine biting into a pillowy loaf that carries the creamy, sweet flavors of ice cream, wrapped up in a golden crust — it’s like dessert and comfort food had a delicious baby. The best part? It’s super easy to make, using just a few simple ingredients you probably already have hanging out in your freezer and pantry. Whether you’re after a fun new baking adventure or just want a nostalgic treat that’ll have your whole crew asking for seconds, this recipe is calling your name. Ready to make your kitchen smell like a sweet cream dream? Let’s get baking!
Why You’ll Love Frosty Dream Loaf
This recipe isn’t just about ingredients — it’s about sparking joy and making memories with every slice. Whether it’s a quick breakfast, a snack to share, or a surprising dessert, this bread fits the bill perfectly:
Versatile: Perfect for breakfast toast, afternoon pick-me-ups, or even alongside your favorite coffee or tea. Plus, it’s great for a last-minute crowd-pleaser.
Budget-Friendly: Uses simple ingredients, mostly ice cream and pantry staples — no fancy shopping needed!
Quick and Easy: Few steps, no fuss. If you’re a newbie baker or just want a fun project, this is for you.
Customizable: Use any ice cream flavor you like to make it your own — chocolate, strawberry, vanilla swirl, the options are endless!
Crowd-Pleasing: Sweet, soft, and utterly irresistible. Kids, adults, and picky eaters alike will be hooked.
Disclosure: This post contains affiliate links.If you click and make a purchase, I may earn a small commission at no extra cost to you.
Ingredients in Frosty Dream Loaf
Here’s the simple magic behind this bread. It’s all about balance — creamy, sweet, and just the right texture:
Ice Cream: The star of the show! Pick your favorite flavor — it melts into the batter, adding both sweetness and moisture. Think of it as the secret sauce for this bread’s softness and flavor.
Self-Rising Flour: This helps the bread rise without extra yeast, keeping the process super quick and easy. It also gives the loaf a tender crumb.
Optional Mix-ins: Nuts, chocolate chips, or dried fruit are great to jazz things up and add little bursts of texture.
(Note: The full ingredients list, including measurements, is provided in the recipe card directly below.)
Instructions
Let’s dive into the steps to create this nostalgic treat:
Preheat Your Oven
Preheat your oven to 350°F (175°C). Getting the oven ready early means your bread will bake evenly and get that perfect golden crust.
Mix the Ice Cream and Flour
In a large mixing bowl, scoop your softened ice cream and add the self-rising flour. Stir gently until just combined. Be careful not to overmix — you want the batter to be light and fluffy, not dense.
Add Optional Mix-ins
If you’re feeling fancy, fold in your choice of nuts, chocolate chips, or dried fruit now. These little surprises take the bread to the next level.
Prepare Your Baking Pan
Grease a loaf pan or line it with parchment paper to make sure your bread comes out easily without sticking.
Pour and Bake
Pour the batter into the prepared pan and smooth the top. Pop it into the oven and bake for about 45-50 minutes, or until a toothpick inserted comes out clean.
Cool and Slice
Let the bread cool in the pan for 10 minutes before transferring it to a wire rack. This helps it set and makes slicing easier.
Serve and Enjoy
Slice up your Frosty Dream Loaf and serve it warm or at room temperature. Spread a little butter or cream cheese if you like, or enjoy it just as it is — pure, dreamy deliciousness.
How to Serve Frosty Dream Loaf
This bread is a dream paired with:
- Fresh berries or a fruit compote to brighten the sweetness
- A spread of creamy butter or tangy cream cheese for contrast
- A warm cup of coffee, chai, or cocoa to cozy up your day
- Simply on its own, because sometimes simple is perfect
Additional Tips
- Prep Ahead: Measure your flour and soften the ice cream in advance to save time.
- Flavor Swaps: Try swapping the ice cream flavor to match seasons — peppermint in winter, peach in summer!
- Storage: Keep leftovers wrapped tightly at room temperature for a day or two, or freeze slices individually for later.
- Double the Fun: This recipe doubles easily if you want to share the joy or save some for later.
FAQ Section
Q1: Can I use any flavor of ice cream?
A1: Absolutely! Feel free to experiment — chocolate, vanilla, strawberry, or even coffee flavors all work beautifully.
Q2: Do I need to use self-rising flour?
A2: It helps the bread rise without yeast. If you don’t have it, you can mix all-purpose flour with baking powder and salt as a substitute.
Q3: Can I add mix-ins like nuts or chocolate chips?
A3: Definitely! They add fun textures and extra flavor — just fold them in gently.
Q4: How do I know when the bread is done?
A4: A toothpick inserted in the center should come out clean or with just a few crumbs attached.
Q5: Can I make this gluten-free?
A5: Yes! Use a gluten-free self-rising flour blend and it should work well.
Q6: How long does the bread keep?
A6: Store it wrapped at room temperature for up to 2 days or freeze for longer storage.
Q7: Can I bake this in a different shape or pan?
A7: Sure! Muffin tins or mini loaf pans work great, just adjust the baking time accordingly.
Q8: Can I use homemade ice cream?
A8: Yes, homemade or store-bought both work perfectly.
Q9: Is this bread sweet?
A9: It has a subtle sweetness from the ice cream — perfect for those who want a gentle dessert-like bread.
Q10: Can kids help make this?
A10: Totally! It’s a fun and easy recipe that’s great for baking with little hands.
Conclusion
So there you have it — Frosty Dream Loaf, your new favorite vintage-inspired ice cream bread that’s sure to bring smiles and sweet memories. It’s easy, delicious, and endlessly adaptable, making it a winner every time. Trust me, you’re going to love how simple ingredients turn into such a delightful treat. Ready to wow your taste buds and impress your friends? Let’s get that oven warmed up and make some magic happen!
Print
Frosty Dream Loaf: A Vintage Ice Cream Bread Adventure
- Prep Time: 10 minutes
- Cook Time: 40 minutes
- Total Time: 50 minutes
- Yield: 8 slices 1x
- Category: Bread
- Method: Baking
- Cuisine: American
- Diet: Vegetarian
Description
A nostalgic, easy-to-make ice cream bread using creamy Nutter Butter ice cream and a hint of peanut butter, perfect for a quick and delicious treat.
Ingredients
- 2 cups Nutter Butter ice cream (or any ice cream)
- ½ to 1 cup all-purpose flour (start with ½ cup, add more as needed)
- 1½ teaspoons baking powder
- 1 teaspoon butter or oil (for greasing the loaf pan)
- 1 Nutter Butter bar, crushed (optional)
- 4 tablespoons peanut butter, melted (optional)
Instructions
- Preheat oven to 350°F (175°C). Grease a loaf pan with butter or oil.
- In a mixing bowl, combine ice cream, flour, and baking powder. Stir until just combined, adding more flour if batter is too wet.
- Fold in crushed Nutter Butter bar and melted peanut butter if using.
- Pour batter into the prepared loaf pan.
- Bake for 35–45 minutes, or until a toothpick inserted in the center comes out clean.
- Let cool before slicing and serving.
Notes
- Start with ½ cup flour and add more if batter is too runny.
- Optional crushed Nutter Butter bar adds extra texture and flavor.
- Melted peanut butter enhances the peanut flavor but can be omitted.
- Allow bread to cool fully before slicing for best results.
- Store leftovers wrapped at room temperature for up to 2 days.
Nutrition
- Serving Size: 1 slice
- Calories: 220
- Sugar: 15g
- Sodium: 150mg
- Fat: 10g
- Saturated Fat: 5g
- Unsaturated Fat: 4g
- Trans Fat: 0g
- Carbohydrates: 28g
- Fiber: 1g
- Protein: 4g
- Cholesterol: 30mg

