Toasted Olive Bliss Melts: A Gooey, Briny, Cheesy Dream You’ll Crave Again and Again
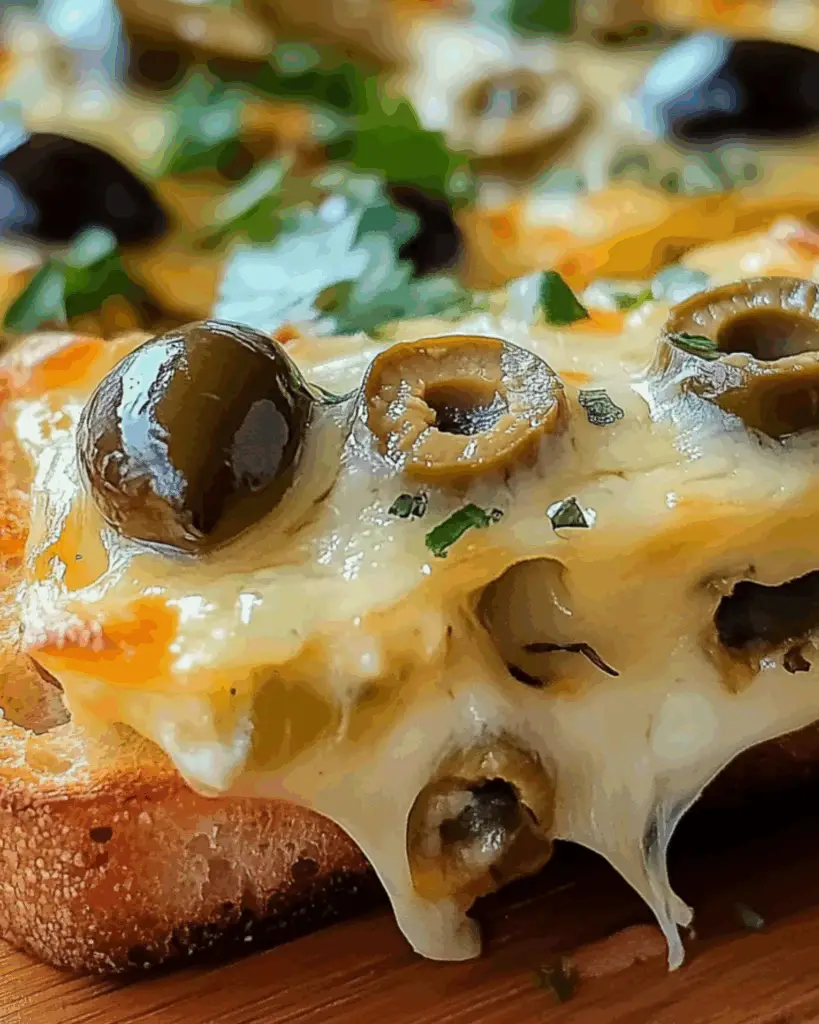
Okay, friend—let me introduce you to a serious snack-time showstopper: Toasted Olive Bliss Melts. If you’re a fan of cheese (and who isn’t?), love that salty, briny bite of olives, and can’t resist anything warm and golden from the oven or skillet, you’re about to fall hard for this one.
These little beauties are everything you want in a quick comfort dish: crispy, melty, cheesy perfection with a bold, savory punch from green and black olives. There’s a tangy sharpness from the cheese, a buttery crunch from the toasted bread, and a rich, creamy base that pulls it all together. It’s the kind of thing you serve at a party and end up scribbling the recipe on napkins because everyone’s asking for it—or you whip up on a cozy night in when you’re craving something indulgent but fuss-free.
Trust me, you’re going to love this.
Why You’ll Love Toasted Olive Bliss Melts
Versatile
Great as an appetizer, a side dish, or a light meal. You can serve them at brunch, bring them to a potluck, or throw them together for a Netflix-and-snack night.
Budget-Friendly
Uses simple pantry and fridge staples—nothing fancy required. It’s proof that magic can happen with humble ingredients.
Quick and Easy
Just mix, spread, toast, and enjoy. No complicated prep, no long ingredient list, no stress.
Customizable
Tweak the olives, switch the cheese, or add a little heat with red pepper flakes—there are tons of ways to make these your own.
Crowd-Pleasing
Even folks who don’t usually go for olives end up loving these. They’re melty, crispy, flavorful, and impossible to eat just one.
Disclosure: This post contains affiliate links.If you click and make a purchase, I may earn a small commission at no extra cost to you.


Ingredients in Toasted Olive Bliss Melts
Green Olives
These bring a briny, slightly tangy flavor that cuts through the richness of the cheese like a dream.
Black Olives
A milder, almost buttery counterpart to the green olives. The combo gives these melts amazing depth of flavor.
Mayonnaise
Creamy, tangy, and the perfect base to bind the cheesy filling together. It helps everything melt into pure deliciousness.
Cheese
You’ll want something sharp and melty—cheddar, Monterey Jack, or even a bit of Gruyère. The goal is golden, gooey goodness.
Garlic Powder
Adds a savory depth that pairs perfectly with the olives and cheese. A subtle boost that makes all the difference.
Bread
Choose a sturdy base like French bread, baguette slices, or even English muffins. Something with structure that can hold up under that melty topping.
(Note: the full ingredients list, including measurements, is provided in the recipe card directly below.)
Instructions
Preheat Your Equipment
Fire up your oven to broil or preheat your skillet over medium heat. This helps get that perfectly toasty finish on the bread.
Combine Ingredients
In a bowl, mix together the chopped olives, cheese, mayonnaise, and garlic powder. Stir until you get a chunky, creamy mixture that’s evenly blended.
Prepare Your Cooking Vessel
If you’re using the oven, line a baking sheet with parchment for easy cleanup. If you’re going stovetop, make sure your skillet is lightly greased and hot.
Assemble the Dish
Spread the olive-cheese mixture thickly and evenly onto each slice of bread. Don’t be shy—you want that topping piled on generously.
Cook to Perfection
Broil for a few minutes until the cheese is bubbling and lightly browned, or toast in a skillet until the bottom is golden and crispy and the top is hot and gooey.
Finishing Touches
Let the melts cool just slightly to avoid molten cheese tongue burns (we’ve all been there). The flavors settle in beautifully after a minute or two.
Serve and Enjoy
Slice, plate, and dig in. Whether as an app, a snack, or a full meal with a salad on the side, these are pure cheesy bliss.
How to Serve Toasted Olive Bliss Melts
Fresh Salads
A crisp green salad with a lemony vinaigrette balances the richness of these melts perfectly.
Soups and Stews
Serve with a bowl of tomato soup or a hearty stew—dip them right in!
Charcuterie Board Style
Cut them into bite-sized pieces and add to a snack board with pickles, nuts, and fresh fruit.
On Their Own
They absolutely shine solo. A garnish of fresh parsley or a little cracked black pepper is all you need.
Additional Tips
Prep Ahead
You can make the olive-cheese mixture ahead of time and store it in the fridge. Just spread and toast when ready.
Spice It Up
Add a pinch of red pepper flakes or a splash of hot sauce if you like heat.
Dietary Adjustments
Use plant-based cheese and mayo for a vegan version. Gluten-free bread works great too.
Storage Tips
Store leftovers in an airtight container in the fridge for up to 3 days. Reheat in the oven or toaster oven for the best texture.
Double the Batch
Making these for a party? Go ahead and double it. They’ll be gone before you know it.
FAQ Section
Q1: Can I use only one type of olive?
A1: Absolutely! Use whatever olives you love—or whatever you have on hand.
Q2: Can I prepare these ahead of time?
A2: Yes! Make the topping in advance and store in the fridge. Assemble and bake when ready.
Q3: How do I store leftovers?
A3: Keep them in an airtight container in the fridge and reheat in the oven or toaster oven.
Q4: Can I freeze these melts?
A4: It’s best to freeze the unbaked topping. Thaw, spread, and bake fresh for the best results.
Q5: What kind of bread is best?
A5: Anything sturdy—like a baguette or English muffin—so it holds up under all that cheesy goodness.
Q6: Can I make them spicy?
A6: Definitely! Try pepper jack cheese or a few dashes of hot sauce in the mix.
Q7: Is this recipe vegetarian?
A7: Yes, it’s naturally vegetarian—just be sure your cheese doesn’t contain animal rennet.
Q8: What other cheeses can I use?
A8: Feel free to play! Mozzarella, provolone, or even crumbled feta could be fun additions.
Q9: How can I make this dish healthier?
A9: Use light mayo, reduce the cheese slightly, and opt for whole grain or lower-carb bread.
Q10: What’s the best cookware for these melts?
A10: A broiler pan, baking sheet, or cast iron skillet all work beautifully for crisping and melting.
Conclusion
There’s something so deeply satisfying about Toasted Olive Bliss Melts—that crispy toast, that melty cheese, that punchy olive flavor. It’s humble, it’s bold, and it’s downright addictive. Whether you’re whipping up a tray for guests or sneaking one as a midnight snack, these melts are always a win. So go on—grab those olives and get cheesy.
Print
Toasted Olive Bliss Melts: A Gooey, Briny, Cheesy Dream You’ll Crave Again and Again
- Prep Time: 10 minutes
- Cook Time: 12 minutes
- Total Time: 22 minutes
- Yield: 8 servings 1x
- Category: Appetizer
- Method: Bake
- Cuisine: American
- Diet: Vegetarian
Description
Olive Cheese Melts are a savory, cheesy snack made with a flavorful blend of olives, cheddar, green onions, and a hint of curry powder, all broiled on crispy English muffins for a perfect appetizer or quick bite.
Ingredients
- 1 cup black olives, chopped
- ⅓ cup green onions, chopped
- 1 ½ cups shredded Cheddar cheese
- ½ teaspoon curry powder
- ½ cup mayonnaise
- ½ teaspoon salt
- 8 English muffins, split in half
Instructions
- Preheat your oven to 375°F (190°C).
- In a medium bowl, combine black olives, green onions, Cheddar cheese, curry powder, mayonnaise, and salt. Mix until well blended.
- Spread the mixture evenly over the cut sides of each English muffin half.
- Place muffins on a baking sheet and bake for 10–12 minutes, or until cheese is melted and bubbly.
- Serve warm as a snack or appetizer.
Notes
- Use a mix of sharp and mild cheddar for added flavor depth.
- For a crispy finish, broil the muffins for the last 1–2 minutes.
- Great for using up leftover olives or cheese from a charcuterie board.
Nutrition
- Serving Size: 1 muffin half
- Calories: 210
- Sugar: 1g
- Sodium: 380mg
- Fat: 18g
- Saturated Fat: 6g
- Unsaturated Fat: 10g
- Trans Fat: 0g
- Carbohydrates: 8g
- Fiber: 1g
- Protein: 6g
- Cholesterol: 25mg