

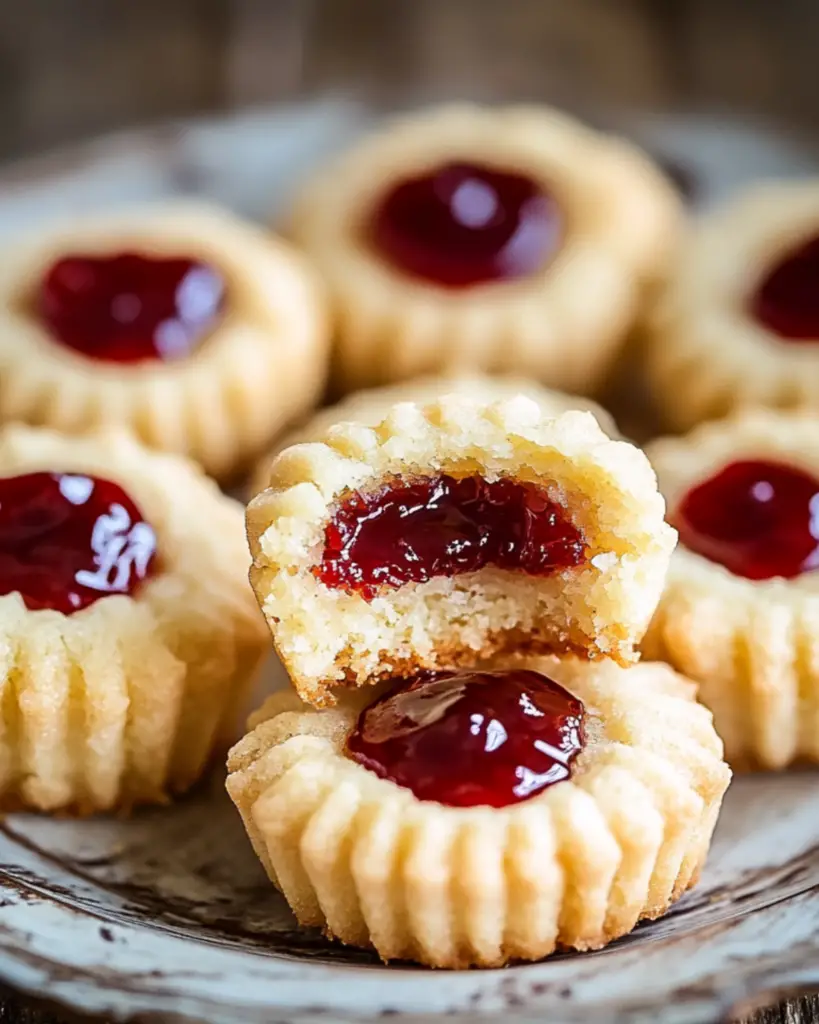
Jam Thumbprint Cookies That Just Channel Nostalgia
There’s something about the humble jam thumbprint cookie that just pulls you right back into the good old days, right? You know, those cozy afternoons baking with family, the warm, sweet scent filling the kitchen, and the simple joy of biting into a buttery cookie with a sweet jam center. Trust me, these cookies are a total game-changer. Every bite is like a little burst of nostalgia, and you’ll find yourself sneaking just one more (okay, maybe two or three) before you even realize it. Whether you’re baking for a holiday or just treating yourself to a cozy afternoon, these Jam Thumbprint Cookies will quickly become a go-to favorite. So, let’s get to it—your taste buds are in for a treat!
Why You’ll Love Jam Thumbprint Cookies
This recipe is so much more than just another cookie. It’s a trip down memory lane, bringing back all those nostalgic feelings of baking in your grandmother’s kitchen or that one afternoon when everything seemed perfect. Here’s why you’re going to love these cookies:
- Versatile: These little gems are perfect for any occasion—whether it’s a casual family get-together, a holiday gathering, or just a sweet snack during your afternoon coffee. They’re the type of treat that always impresses, no matter the setting.
- Budget-Friendly: No need to break the bank on fancy ingredients. These cookies use simple, everyday pantry items, making them as easy on your wallet as they are on your taste buds.
- Quick and Easy: Don’t be intimidated! These cookies are easy to make, even for beginners. There’s no complicated technique here—just mix, roll, and bake. Plus, you get that homemade touch without spending hours in the kitchen.
- Customizable: You can easily switch up the jam fillings to match your personal favorites. Raspberry, apricot, strawberry, or even a combo—your choice! These cookies are incredibly flexible and open to flavor experiments.
- Crowd-Pleasing: Everyone loves them! Kids will adore the jam center, and adults will appreciate the buttery, melt-in-your-mouth goodness of the cookie. They’re always a hit at parties and gatherings.
Disclosure: This post contains affiliate links.If you click and make a purchase, I may earn a small commission at no extra cost to you.


Ingredients
Here’s the magic of these cookies—they’re made with just a few simple ingredients, but the flavor is anything but basic. Let’s break it down:
Butter:
The key to that melt-in-your-mouth texture. It gives the cookies that rich, delicious flavor that makes you keep coming back for more.
Sugar:
You’ll need both granulated and powdered sugar to balance the sweetness of the cookie and provide a soft texture.
Flour:
All-purpose flour holds everything together and gives the cookies their structure. Simple, but essential.
Eggs:
Two eggs, to give the dough the perfect consistency for shaping and to hold all the ingredients together.
Vanilla Extract:
Just a splash adds that cozy, comforting flavor that makes these cookies feel extra special.
Jam:
The star of the show! Choose your favorite fruit jam (or jams) for the center. Whether it’s strawberry, raspberry, or apricot, this is where you can really get creative!
(Note: the full ingredients list, including measurements, is provided in the recipe card directly below.)
Instructions
Let’s dive into the steps to create these nostalgic little cookies that will have everyone asking for the recipe:
Preheat Your Oven:
Start by preheating your oven to 350°F (175°C). This ensures your cookies bake evenly and turn out perfectly golden.
Cream the Butter and Sugar:
In a large bowl, beat together the butter and both sugars until light and fluffy. This is where the magic begins—trust me, you want that fluffy texture!
Add Eggs and Vanilla:
Next, add the eggs and vanilla extract, and mix until everything is well combined. You’re almost there!
Add Flour:
Gradually stir in the flour until a dough forms. Don’t overmix—just enough to bring it all together.
Roll into Balls:
Take spoonfuls of the dough and roll them into 1-inch balls. Place them on a parchment-lined baking sheet, leaving a little space between each.
Create the Thumbprint:
Use your thumb (or the back of a spoon) to gently press a well into the center of each dough ball. This is where the jam will go, so make sure to create a nice little dip.
Add the Jam:
Spoon a small amount of your chosen jam into each thumbprint. Be careful not to overfill, as the jam might spill over while baking.
Bake to Perfection:
Pop the cookies into the oven and bake for 12-15 minutes, or until the edges are golden brown. Your kitchen will start to smell like heaven!
Cool and Enjoy:
Let the cookies cool on a wire rack. Try to wait a little before taking a bite (but I won’t judge if you can’t resist!).
How to Serve Jam Thumbprint Cookies
These cookies are perfect just as they are, but you can always jazz them up a bit if you like! Here are a few ideas for pairing them:
- With a Cup of Tea or Coffee: There’s something magical about enjoying these cookies with a hot cup of tea or coffee. The sweetness of the cookies pairs perfectly with the bitterness of the brew.
- As Part of a Cookie Platter: If you’re entertaining, why not add these to a cookie platter alongside other favorites like chocolate chip or snickerdoodle cookies?
- For a Simple Dessert: Serve these cookies after dinner with a scoop of vanilla ice cream on the side for a decadent yet easy dessert.
Additional Tips
Here are some extra tips to help you get the most out of this recipe:
- Prep Ahead: You can prepare the dough in advance and refrigerate it for up to 2 days. Just let it come to room temperature before rolling and baking.
- Customize the Jam: Feel free to mix and match your favorite jams for different flavor combos. Raspberry, blackberry, or even a fun citrus marmalade—there are endless possibilities!
- Storage Tips: Store these cookies in an airtight container for up to a week, or freeze them for up to 3 months. They thaw beautifully and are perfect for making ahead!
- Perfect Texture: If the dough feels a bit too sticky, chill it in the fridge for 30 minutes before rolling into balls.
FAQ Section
Q1: Can I use store-bought jam?
A1: Absolutely! Store-bought jam works just as well, and you’ll still get that sweet, fruity center everyone loves.
Q2: Can I make these ahead of time?
A2: Yes! These cookies are great for making ahead. You can prep the dough and store it in the fridge or freeze the cookies after baking.
Q3: How do I store leftovers?
A3: Keep them in an airtight container at room temperature for up to a week. If you freeze them, they’ll last up to 3 months.
Q4: Can I use other fillings besides jam?
A4: For sure! Nut butters, chocolate ganache, or even a lemon curd would make delicious alternatives. Get creative!
Q5: Can I double the recipe?
A5: Definitely! Just be sure you have enough room on your baking sheets and possibly adjust baking time a little.
Q6: Are these cookies gluten-free?
A6: You can easily make these gluten-free by using a 1:1 gluten-free flour blend.
Q7: What’s the best way to reheat these cookies?
A7: To reheat, pop them in the oven for a few minutes at 300°F (150°C) to warm them up without drying them out.
Conclusion
There you have it—your new go-to recipe for Jam Thumbprint Cookies! These little bites of nostalgia are not only easy to make, but they also deliver big on flavor and heartwarming memories. Whether you’re sharing them with family and friends or savoring them with a cup of tea on a quiet afternoon, these cookies have a way of making everything feel a little sweeter. Trust me, once you try them, you’ll be making them again and again. So, roll up your sleeves, get that jam ready, and let the cookie magic happen. Happy baking!
Print
Jam Thumbprint Cookies That Just Channel Nostalgia
- Prep Time: 15 minutes
- Cook Time: 10-12 minutes
- Total Time: 25-27 minutes
- Yield: About 24 cookies 1x
- Category: Dessert, Cookie
- Method: Baking
- Cuisine: American
- Diet: Vegetarian
Description
These Jam Thumbprint Cookies bring back the nostalgia of homemade treats with their buttery, soft texture and sweet fruit jam center. They are easy to make, perfectly bite-sized, and the ideal treat for any occasion
Ingredients
- 1 ½ cups all-purpose flour
- ½ tsp baking powder
- ¼ tsp salt
- ½ cup unsalted butter, softened
- ½ cup granulated sugar
- 1 large egg
- 1 tsp vanilla extract
- ¼ cup fruit jam (strawberry, raspberry, or your choice)
Instructions
- Preheat the oven to 350°F (175°C) and line a baking sheet with parchment paper.
- In a bowl, whisk together the flour, baking powder, and salt.
- In a separate bowl, beat the butter and sugar together until light and fluffy. Add the egg and vanilla extract, mixing well.
- Gradually add the dry ingredients to the wet ingredients, mixing until just combined.
- Roll the dough into 1-inch balls and place them on the prepared baking sheet.
- Use your thumb to make an indentation in the center of each cookie.
- Fill each indentation with about 1 teaspoon of fruit jam (strawberry, raspberry, or your preferred flavor).
- Bake for 10-12 minutes, or until the edges are golden brown.
- Let the cookies cool on the baking sheet before serving. Enjoy your nostalgic jam thumbprint cookies!
Notes
- Feel free to use any jam of your choice; raspberry, strawberry, or apricot are popular options.
- These cookies can be stored in an airtight container for up to a week.
- For a more festive look, you can dust with powdered sugar once they cool.
Nutrition
- Serving Size: 1 cookie
- Calories: 120
- Sugar: 8g
- Sodium: 45mg
- Fat: 6g
- Saturated Fat: 4g
- Unsaturated Fat: 2g
- Trans Fat: 0g
- Carbohydrates: 15g
- Fiber: 0g
- Protein: 1g
- Cholesterol: 20mg


