

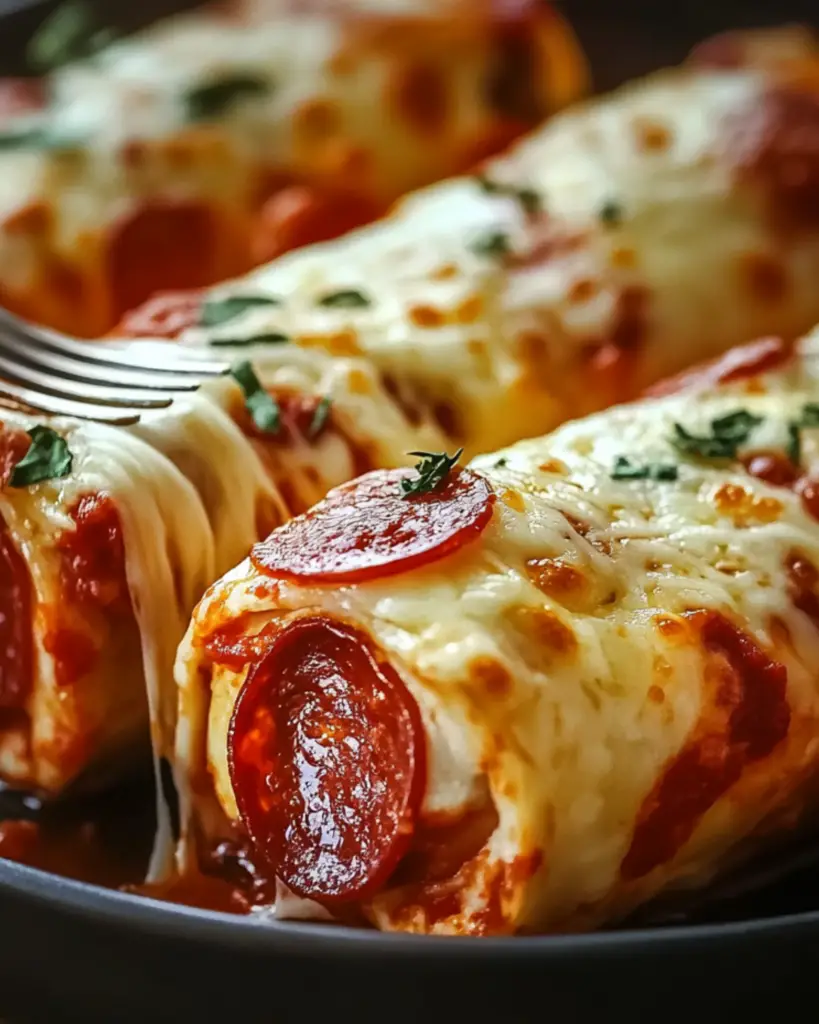
Cheesy Pepperoni Pizza Roll-Ups with Low-Carb Tortillas
Oh, my friend, do I have a treat for you today! Imagine the irresistible comfort of pizza, but wrapped up in a fun, low-carb tortilla that’s bursting with cheesy goodness and zesty pepperoni. These Cheesy Pepperoni Pizza Roll-Ups are not just easy to make, they’re game-changers. Trust me, every bite is a little flavor explosion—perfectly cheesy, savory, and just the right amount of spice. Whether you’re craving a quick snack or looking for a crowd-pleasing dish, these roll-ups are your go-to. And did I mention they’re low-carb? It’s a win-win situation.
Why You’ll Love Cheesy Pepperoni Pizza Roll-Ups
This recipe isn’t just a simple snack—it’s the perfect combination of flavors and convenience. Here’s why you’re going to fall in love with this dish:
Versatile: Whether you need a quick meal for yourself, a fun party snack, or a dinner option that everyone will devour, these roll-ups are perfect for any occasion. They’re so easy to make, you’ll be whipping them up every week!
Budget-Friendly: You don’t need to break the bank on fancy ingredients for this one. With simple items you probably already have in your kitchen, you can create a crowd-pleaser that’s both delicious and affordable.
Quick and Easy: From start to finish, this recipe takes no time at all! Even if you’re not a pro in the kitchen, you’ll find this one super simple to put together.
Customizable: Add or remove ingredients to make them just the way you like. If you’re not a fan of pepperoni, swap it out for turkey, chicken, or even veggies. The options are endless!
Crowd-Pleasing: Seriously, these roll-ups are always a hit with both kids and adults. There’s something about the melty cheese and the crispy edges that everyone loves.
Disclosure: This post contains affiliate links.If you click and make a purchase, I may earn a small commission at no extra cost to you.


Ingredients in Cheesy Pepperoni Pizza Roll-Ups
Here’s the magic of these roll-ups—simple ingredients that come together to create a snack that tastes like a mini pizza party. Let’s dive in:
- Low-Carb Tortillas: These are the base of our roll-ups, offering the perfect, flexible canvas for all the cheesy, pepperoni goodness. They keep things light, but still satisfying.
- Mozzarella Cheese: Oh, the cheese! Mozzarella brings that melty, gooey, stretchy texture we all crave in pizza. Plus, it helps hold everything together.
- Pepperoni Slices: These little discs of flavorful, savory heaven are what give the roll-ups that true pizza vibe. The crispy edges? Yes, please.
- Cream Cheese: A smooth layer of cream cheese adds richness and helps bind the ingredients together. It’s the secret ingredient for extra flavor and creaminess.
- Garlic Powder & Italian Seasoning: These two are the flavor MVPs. They bring that pizza seasoning magic to the roll-ups, elevating them to next-level deliciousness.
- Olive Oil: A little olive oil brushed on the tortillas before baking ensures they come out crispy and golden. It’s the finishing touch for that perfect crunch.
(Note: The full ingredients list, including measurements, is provided in the recipe card directly below.)
Instructions
Let’s dive into the steps to create these cheesy, pepperoni-filled roll-ups:
Preheat Your Oven
Start by preheating your oven to 375°F. You want it nice and hot to get that perfect golden-brown crisp on the tortillas.
Prepare the Tortillas
Take your low-carb tortillas and spread a thin layer of cream cheese on each one. You’re aiming for a nice, even coating, which will help hold everything together.
Add the Toppings
Next, sprinkle on a generous amount of mozzarella cheese and layer on the pepperoni slices. Don’t be shy with the cheese—this is where the magic happens. Top it off with a dash of garlic powder and Italian seasoning for that pizza flavor we all love.
Roll It Up
Carefully roll each tortilla up tightly, making sure everything is tucked inside. The goal is to have a nice, compact roll that holds all the cheesy goodness in place.
Bake to Perfection
Brush each roll-up with a little olive oil and place them on a baking sheet. Pop them in the oven and bake for about 10-12 minutes, or until they’re golden and crispy on the outside. Don’t forget to check and keep an eye on them toward the end so they get that perfect crunch without overbaking.
Serve and Enjoy
Once they’re out of the oven, let them cool for a minute (if you can resist) and slice them into bite-sized pieces. Serve with a side of marinara for dipping, and watch them disappear!
How to Serve Cheesy Pepperoni Pizza Roll-Ups
These roll-ups are super versatile and pair well with many sides. Here are a few ideas to take your meal to the next level:
- Fresh Salads: A crisp, tangy green salad with a light vinaigrette balances the richness of the roll-ups perfectly.
- Garlic Bread: Serve with some homemade garlic bread for that extra carb satisfaction (if you’re not on a strict low-carb plan!).
- Marinara Sauce: You can’t go wrong with a warm, zesty marinara dip. It’s like dipping your pizza in the best sauce ever.
- Veggie Sides: A side of roasted veggies (think zucchini, bell peppers, or asparagus) adds color and freshness to your meal.
Additional Tips
Here are a few extra tips to get the most out of this recipe:
- Prep Ahead: If you’re making these for a party or busy weeknight, prep the roll-ups in advance and keep them in the fridge until you’re ready to bake them.
- Spice It Up: Want a little more heat? Add some red pepper flakes to the inside before rolling, or swap out the pepperoni for spicy sausage.
- Make it Your Own: Don’t be afraid to experiment! You can add vegetables like bell peppers, onions, or mushrooms to customize the flavor.
- Leftovers: These roll-ups store beautifully in an airtight container for up to 3 days. Just reheat them in the oven to get that crispy texture back.
FAQ Section
Q1: Can I substitute the pepperoni?
A1: Of course! Try turkey pepperoni, sausage, or even veggies like mushrooms and spinach if you prefer something lighter.
Q2: Can I make these ahead of time?
A2: Yes! Prepare the roll-ups and store them in the fridge until you’re ready to bake them. Just pop them in the oven when it’s time to eat.
Q3: How do I store leftovers?
A3: Store leftovers in an airtight container in the fridge for up to 3 days. Reheat in the oven to bring back the crispiness.
Q4: Can I freeze these roll-ups?
A4: Absolutely! Freeze them before baking, and when you’re ready, just pop them in the oven straight from the freezer. You might need to add a few extra minutes to the bake time.
Q5: What’s the best way to reheat these?
A5: For the crispiest texture, reheat them in the oven at 350°F for about 5-7 minutes.
Q6: Can I double the recipe?
A6: Definitely! Just make sure to use a larger baking sheet, and you might need to bake them in batches depending on how many you’re making.
Q7: Is this recipe suitable for keto?
A7: Yes! Since you’re using low-carb tortillas, this recipe fits perfectly within a keto diet.
Q8: What sides go well with these roll-ups?
A8: A side of fresh veggies, like a salad or roasted Brussels sprouts, works wonderfully with these.
Q9: How can I make these roll-ups healthier?
A9: Use leaner cuts of pepperoni, or go for turkey pepperoni. You can also add extra veggies for a nutritional boost.
Q10: What’s the best way to serve these?
A10: Serve them with a side of marinara sauce for dipping or drizzle with a little ranch dressing for extra flavor.
Conclusion
These Cheesy Pepperoni Pizza Roll-Ups are the perfect snack or meal for when you want all the cheesy, pizza-like goodness without the carbs. Simple, tasty, and fun to make, they’re a dish that’s bound to become a favorite in your household. Whether you’re feeding a crowd or just indulging yourself, these roll-ups are sure to impress. So what are you waiting for? Let’s roll!
Print
Cheesy Pepperoni Pizza Roll-Ups with Low-Carb Tortillas
- Prep Time: 10 minutes
- Cook Time: 25 minutes
- Total Time: 35 minutes
- Yield: 4 servings 1x
- Category: Side Dish
- Method: Baking
- Cuisine: American
- Diet: Vegetarian
Description
This crispy baked cauliflower is the perfect healthy snack or side dish! With a crunchy Parmesan coating and a hint of garlic and paprika, it’s a savory treat that’s sure to satisfy. Quick, easy, and so delicious!
Ingredients
- 1 medium head of cauliflower, cut into bite-sized florets
- 3 tablespoons olive oil
- 1/2 cup grated Parmesan cheese
- 1 teaspoon garlic powder
- 1/2 teaspoon paprika
- 1/2 teaspoon salt
- 1/4 teaspoon black pepper
- Fresh parsley, chopped (for garnish)
Instructions
- Preheat the Oven: Preheat your oven to 400°F (200°C). Line a baking sheet with parchment paper or a silicone baking mat.
- Prepare the Cauliflower: In a large bowl, toss the cauliflower florets with olive oil until evenly coated.
- Season the Cauliflower: In a separate bowl, mix the Parmesan cheese, garlic powder, paprika, salt, and black pepper. Sprinkle this mixture over the cauliflower and toss to coat thoroughly.
- Arrange on the Baking Sheet: Spread the seasoned cauliflower florets in a single layer on the prepared baking sheet.
- Bake: Bake in the preheated oven for 25-30 minutes, or until the cauliflower is tender and golden brown, stirring halfway through for even cooking.
- Garnish and Serve: Sprinkle the baked cauliflower with fresh parsley and serve warm. Pair it with your favorite dipping sauce for extra flavor!
Notes
- You can substitute the Parmesan with a dairy-free version for a vegan alternative.
- For a spicier kick, add some red pepper flakes to the seasoning mixture.
Nutrition
- Serving Size: 1 serving
- Calories: 150
- Sugar: 2g
- Sodium: 350mg
- Fat: 10g
- Saturated Fat: 2g
- Unsaturated Fat: 7g
- Trans Fat: 0g
- Carbohydrates: 10g
- Fiber: 4g
- Protein: 6g
- Cholesterol: 10mg


